background image

Read all instructions in this User Manual and on the 

product carefully BEFORE operating this device. 


The  latest  version  of  this  handbook  can  be  found  at 

www.vision-products.co.uk


Many  Vision  products  are  intended  for  indoor  use  only. 

Under  no  circumstances  must  these  products  be  used 

outdoors unless explicitly stated otherwise. 


Clean  the  exterior  of  the  product  with  a  clean  and  dry, 

non-abrasive cloth. Do not use solvents or liquids to clean 

the product.


There  are  no  user  replacement  parts  inside  the  product. 

Do  not  open  the  product  for  any  reason.  This  will 

invalidate  your  Manufacturer  Warranty  and  may  impair 

the safety features of the product.


Do  not  use  the  product  if  you  suspect  it  has  been 

damaged  in  any  way,  including  being  dropped,  is 

malfunctioning  or  has  been  exposed  to  liquids  or 

moisture.  


The unit must be repaired by an authorised service centre 

only.  


Manufacturer  Warranty  is  void  if  unit  is  opened  or 

adapted in any way.  


If the product appears to be malfunctioning or operating 

in an unexpected manner, stop using the unit immediately 

and contact your supplier.


Never lift, move or carry the product by any other means 

other than the case as a whole or handle if provided. 


This product complies with the relevant clauses of the European 
Directive 2002/96/EC. The unit must be recycled or discarded 
according to applicable local and national regulations. 

Equipment intended for indoor use only. Vision Products (Europe) 
Ltd confirms that this product is in accordance to following norms 
of EU EMC norm EN50083-2 and safety norm EN60065. 


3

Please note this product may be improved or updated without notice. Please refer to your 

supplier before purchasing. Examples shown and the possible faults indicated in those 

examples are suggestions only. It is the operator’s sole responsibility to ensure the correct 

conclusions are drawn from any tests or test results. 

Coax cables, electronic products and connectors etc. may not be able to sustain the maximum 

operating parameters of this tester and great care must be taken to ensure the specifications 

and limitations of peripheral items are not exceeded. E&OE.

Содержание V18-310

Страница 1: ...V18 310 TV SATELLITE DC Power Tester...

Страница 2: ...est the 12V supply to a masthead amplifier Page 5 Test the LNB input of a satellite receiver Page 7 Test the LNB input of IRS Page 9 Test the PSU and load on IRS installation Page 11 Test the voltage...

Страница 3: ...llite systems connected to legacy satellite receivers SKY Sky HD Sky Q Freesat Freesat HD dSCR SCR and DiSEq installations etc IMPORTANT The V18 310 TV SAT Power Tester requires a PP3 6LR61 MN1604 9V...

Страница 4: ...Do not use the product if you suspect it has been damaged in any way including being dropped is malfunctioning or has been exposed to liquids or moisture The unit must be repaired by an authorised ser...

Страница 5: ...t move or carry the product by any other means other than the case as a whole or handle if provided This product complies with the relevant clauses of the European Directive 2002 96 EC The unit must b...

Страница 6: ...ead amplifier to the TV SAT Power Tester Load 5 Press the red test button Check the voltage and current display 6 If the voltage displayed is now lower than at step 4 or the current is higher than the...

Страница 7: ...6...

Страница 8: ...7...

Страница 9: ...the voltage and current display 4 If the voltage displayed is now lower than at step3 or the current is higher than the equipment ratings label there is a fault in the installation Check the 22 KHz LE...

Страница 10: ...9...

Страница 11: ...t the TV SAT Power Tester DC OUT Load to the LNB feed marked H Lo green cable 4 Press the red test button Check the voltage and current display 5 If the voltage displayed is now lower than at point c...

Страница 12: ...ss and hold the red test button 6 Check the voltage remains at 18V when under load 7 Add the current rating for each device on the system including all multiswitches the LNB and any amplifier 8 Check...

Страница 13: ...12...

Страница 14: ...13...

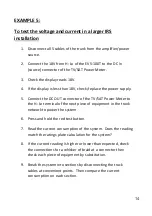
Страница 15: ...TV SAT Power Meter to the H Lo terminal of the next piece of equipment in the trunk network to power the system 6 Press and hold the red test button 7 Read the current consumption of the system Does t...

Страница 16: ...2017 Vision Products Europe Ltd Redbourne Park Brackmills Northampton NN4 7DT www vision products co uk technical vision products co uk 01604 664758...

Отзывы: