


Getting Started VC Smart Cameras
40
8.5 Changing the IP address on Ethernet cameras
The camera IP address is changed by uploading a #IP file into the camera memory. This is an ASCII
file containing the IP address settings:
The
default IP address
of all Vision Components Smart Cameras is
192.168.0.65
In order to operate more than one camera on a network, each camera requires an individual IP
address. Changing the IP address of a camera is done the following way:
Edit the file ASCII.INP – under C:\ti\myprojects\demofiles VCRTXXX\ Ethernet New IP
Type in the new IP address (
RETURN at the end of every line required!
)
For example:
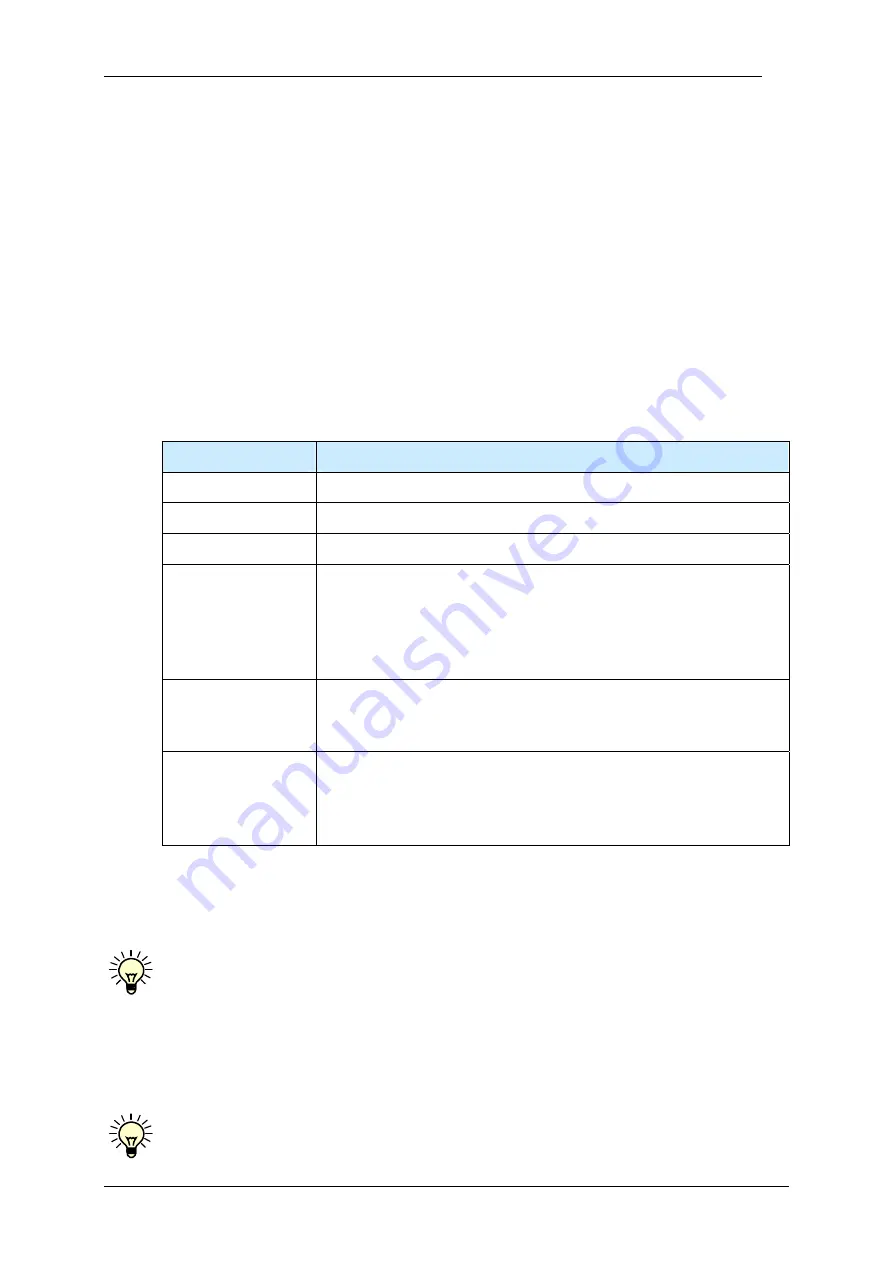
#IP file entry:
Explanation
IP: 192.168.0.81
New camera IP address – change at next start up
MSK: 255.255.0.0
Mask for setting the IP address subgroup
GTW: 192.168.0.1
Specify gateway if required
DHCP
Adding “DHCP” to the “#IP”- file requests the IP address allocation
from the DHCP server. In case DHCP allocation is not possible, the
camera is set to the IP address specified in the first line. If no other
IP address is specified in this file, the camera is set to its default IP
address: 192.168.0.65
PWD: mypassword
It is possible to protect the access to the camera with a password.
The password set in the #IP file will be asked for both Telnet and
FTP connections to the camera (for FTP: username is don’t care)
NS1: 192.168.0.1
NS2: 192.168.0.2
NS1 and NS2 are the IP addresses of DNS servers. When these (or
at least one) are available in the #IP file, VCRT automatically starts
the DNS resolver at startup and allows to use the name resolving
functions.
Execute the “cc_IP.bat” file
Download the ip.msf file to the camera
Alternatively the #IP file can also be uploaded using FTP. Rename the Ascii.inp file into
#IP.001 after editing and upload this file directly into the flash memory using a standard FTP
client.
The new IP address is displayed on the monitor connected to the camera for a few seconds at every
power up. The file “ip.msf” is displayed as “#IP” in the camera memory (flash EPROM). Deleting this
file resets the camera to its standard IP address of 192.168.0.65 at next start up.
You can check the #IP file at the camera shell with the command: $type #IP
It is advised to perform this #IP file check prior to re- booting the camera!
1996-2011 Vision Components GmbH Ettlingen, Germany
Getting_Started_VC.pdf


