
1
Connect the power cord to the
AC adapter.
TM
Quick Installation Guide
2
Connect the AC adapter to the
printer’s AC adapter terminal
& plug the power cord into a
power socket.
3
Connect the USB cable to the
USB port of the PC.
4
Connect the USB cable to the
USB port of the printer.
Do not disconnect the AC Adapter,
power cord or USB cable during the
printing process as it may cause the
printer to malfunction.
Only use the power cord and AC Adapter
supplied with the printer.
Ensure that you use a standard house-
hold power socket rated for the voltage
specified on the supplied AC adapter.
Connect the USB cable directly to the
USB port of the PC.
Connecting through a hub or chaining
through another USB device may cause
the printer to malfunction.
•
5
Insert CD-ROM in your PC.
(If auto run is disabled, open
Windows Explorer and click the
CD icon.)
6
Follow the instructions on the
PC and install the software.
7
Restart the computer and
double-click the
icon to start the application.
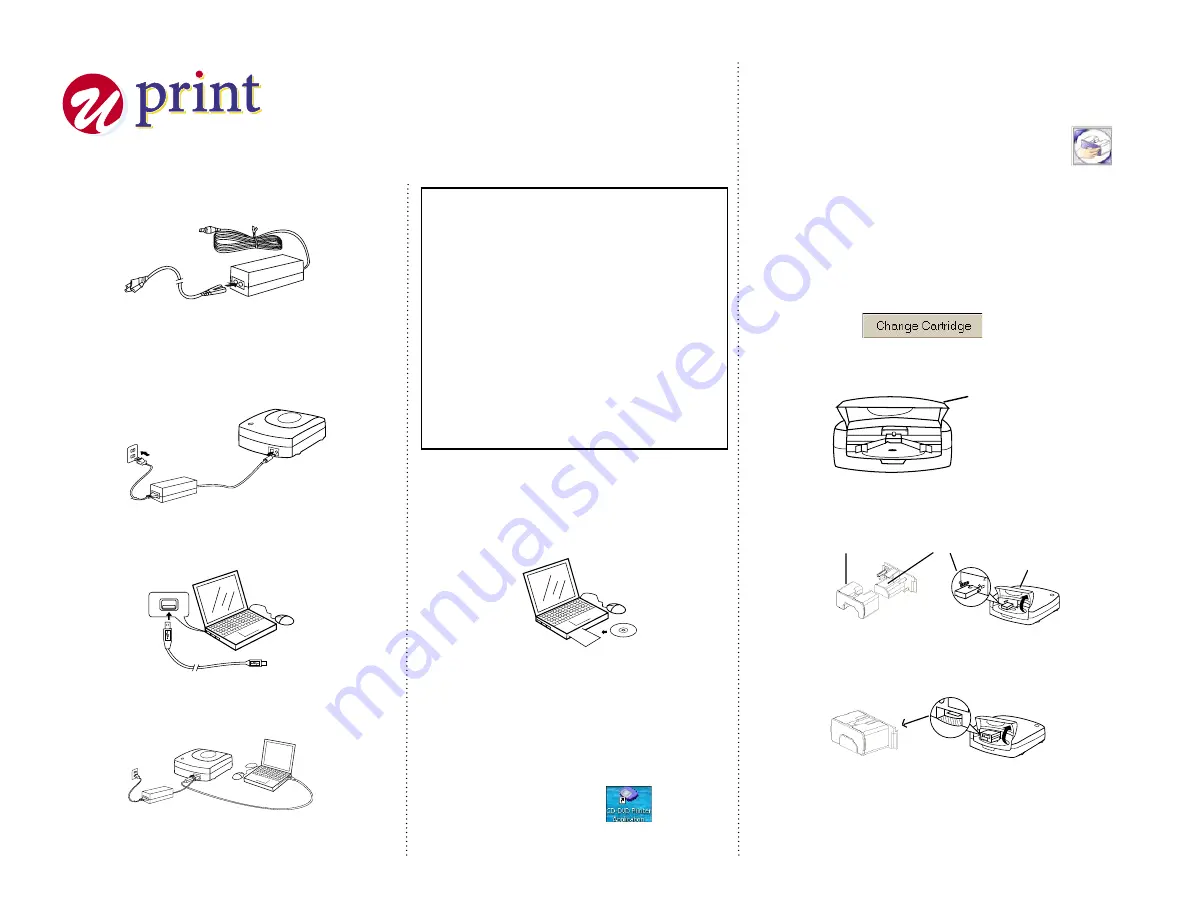
1
Click the
‘Change Cartridge’
icon
on the CD/DVD Application Window to
open a new Window called “Change
Cartridge Wizard”.
2
Click on the “Change Cartridge” button
to have the cartridge holder moved to
the change cartridge position.
•
•
•
•
Installing Cartridge
3
Open the printer access door.
Access door
4
Position the ribbon cartridges so that
the ribbon passes under the cartridge
bar.
Cartridge
Cartridge
Bar
Access door
5
Press the ribbon cartridge against the
back carriage until the cartridge is in
line with the cartridge bar.
6
Click the
OK
button on the cartridge
dialogue box and the cartridge will
move back to the home position, or
“Cancel” to exit. Then close the printer
access door.
V1.00