Getting Started
Flowire Converter FCDC1/FCDC2
1 Flowire Connection
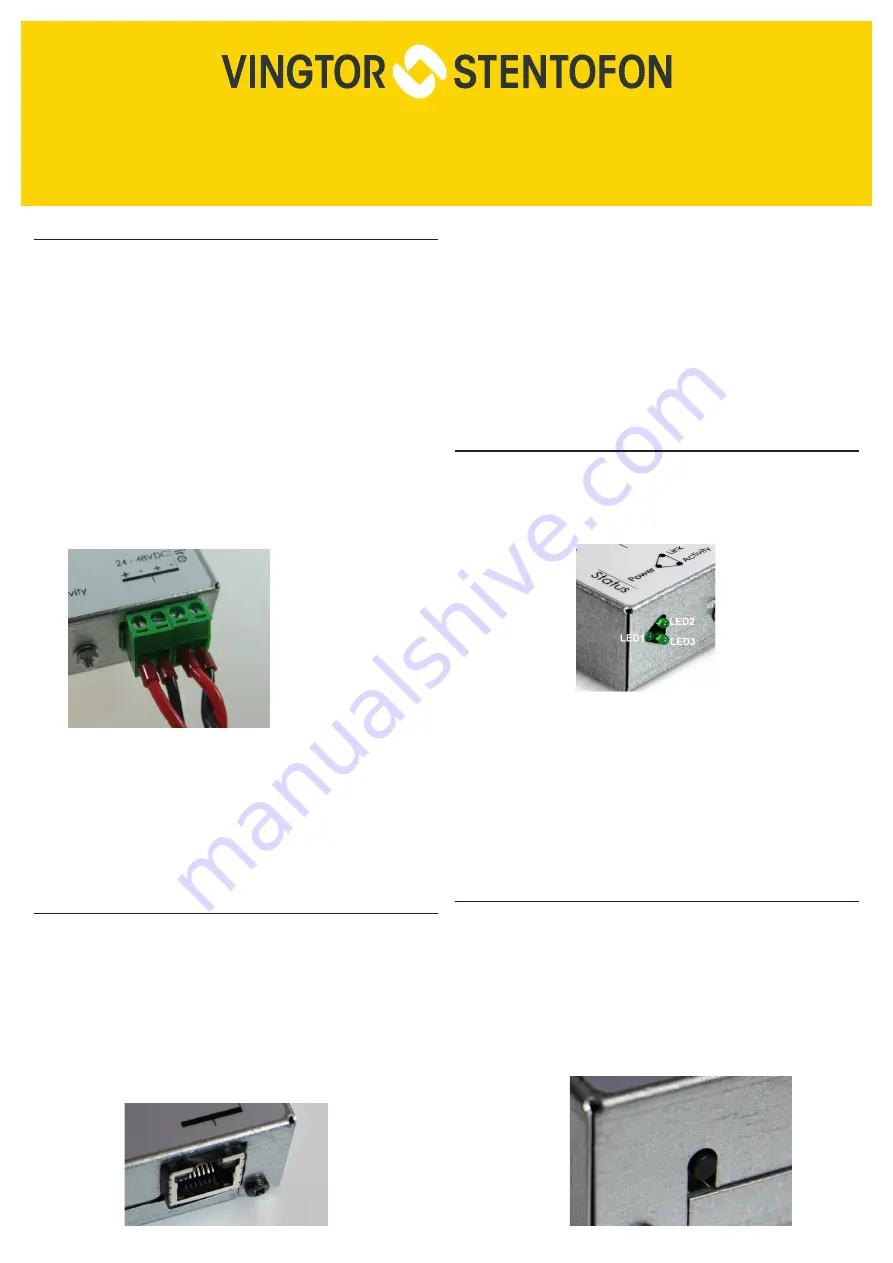
The Flowire Converter (FCDC1 & FCDC2) must be
connected to the Flowire network star configuration
using twisted cabling as shown. The red wire is the
positive supply voltage while the black wire is the
negative supply voltage. The power supply voltage
used depends on the type of devices in the star
configuration.
48 VDC PSU
: When using Flowire with Vingtor-
Stentofon IP intercoms and access panels.
24 VDC PSU
: When using Flowire with Vingtor-
Stentofon Ex intercoms and access panels. (FCDC2 is
particularly suited to this.)
For the sake of convenience, the converter is equipped
with two connections to the star configuration.
L
Please note that these two connections are equivalent.
For the first converter unit on the configuration, one
connection can be used to connect the power supply,
while the other can be used to connect to the actual
star configuration. The power supply may be connected
at any point on the star configuration, i.e. it can be
connected to any of the Flowire Converters on the star
configuration.
2 Ethernet Connection
Ethernet is connected via the RJ45 port. This supplies
10/100 Mbps Ethernet (in and out) and power out over
spare pairs (
FCDC1 only
). The power on the spare
pairs is the same voltage as the one supplied to the
converter. Hence, at least 40 volts must be applied
to the converter in order to ensure stable operation
when powering IP intercom stations directly through
their Ethernet ports. If the station has a 24V input, the
current can be reduced to 24 volts by separating the
spare pairs from the CAT cable and connecting it to this
input.
L
DO NOT power the Flowire Converter through the RJ45
port. Trying to do so with a PoE injector will damage the
converter.
L
DO NOT use Gigabit switch with FCDC1 as this will
damage the switch
L
The RJ45 port on FCDC1 is NOT a PoE-compatible
output but DC voltage on spare pairs which is present at
all times. It MUST NOT be connected to any equipment
that can be damaged by this voltage.
3 Indicator LEDs
The Flowire Converter is equipped with three green
LEDs. These indicate the status of the power, the
connection/link to Flowire, and whether data is
transmitted on Flowire or not
.
LED1 - Power
:
This LED is lit when the converter is
receiving enough power for powering up.
LED2 - Link
:
This LED is lit when the converter
recognizes one or more converters on the Flowire star
configuration.
LED3 - Activity
: T
his LED flashes when data is
transmitted to or from the converter.
4 Password Reset Button
Pressing and holding this button for more than 15
seconds will reset the NMK password to the default:
HomePlugAV0123
In addition to resetting the NMK password to its
default, the procedure will also set the following factory
defaults:
● DHCP will be turned on
● IGMP snooping querier will be turned on


