background image

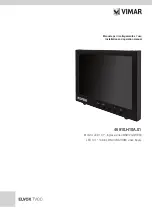
Manuale per il collegamento e l’uso 

Installation and operation manual

46910.H10A.01 

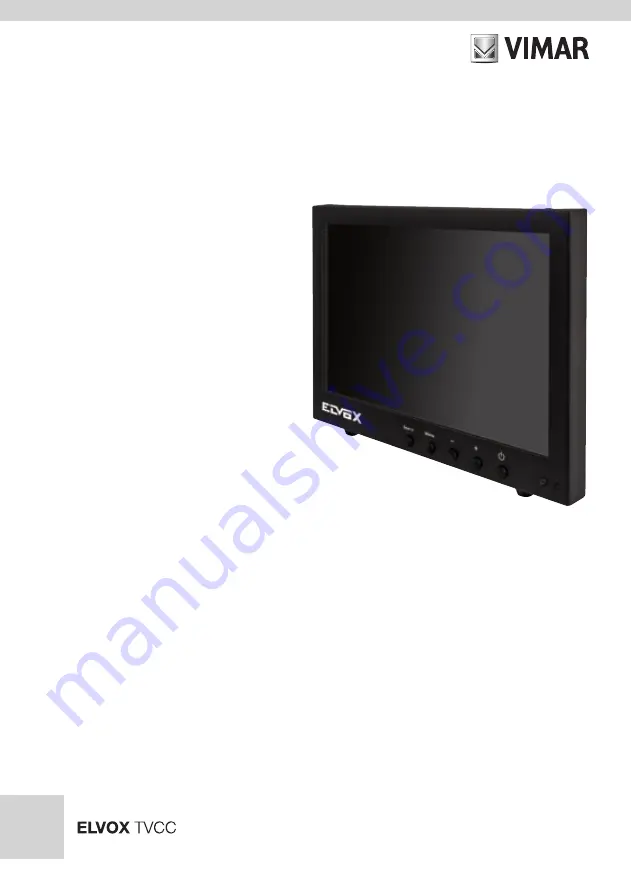
Monitor LED 10,1", ingressi video BNC/VGA/HDMI

LED 10.1" monitor, BNC/VGA/HDMI video inputs 

Содержание ELVOX 46910.H10A.01

Страница 1: ...Manuale per il collegamento e l uso Installation and operation manual 46910 H10A 01 Monitor LED 10 1 ingressi video BNC VGA HDMI LED 10 1 monitor BNC VGA HDMI video inputs ...

Страница 2: ...etto del monitor Per questo tipo di montaggio è necessario togliere prima la base 1 Posizionare il monitor con lo schermo rivolto verso il basso su una superficie morbida ma abbastanza robusta da sostenerlo 2 Con un cacciavite rimuovere le viti dai quattro fori su ciascun lato sul fondo della base del monitor 3 Accertarsi che tutti i cavi siano già collegati al monitor 4 Seguire le istruzioni incl...

Страница 3: ...lla gestione autonoma è possibile consegnare gratuitamente l ap parecchiatura che si desidera smaltire al distributore al momento dell acquisto di una nuova apparecchiatura di tipo equivalente Presso i distributori di prodotti elettronici con superficie di vendita di almeno 400 m2 è inoltre possibile consegnare gratuitamente senza obbligo di acquisto i prodotti elettronici da smaltire con dimensio...

Страница 4: ...i 3 2 1 Interfaccia posteriore 3 2 2 Disposizione comandi 3 2 3 Collegamento del monitor 3 3 Configurazione di base con OSD 4 3 1 Telecomando 4 3 2 AV Configurazione ingresso 5 3 3 HDMI Configurazione ingresso 6 3 4 VGA Configurazione ingresso 7 4 Specifiche del monitor 9 ...

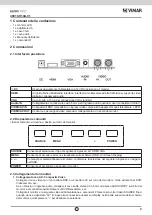
Страница 5: ...destra sul retro del monitor SOURCE MENU POWER SOURCE Consente di selezionare il tipo di segnale di ingresso AV HDMI VGA MENU Consente di accedere al menu visualizzato sullo schermo OSD On Screen Display e Comandi per alzare abbassare il volume confermare la selezione del segnale in ingresso e navigare nell OSD POWER Consente di accendere o spegnere il monitor 2 3 Collegamento del monitor 1 Colleg...

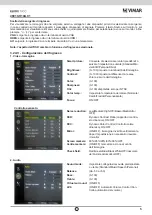
Страница 6: ... 1 Per accedere al menu OSD premere MENU 2 Usare i tasti o per selezionare la voce di menu desiderata quindi premere il tasto SOURCE per selezio nare il sottomenu 3 Continuare a premere il tasto SOURCE per evidenziare il campo desiderato quindi regolare l impostazione con i tasti o 4 Premere il tasto MENU per tornare al menu precedente 5 Premere di nuovo il tasto MENU per uscire definitivamente da...

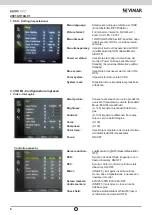
Страница 7: ...o vie ECO Personal Vivid Brightness 0 100 imposta la luminosità dell immagine Contrast 0 100 imposta la differenza tra le aree chiare e scure dell immagine Color 0 100 Sharpness 0 100 Tint 0 100 disponibile solo per NTSC Color temp Imposta la temperatura del colore Normale Caldo Freddo Personalizzata Focus ON OFF Controllo avanzato Noise reduction Low Medium High Off Basso Medio Alto OFF DCR Dynam...

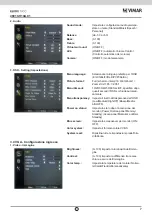
Страница 8: ...ca 3 3 HDMI Configurazione ingresso 1 Video Immagine Smart picture Consente di selezionare i valori predefiniti o salvare l impostazione utente Standard Movie ECO Personal Vivid Brightness 0 100 imposta la luminosità dell imma gine Contrast 0 100 imposta la differenza tra le aree chiare e scure dell immagine Color 0 100 Sharpness 0 100 Color temp Imposta la temperatura del colore Norma le Caldo Fr...

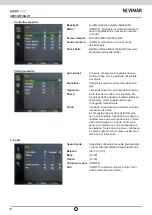
Страница 9: ...fica dopo quanti secondi l OSD si chiude automati camente Menu transparency Imposta il livello di trasparenza dell OSD Low Medium High Off Basso Medio Alto OFF Power on status Imposta lo stato dopo l accensione del monitor Power On Keep Last Memory Standby Accensione Memorizza ultimo Standby Blue screen Imposta lo screensaver del monitor ON OFF Color system Imposta il formato colore CVBS System re...

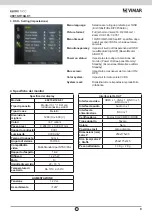
Страница 10: ...ne Phase Se la fase del monitor non è regolata l im magine potrebbe apparire instabile sull asse orizzontale Usare questa opzione per correggerla manualmente Clock Consente di regolare manualmente la sincro nizzazione del clock Se l impostazione del clock dell immagine non è sincronizzata si potrebbero vedere pe riodicamente barre verticali dovute a rumore video sull immagine Le barre di rumore in...

Страница 11: ...i fabbrica 4 Specifiche del monitor Specifica del display Modello 46910 H10A 01 Tipo di pannello Monitor 10 1 16 9 con retroilluminazione a LED Tipo di case Metallo Risoluzione migliore 1280 H x 800 V Colori 16 7 milioni Passo pixel 0 294 H x 0 294 V mm Rapporto contrasto 800 1 Luminosità 330 Cd m2 Tempo di risposta 12 ms Angolo di visione 160 160 Compatibilità video Multi Standard per NTSC PAL Ra...

Страница 12: ...o mount safely The stand must be removed first before mounting this way 1 Place the monitor face down on a surface that is soft yet strong enough to hold the monitor 2 Use a screwdriver to remove the screws from the four holes on each side of the bottom of the monitor s base 3 Make sure all cables are already connected to the monitor 4 Follow the directions included with the wall mount to fix the ...

Страница 13: ...e worn prod uct to a sorted waste center or return it to the retailer when purchasing a new one Products for dis posal can be consigned free of charge without any new purchase obligation to retailers with a sales area of at least 400 m2 if they measure less than 25 cm An efficient sorted waste collection for the environmen tally friendly disposal of the used device or its subsequent recycling help...

Страница 14: ...13 2 1 Rear interface 13 2 2 Control Layout 13 2 3 How to connect your monitor 13 3 Basic on screen display setup 14 3 1 Remote control 14 3 2 AV Input Configuration 15 3 3 HDMI Input Configuration 16 3 4 VGA Input Configuration 17 4 Monitor specification 19 ...

Страница 15: ... on the right hand rear side of the monitor SOURCE MENU POWER SOURCE Selects input mode AV HDMI VGA MENU Access to the On Screen Display OSD menu and Volume controls up down confirm input source selection and navigation in the OSD POWER Turns the monitor on or off 2 3 How to connect your monitor 1 Connecting using AV Composite Video Connect your video cable with BNC connector to the AV connector o...

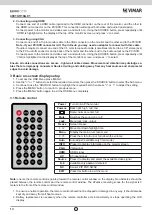
Страница 16: ...n screen display setup 1 To access the OSD Menu press MENU 2 Use the or buttons to select the required menu item then press the SOURCE button to select the Sub menu 3 Continue to use the SOURCE button to highlight the required field then press or to adjust the setting 4 Press the MENU button to return to previous menu 5 Press the MENU button again to exit the OSD Menu completely 3 1 Remote control...

Страница 17: ...icture Smart picture Select defaults or save user setting Stand ard Movie ECO Personal Vivid Brightness 0 100 Set the brightness of the image Contrast 0 100 Set the difference between the light and dark areas of the picture Color 0 100 Sharpness 0 100 Tint 0 100 only available if NTSC Color temp Select the color temperature Normal Warm Cool Personal Focus ON OFF Advanced control Noise reduction Lo...

Страница 18: ...m reset Restore all factory defaults 3 3 HDMI Input Configuration 1 Video Picture Smart picture Select defaults or save user setting Standard Movie ECO Personal Vivid Brightness 0 100 Set the brightness of the image Contrast 0 100 Set the difference between the light and dark areas of the picture Color 0 100 Sharpness 0 100 Color temp Select the color temperature Normal Warm Cool Personal Focus ON...

Страница 19: ... 40 50 60 Sec Off Set seconds for the OSD to automatically close Menu transparency Setting the transparency level of the OSD Low Medium High Off Power on status Setting status after power on the monitor Power On Keep Last Memory Standby Blue screen Setting up the monitor screensaver ON OFF Color system Setting CVBS color format System reset Restore all factory defaults 3 4 VGA Input Configuration ...

Страница 20: ...e If the phase of your monitor is not fine tuned you may observe the image being unstable in the horizontal axis Use this option to manually correct Clock Manually adjust clock synchronisation If the clock setting of your image is not fine tuned you may observe periodic vertical bars of video noise on your image These bars of noise are usually adjusted out when an Auto Configuration is performed I...

Страница 21: ...r specification Display Specification Model 46910 H10A 01 Panel Type 10 1 16 9 LED Backlight Monitor Case Type Metal Best Resolution 1280 H x 800 V Colors 16 7M Pixel Pitch 0 294 H x 0 294 V mm Contrast Ratio 800 1 Brightness 330 Cd m2 Response Time 12 ms Viewing Angle 160 160 Video Compatiblity Multi Standard for NTSC PAL Aspect Ratio 16 9 Speakers 1 x 2 5 W Mute YES Work Humidity 20 70 Work Temp...

Страница 22: ...Viale Vicenza 14 36063 Marostica VI Italy www vimar com 49401311A0 00 1806 ...

Отзывы: