background image

23

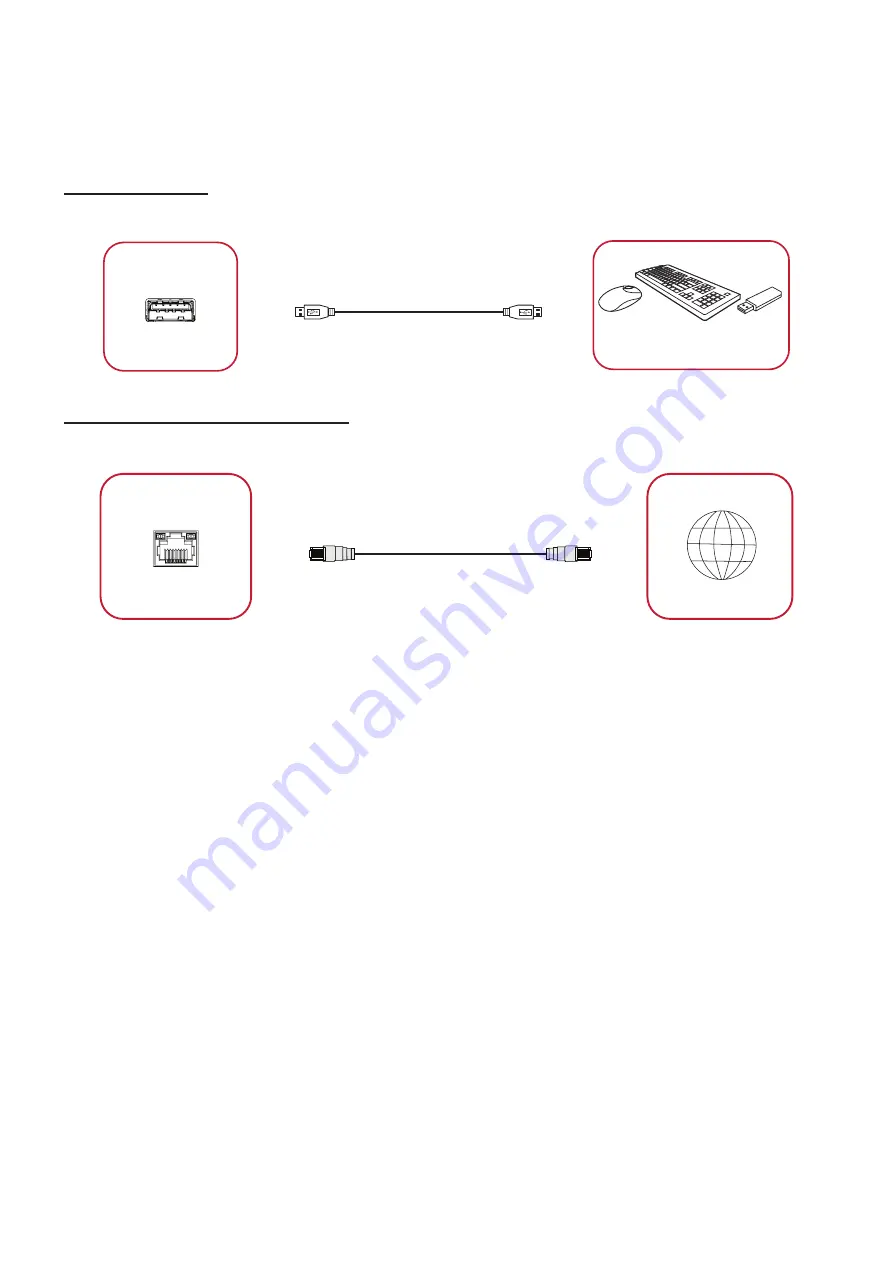
USB and Networking Connections

Just like any PC, it is easy to connect various USB devices and other peripherals to 

your ViewBoard.
USB Peripherals
Plug the USB device cable into the 

USB

 port.

USB Cable

USB Device

Networking and Modem cables
Plug the network cable into the 

LAN 

port.

Network Cable

Internet

LAN

Содержание IFP32-2 Series

Страница 1: ... safe manner as well as registering your product for future service Warranty information contained in this User Guide will describe your limited coverage from ViewSonic Corporation which is also found on our web site at http www viewsonic com in English or in specific languages using the Regional selection box in the upper right corner of our website Antes de operar su equipo lea cu idadosamente l...

Страница 2: ...eeding the world s expectations for technological evolution innovation and simplicity At ViewSonic we believe that our products have the potential to make a positive impact in the world and we are confident that the ViewSonic product you have chosen will serve you well Once again thank you for choosing ViewSonic ...

Страница 3: ... unstable surface The device may fall over resulting in an injury or a malfunction Do not place any heavy objects on the device or connection cables If smoke an abnormal noise or a strange odor is present immediately turn the device off and call your dealer or ViewSonic It is dangerous to continue using the device The device is a monitor with an LED backlight intended for general office use Do not...

Страница 4: ...riod of time Place the device in a well ventilated area Do not place anything on the device that prevents heat dissipation Also avoid any direct lighting Refer all servicing to qualified service personnel Service will be required when the unit has been damaged in any way such as if the power supply cord or plug is damaged if liquid is spilled onto or objects fall in the unit if the unit is exposed...

Страница 5: ... Gestures 19 Select and Deselect an Object Clicking 19 Display Menu Options Right Clicking 19 Double Clicking 19 Moving an Object 20 Erasing Digital Ink 20 Swipe Up for General Settings 20 Making Connections 21 Connecting External Devices and Touch Connection 21 HDMI Connection 21 VGA Connection 21 RS 232 Connection 22 USB and Networking Connections 23 Media Player Connection 24 Audio Connection 2...

Страница 6: ...s 40 Widget 41 Settings HDMI VGA Input Source 42 Audio Settings 42 Screen Settings 43 Display Settings 44 Low Blue Light Filter and Eye Health 45 Settings Embedded Player 47 Wireless Network 47 Wi Fi 48 Ethernet 49 Wireless Hotspot 50 VPN 51 Share 53 SAMBA 53 Display 55 Wallpaper 56 Protection 58 Preference 59 Touch 60 Language 60 Keyboard Input Method 61 Date Time 62 Boot Mode 63 Startup Shutdown...

Страница 7: ...ard Cast 82 Cast Sender from Windows based Macbook and Chrome devices 83 Cast Sender from Mobile Devices iOS based iPhone iPad and Android OS based phone tablet 84 Cast Out from a Mobile Device that Supports Annotation 85 Screen Recorder 86 Air Class 87 Voter 89 Judge 91 Responder 92 Selector 93 Grouping 93 Message 94 Manager 94 Exit 94 Other Default Applications 95 vSweeper 95 Screen Lock 96 Chro...

Страница 8: ...ions 119 Display Modes 120 VGA Mode 120 HDMI Mode 120 Troubleshooting 121 Maintenance 123 General Precautions 123 Cleaning the Screen 123 Cleaning the Case 123 Regulatory and Service Information 124 Compliance Information 124 Industry Canada Statement 124 CAN ICES 003 B NMB 003 B 124 CE Conformity for European Countries 124 Declaration of RoHS2 Compliance 125 Indian Restriction of Hazardous Substa...

Страница 9: ... ɩɪɨ ɜɿɞɩɨɜɿɞɧɿɫɬɶ Ɏɟɞɟɪɚɥɶɧɨʀ ɤɨɦɿɫɿʀ ɡɜ ɹɡɤɭ ɋɒȺ 8 JXQOXN H DQÕ HVWlPPHOVHU MDYD R VDJODVQRVWL ɋɨɨɬɜɟɬɫɬɜɢɟ ɬɪɟɛɨɜɚɧɢɹɦ Ɏɟɞɟɪɚɥɶɧɨɣ ɤɨɦɢɫɫɢɢ ɩɨ ɫɜɹɡɢ ɋɒȺ HFODUDĠLH GH FRQIRUPLWDWH 0HJIHOHOĘVpJL NLMHOHQWpV ǻȒȜȦıȘ ıȣȝȕĮIJȩIJȘIJĮȢ 6llG VWHQPXNDLVXXVLOPRLWXV Prohlášení o souladu se VPČUQLFHPL Izjava o sukladnosti ɂɡɹɜɥɟɧɢɟ ɡɚ ɫɴɜɦɟɫɬɢɦɨɫɬ Δϳϟ έΩϳϔϟ ΕϻΎλΗϻ ΔϧΟϟ ϊϣ ϖϓ ϭΗϟ ϥΎϳΑ IFP6532 2 IFP7532 2 IFP8632...

Страница 10: ...taching to other building materials please contact your nearest dealer B A D C Model VESA Spec A x B Standard Screw C x D Quantity IFP6532 2 65 600 x 400 mm M8 x 25 mm 4 IFP7532 2 75 800 x 400 mm M8 x 25 mm 4 IFP8632 2 86 800 x 600 mm M8 x 25 mm 4 NOTE Do not use screws that are longer than the standard dimension as they may cause damage to the inside of the display ...

Страница 11: ...11 Product Overview Front Panel Control Panel Rear Panel 1 2 3 4 5 5 ...

Страница 12: ...rn on off the device Tap to enter Energy Saving mode Press and hold for at least two 2 seconds to enter Standby mode 2 Ambient light sensor 3 Remote control IR sensor 4 USB 2 0 Smart USB port for PC HDMI VGA and ViewBoard input signals 5 Speaker ...

Страница 13: ...13 I O Panel Lower Right Side HDMI 1 HDMI 2 Camera USB LAN TOUCH RS232 AUDIO OUT Bottom Left Bottom Right VGA AUDIO IN Bottom Center 8 10 9 2 1 2 3 3 4 5 6 7 11 12 ...

Страница 14: ...ard Internet connection interface NOTE This network port is used for the Embedded Player and slot in PC 5 Touch Touch signal output to external PC 6 RS 232 Serial interface used for mutual transfer of data between devices 7 Audio Out Audio output to an external speaker 8 AC Switch Turn on off AC power supply I Power on O Power off 9 AC IN AC power input 10 Audio In External computer audio input 11...

Страница 15: ...15 Remote Control 1 10 11 12 13 14 15 16 17 18 19 20 2 3 4 5 6 7 8 9 ...

Страница 16: ...eric Keypad 9 Information 10 Input source selection 11 Media control buttons Red Play Pause Green Stop Yellow Forwards Blue Backwards 12 PC Menu button 13 PC Exit dialog box 14 Settings menu 15 Up Down Left Right OK 16 Freeze screen 17 Mute Unmute 18 Increase Decrease Brightness 19 Blank screen 20 Adjust Aspect Ratio All computer related function keys are not available without a slot in computer ...

Страница 17: ...he battery post 3 Replace the cover by aligning it with the slot on the remote control and snapping the latch shut WARNING There is a risk of explosion if batteries are replaced with the incorrect type NOTE It is recommended that you do not mix battery types Always dispose of old batteries in an environmentally friendly way Contact your local government for more information on how to dispose of ba...

Страница 18: ...eceiver Range The working range of the remote control is shown here It has an effective range of 8 meters 30 degrees left and right Ensure there is nothing obstructing the remote control s signal to the receiver 8m 30 30 ...

Страница 19: ...l ink and much more Select and Deselect an Object Clicking Press and release the ViewBoard to select deselect options or objects This is like a single standard left mouse click Display Menu Options Right Clicking Press and hold the ViewBoard with your finger This is like a single standard right mouse click Double Clicking Quickly press and release twice in the same location on the ViewBoard This i...

Страница 20: ...it with your finger to your desired location Erasing Digital Ink Use your flattened hand palm or fist on the ViewBoard and move your hand across the area which you wish to erase Swipe Up for General Settings Swipe up from the bottom of the ViewBoard to launch the General Settings ...

Страница 21: ...configurations HDMI Connection To connect via HDMI 1 Connect an HDMI cable from your external device to the HDMI port on the ViewBoard 2 Connect a USB cable to the external device from the TOUCH port of the ViewBoard VGA Connection To connect via VGA 1 Connect a VGA cable from your external device to the VGA port on the ViewBoard 2 Connect a USB cable to the external device from the TOUCH port of ...

Страница 22: ...2 Serial Port Cable When you use a RS 232 serial port cable to connect your display to an external computer certain functions can be controlled remotely by the PC including Power On Off Volume adjustment Input select Brightness and more ...

Страница 23: ...is easy to connect various USB devices and other peripherals to your ViewBoard USB Peripherals Plug the USB device cable into the USB port USB Cable USB Device Networking and Modem cables Plug the network cable into the LAN port Network Cable Internet LAN ...

Страница 24: ... to the HDMI ports on your ViewBoard and peripheral device 2 Plug in the power cord of your ViewBoard and turn on the power supply switch 3 Press the Power button on the right hand side of the ViewBoard to turn the screen on 4 Press the INPUT button on the remote control and switch to the HDMI input source ...

Страница 25: ...through the ViewBoard s speakers connect one end of an audio cable to your external device and the other end to the ViewBoard s Audio In port Audio Out To play audio from the ViewBoard through an external speaker connect one end of an audio cable to the external speaker and the other end to the ViewBoard s Audio Out port ...

Страница 26: ...ng Your ViewBoard Powering On Off your ViewBoard 1 Ensure the power cord is connected plugged into a power outlet and the power switch is in the On position VGA Audio In 2 Press the Power button to turn on the ViewBoard 3 To turn the ViewBoard off press and hold the Power button ...

Страница 27: ...27 27 Initial Launch Setup When you first turn on your ViewBoard an initial setup wizard will launch 1 Select your Language 2 Setup and verify your LAN connection ...

Страница 28: ...28 28 3 Select your Time Zone to set the Date and Time 4 Select your preferred System Mode 5 Accept or Decline the Privacy and Copyright Protection Terms ...

Страница 29: ...29 29 vLauncher Customizable Welcome Screen vLauncher Message Both the vLauncher Title and Subtitle can be customized by tapping on them ...

Страница 30: ...30 30 Additionally a password can be set by tapping on Set Password Applications Installed applications can all be found on the welcome screen To view all applications tap on the Down Arrow ...

Страница 31: ...31 31 To hide the application drawer tap the Up Arrow To add a shortcut to an application tap hold and drag up the icon To remove an application shortcut tap hold and drag the icon down ...

Страница 32: ... To launch a tool 1 Tap a Toolbar trigger icon 2 Tap on your desired tool icon NOTE The default toolbar setting is to be available for all input sources however users can go to Settings Preference Toolbar setting to adjust the options 1 available for all input sources 2 hide the toolbar for all input sources ...

Страница 33: ...the Embedded Player source Home Return to the Home Screen of the Embedded Player Recent Display all embedded applications that are currently being used App View all installed applications myViewBoard Launch the myViewBoard software Recorder Record view and save the on screen content ...

Страница 34: ...fault pen setting supports up to 10 point writing Highlighter Mark and highlight with yellow grey gold orange red pink green or blue ink NOTE The default highlighter setting supports up to 10 point marking Eraser Selectively remove the digital ink on the screen Undo Undo the previous action Redo Redo the previous action Clean Clears all the digital ink on the screen Save Save the screen image and ...

Страница 35: ...Air Class Hide Unhide Screen Capture Screen Freeze Convert the currently displayed content into a still image then you can zoom in zoom out go back to full screen and exit Zoom in Zoom out Fullscreen Exit Spotlight Highlight the focus content zone Tap the Setting icon to adjust the spotlight size and alpha blending effect ...

Страница 36: ...the stopwatch can be paused resumed split or reset Timer Access the countdown timer with an optional alarm setting Touch and swipe to adjust the numeric values then click Start At any time the countdown timer can be paused resumed or reset Hide Unhide Hide or unhide the Tool bar trigger icons ...

Страница 37: ...37 37 Icon Description More Air Class Interactive teaching tool for classroom usage Screen Capture Take a screenshot of the current screen Settings Access the General Settings ...

Страница 38: ... Access General Settings Input Settings and Widgets through the OSD Menu ViewBoard has two options for opening the OSD Menu Option 1 Long press anywhere in the vLauncher background Option 2 Press the INPUT button on the remote control ...

Страница 39: ... On or Off to enable disable the function 3 Press BACK on the remote control or touch a blank area outside of the menu to exit To adjust the Volume 1 Press INPUT on the remote control or long press the vLauncher background and touch General on screen if needed to display the General Settings menu 2 Drag the volume slider directly to adjust the value 3 Press Mute on the remote control to enable or ...

Страница 40: ... Settings menu 2 Press q p t u to select the input source you want NOTE PC source will only display when the slot in computer is connected 3 Press ENTER on the remote control or touch the input source 4 Press BACK on the remote control or touch a blank area outside of the menu to exit NOTE To adjust the settings of an input source touch the setting icon next to the highlighted input source ...

Страница 41: ... Embedded Player source To add a widget to the vLauncher welcome screen 1 Long press the vLancher background via touch to launch the OSD Menu 2 Select Widget 3 Touch and hold the desired widget 4 Drag the widget onto the vLauncher background ...

Страница 42: ...control and select the Audio menu 2 Press q p t u on the remote control or directly touch the option to select it 3 Adjust the Volume Bass Treble and Balance directly by touching and adjusting each value or with the remote control by pressing ENTER to adjust the option 4 Touch the Mute slider directly to enable disable mute or press Mute on the remote control 5 Press BACK on the remote control or ...

Страница 43: ...en menu 2 Press q p t u on the remote control or directly touch the option to select it 3 Adjust your preference by touching each value directly or with the remote control by pressing ENTER 4 Press BACK on the remote control or touch a blank area outside of the menu to exit ...

Страница 44: ...the option to select it 3 Adjust the Brightness Contrast Hue and Sharpness directly by touching and adjusting each value or with the remote control by pressing ENTER to adjust the option 4 Drag the blue light slider directly to adjust the blue light value 5 Press BACK on the remote control or touch a blank area outside of the menu to exit ...

Страница 45: ...ial than longer less frequent breaks Focus Fatigue 20 20 20 Rule To reduce the risk of eye fatigue by constantly looking at the screen look away from the screen at least every 20 minutes and gaze at a distant object at least 20 feet away for at least 20 seconds Looking at Distant Objects While taking breaks users can further reduce eye strain and dryness by focusing on objects that are further awa...

Страница 46: ...n turn down to look at the floor 3 Move the eyes to look at objects at the right upper direc on and then right lower direc on Repeat for the le upper and le lower direc ons 2 Move the eyes le and right slowly to look at objects on the two sides Neck Exercises Neck exercises can also help minimize eye strain Relax your arms and let them hang at your sides bend forward slightly to stretch the neck t...

Страница 47: ...ck current network connection status set up and manage Wi Fi Ethernet Bluetooth and VPN and establish a Wireless hotspot NOTE Wi Fi Wireless hotspot and Bluetooth settings will appear when LB WIFI 001 optional has been installed Ethernet will disable automatically when Wi Fi is enabled Wi Fi will disable automatically when Ethernet is enabled Wi Fi will disable when Wireless hotspot is enabled The...

Страница 48: ...oints Tap the toggle button to turn Wi Fi On or Off Once On you can Add a Network view Saved Networks Refresh the network list or view Advanced settings In Advanced settings you can toggle Network notifications On or Off and view Network card info ...

Страница 49: ...et the local network and proxy Tap the drop down menu to connect disconnect the Ethernet You can adjust Local network and Proxy settings as well Tap Advanced to view Network card info and toggle Network auto reconnect ...

Страница 50: ...50 50 Wireless Hotspot Set and share my internet connection with other devices Tap the toggle button to turn Wireless hotspot On or Off Tap Set up to set the Network name Security and Password ...

Страница 51: ...51 51 VPN Setup and manage Virtual Private Networks To create a VPN profile 1 Go to Settings Wireless Network VPN and tap Add VPN 2 Key in the Name ...

Страница 52: ...52 52 3 Select the VPN Type 4 Choose to enable disable PPP encryption MPPE and or show Advanced options ...

Страница 53: ...Board file system with a PC or mobile equipment 1 To access go to Settings Share SAMBA 2 Tap the toggle button to enable the SAMBA Service then set a password if needed 3 Ensure the ViewBoard and client equipment are connected to the same network 4 Log in to the ViewBoard with the client equipment Input the ViewBoard s IP address ...

Страница 54: ...54 54 5 Key in the user name and password then select OK if necessary 6 After a successful log in the ViewBoard files will be available ...

Страница 55: ...55 55 Display Adjust the Wallpaper Theme Display ID and Protection settings ...

Страница 56: ...56 56 Wallpaper Users can change their wallpaper with default images both still and live or ...

Страница 57: ...57 57 use their own by tapping My Photo and selecting the image file ...

Страница 58: ...58 58 Protection Set a Password for Screen Lock To set up a password for screen lock tap Set Password and enter the desired password ...

Страница 59: ...59 59 Preference View and adjust Touch Language Keyboard Input Date Time Boot and Start up Shut down settings ...

Страница 60: ...60 60 Touch Adjust Touch Settings and toggle Touch Sounds and Windows Ink On Off Language Adjust and choose the preferred language from the available languages ...

Страница 61: ...61 61 Keyboard Input Method Enable disable the visual keyboard and or change the default input method Tap on Settings to adjust the advanced keyboard settings ...

Страница 62: ...ime When enabled the ViewBoard will automatically synchronize the date and time via the Internet Time Zone Select the appropriate time zone Time Format Choose from 12 hour or 24 hour time format Simply toggle 24 hour format On Off Date Format Select from the available date formats ...

Страница 63: ...dded OS will not appear ViewBoard Settings Access Password Toggle to lock unlock the ViewBoard Settings Password for Protection Modify the Boot mode and ViewBoard Settings entry password Local File Protection Policy Choose how long to keep local storage files in the Folder app Color Correction Color correct the ViewBoard display screen Non ViewBoard OS Mode Side Toolbar Setting Enable the side too...

Страница 64: ...cide what happens to the display when there is no signal for HDMI PC or VGA sources ECO Mode Enable to automatically initiate ECO Mode when the screen is idle for one hour Black Screen After Startup When enabled the ViewBoard will turn off the backlight automatically after booting up Time Switch Power Off Reminder When enabled the ViewBoard will turn off without any reminder after the scheduled of...

Страница 65: ...65 65 Toolbar Setting Adjust the Side toolbar settings ...

Страница 66: ...66 Input Source Adjust the input source names and settings as well as the side tool bar settings 66 ...

Страница 67: ...67 Rename Input Source Set labels for each input source that will be easily recognized when displayed ...

Страница 68: ...utomatically after plugging in an HDMI cable when the screen is off Signal Auto Search When enabled if the current source does not have a signal the ViewBoard will automatically search for an input source Input Port Auto Switch The original signal will automatically switch to a new cable after it s plugged in Energy Saving Set a time period to power off if no signal is detected ...

Страница 69: ...information and force stop uninstall move to USB storage clear data clear cache and clear defaults NOTE Pre loaded apps cannot be uninstalled Not all apps support the move to USB storage feature Not all apps support Clear Defaults ...

Страница 70: ...70 APP View any running or installed applications Tap on them for more detailed information and options By tapping on a running application you can see more information stop or report the application ...

Страница 71: ...71 71 Selecting All Download or USB storage will list all installed applications Tapping on any application will display further information and options ...

Страница 72: ...72 72 System View and adjust Storage Security System Update and About device settings ...

Страница 73: ...73 Clone to USB Copy settings to an external USB drive ...

Страница 74: ...74 Display ID Assign a number to remote control the display by RS 232 LAN To assign or change the Display ID tap Change and input a number NOTE The Display ID is for RS 232 users and the range is 01 99 ...

Страница 75: ...75 75 Security Review Certificate Trusted Credential storage and Unknown sources install settings Tap on Install certificate from storage to add additional certificates ...

Страница 76: ...ill remove all manually installed credentials NOTE Pre loaded credentials cannot be cleared Under Trusted Credentials view and edit all trusted and installed CA certificates Tapping on a credential will provide more detailed information ...

Страница 77: ...77 Allow the installation of applications from unknown sources by selecting the box under Unknown source security NOTE Apps from unknown sources may not be compatible or work properly ...

Страница 78: ...can update their version of ViewBoard software Item Description Auto Update When the display is off the system will automatically check for a new version If a new version is found the system will automatically update After the update is complete the system will turn off Schedule Set the update time Manual Update Update the software manually ...

Страница 79: ...79 About Device Display Embedded Player information Legal information and Asset Tagging By selecting Edit the asset information can be adjusted Tap on Legal information to check open source licenses ...

Страница 80: ... a new canvas Toolbar Full Screen Capture Toolbar Move Button Select and hold to move the toolbar to the left side right side or bottom of the screen File Button 1 New myViewBoard File 2 Open File 3 Save File 4 Save as File 5 Export 6 Email Import resources image video audio etc to the whiteboard Infinite Canvas Button Select Use two hands to zoom in out on of the working panel Selection Button Se...

Страница 81: ...ates a Text box Undo Button Undo previous actions Redo Button Redo previous actions Page Toggle Button Select pages sort pages delete pages Show or hide the current host information Whiteboard background management menu ...

Страница 82: ...camera s Network Information ViewBoard Cast software laptops and mobile devices can connect to both the same subnet and across the subnet network Connected devices will show up under Device List on the same subnet connection If the device does not show up under Device List users will need to key in the on screen PIN code ViewBoard Cast is a wireless peer to peer data communication therefore the be...

Страница 83: ... is connected to the same network as the ViewBoard 2 Visit the address that is shown on the ViewBoard to download the application 3 Launch the application and click the connect icon next to the Device Name NOTE If the device is not listed click Connect with PIN Code and input the pin code displayed on the ViewBoard ...

Страница 84: ... the server or download from the Google Play Store or the Apple Store 3 Launch the application and select the correct Device Name and input the pin to connect You can also directly input the pin code displayed on the ViewBoard to connect Apple AirPlay 1 Make sure your device is connected to the same network as the ViewBoard 2 Directly open AirPlay and select the Device Name to connect 3 Another Ai...

Страница 85: ...turn to previous operation interface Folder Click to view or open the mobile device s internal file Screen sharing Click to share screen Android 5 0 and above supported Touch Click to change to touch mode Pen Click to make annotations and to change color and thickness Clear Click to clear everything on the screen Camera Click to use the camera and send the image to the ViewBoard ...

Страница 86: ...n Recorder icon in the application drawer 2 Tap the record icon and select the preferred recording configurations Then tap the check mark 3 Select Start Now and a three 3 second countdown will begin Screen recording will begin immediately after the countdown 4 After stopping the recording you will be able to preview the video save it or discard it ...

Страница 87: ...ers remotely Whether deploying single or multiple choice questions the ViewBoard will record the results for each device being used Network Information PC Windows Mac Chromebook and tablet mobile iOS Android devices as well as the ViewBoard need to be linked to the same LAN network subnet Ports TCP 8080 ...

Страница 88: ...available interactive functions at the bottom of the screen Item Description Voter Single and Multiple choice questions Judge True False questions Responder Race to answer first Selector Randomly select a participant Grouping Assign participants to groups Message Allow Deny participants to direct message the ViewBoard Manager Add participants Exit Exit Air Class ...

Страница 89: ... preferred answer type 2 Tap BEGIN VOTING to let the participants start 3 After the participants are finished and press OK the ViewBoard will show the participant s name on screen 4 Tap FINISH VOTING to close the quiz 5 Then the participants Answer Statistics will be displayed ...

Страница 90: ...90 90 6 Choose the right answer to show the correct rate 7 Click the Explain icon to further analyze the topic ...

Страница 91: ...icipants start a True False questionnaire 2 After the participants are finished and press OK the ViewBoard will show the participant s name on screen 3 Tap FINISH VOTING to close the quiz 4 Then the participants Answer Statistics will be displayed ...

Страница 92: ...92 92 5 Choose the right answer to show the correct rate 6 Click the Explain icon to further analyze the topic Responder Participants race to select their answer and tap OK to submit their answer ...

Страница 93: ... to be selected NOTE The number of participants that can be selected will be based on the total number of participants 3 Tap START to start the random selection 4 The selected participant s name will then be displayed Grouping Select the icon to assign participants to groups ...

Страница 94: ... Participants select Message to change to the message interface 3 Participants key in their message then select SEND 4 The message will scroll across the top of the ViewBoard Manager Select the icon to let more participants join the class Exit Select to exit the Air Class interface ...

Страница 95: ...95 95 Other Default Applications vSweeper Clear unnecessary data and unwanted files Advanced Settings can also be customized to the user s needs ...

Страница 96: ...o default To set a screen lock password 1 Go to Settings Personal Password for screen lock or select the Screen Lock icon in the apps list NOTE If you select the Screen Lock icon and no password has been set the below prompt will appear 2 Select Set Password and input a new four 4 digit password Then select OK 3 Now when selecting the Screen Lock icon the screen will be locked ...

Страница 97: ...97 97 Chromium Web browser for surfing the Internet WPS Office Create edit and view Documents Memos Presentations and Spreadsheets ...

Страница 98: ...lick to sort file Thumbnail Click to display file by thumbnail mode List Click to display file by list mode Select Click to select file Add folder Click to add folder Copy Click to copy file Paste Click to paste file Cut Click to cut file Delete Click to delete file Rename Click to rename file More Click to show more functions ...

Страница 99: ...mage stored by myViewBoard Side Tool Bar and remote control Screen Capture button Picture Image files Media Audio and Video files 4 File Information Preview the image show the image s name size resolution and creation date 5 Main Display Area Display files of corresponding type ...

Страница 100: ... RS 232 protocol command Description RS 232 Hardware Specification ViewSonic LFD communication port on the rear side 1 Connector type DSUB 9 Pin Male or 3 5 mm barrel connector 2 Use of crossover null modem cable for connection 3 Pin Assignment Female DSUB 9 Pin Male DSUB 9 Pin Pin Signal Remark 1 NC 2 RXD Input to Display 3 TXD Output from Display 4 NC 5 GND 6 NC 7 NC 8 NC 9 NC Provide 5V 2A powe...

Страница 101: ... Communication Setting Baud Rate Select 9600bps fixed Data bits 8 bits fixed Parity None fixed Stop Bits 1 fixed LAN Communication Setting Type Ethernet Protocol TCP IP Port 5000 fixed Cross subnet No Logon Credentials No Command Message Reference PC sends to LFD command packet followed by CR Every time PC sends control command to Display the Display shall respond as follows 1 If the message is re...

Страница 102: ...reply The LFD ID can be set via the OSD menu for each Display Command Type Identify command type s 0x73h Set Command 0x2Bh Valid command Reply 0x2Dh Invalid command Reply Command Function command code One byte ASCII code Value 1 3 Three bytes ASCII that defines the value CR 0x0D Set Function Format Send Command Type s Name Length ID Command Type Command Value1 Value2 Value3 CR Byte Count 1 Byte 2 ...

Страница 103: ...x24 0x30 0x37 0x36 0x0D Reply Hex Format Name Length ID Command Type CR Hex 0x34 0x30 0x32 0x2B 0x0D Example 2 Set Brightness as 75 for Display 02 and this command is NOT valid Send Hex Format Name Length ID Command Type Command Value1 Value2 Value3 CR Hex 0x38 0x30 0x32 0x73 0x24 0x30 0x37 0x35 0x0D Reply Hex Format Name Length ID Command Type CR Hex 0x34 0x30 0x32 0x2D 0x0D ...

Страница 104: ...VI 006 VGA1 016 VGA2 026 VGA3 007 Slot in PC OPS SDM HDBT 008 Internal memory 009 DP 00A Embedded Main Android 1 No need for USB 2 For the case of two more same sources the 2nd digital is used to indicate the extension 3 The HEX of 00A is 30 30 41 Brightness 8 s 24 000 100 900 Bright down 1 901 Bright up 1 3 1 1 Backlight 3 2 0 8 A B 42 000 100 1 For Android platform whose main mode is controlled ...

Страница 105: ...ding hot key in RCU like Mute etc MENU Lock 1 Lock MENU key of front panel and RCU 2 The Factory and Hospitality modes should not be blocked for the model using MENU combined key to enter these two modes Alternative approach will be indicated separately if any limitation by model POWER Lock 1 Lock POWER key on the front and RCU 2 The SET_POWER on off should be workable via RS 232 but does not mean...

Страница 106: ... s 0 30 000 100 050 is central Picture Size 8 s 1 31 000 FULL 16 9 001 NORMAL 4 3 002 REAL 1 1 3 1 0 OSD language 8 s 2 32 000 English 001 French 002 Spanish Could be extend ed for more sup ported languages by model PIP Mode 8 s 9 39 000 OFF 001 PIP POP 002 PBP PIP Sound select 8 s 3A 000 Main 001 Sub PIP Position 8 s 3B 000 Up 001 Down 002 Left 003 Right PIP Input 8 s 7 37 2 9 000 TV 001 AV 002 S...

Страница 107: ...7 Y99 Last 2 digits 20 17 20 99 Date Month 8 s V 56 M01 M12 2 digits Date Day 8 s V 56 D01 D31 2 digits Time Hour 8 s W 57 H00 H23 24 hr format 2 digits Time Min 8 s W 57 M00 M59 2 digits Time Sec 8 s W 57 S00 S59 2 digits NOTE 1 Tiling definition of H Monitors V Monitors and Position 2 Set Date example Date 2017 3 15 Send 0x 38 30 31 73 56 59 31 37 0D Y17 Send 0x 38 30 31 73 56 4D 30 33 0D M03 Se...

Страница 108: ...ply Command Function command code One byte ASCII code Value 1 3 Three bytes ASCII that defines the value CR 0x0D Get Function Format Send Command Type g Name Length ID Command Type Command Value1 Value2 Value3 CR Byte Count 1 Byte 2 Byte 1 Byte 1 Byte 1 Byte 1 Byte 1 Byte 1 Byte Bytes order 1 2 3 4 5 6 7 8 9 Reply Command Type r or If the Command is valid Command Type r Name Length ID Command Type...

Страница 109: ...D Reply Hex Format Name Length ID Command Type Command Value1 Value2 Value3 CR Hex 0x38 0x30 0x35 0x72 0x62 0x30 0x36 0x37 0x0D Example 2 Get Color from Display 05 but the Color command is not supported by this model Send Hex Format Name Length ID Command Type Command Value1 Value2 Value3 CR Hex 0x38 0x30 0x35 0x67 0x26 0x30 0x30 0x30 0x0D Reply Hex Format Name Length ID Command Type CR Hex 0x34 0...

Страница 110: ...al 1 means signal detected 2 2nd 3rd digit See Set function table Get Power status ON STBY 8 g l 6C 001 ON 000 STBY Get Remote control S g n 6E 000 Disable 001 Enable 002 Pass through Get RCU mode status Get Power lock 8 g o 6F 000 Unlock 001 Lock Get Button lock 8 g p 70 000 Unlock 001 Lock Get Menu lock 8 g l 6C 000 Unlock 001 Lock Get ACK 8 g z 7A 000 This command is used to test the com munica...

Страница 111: ... Get Device Name Reply 0x 32 30 31 72 34 43 44 45 2D 35 35 30 30 00 00 00 00 0D Assumed the device name is NMP 302 1 Send 0x 38 30 31 67 34 30 30 30 0D Get Device Name Reply 0x 32 30 31 72 34 4E 4D 50 2D 33 30 32 23 31 00 00 00 00 0D 3 Get MAC address example Assumed the MAC address is 00 11 22 aa bb cc Send 0x 38 30 31 67 35 30 30 30 0D Get MAC add Reply 0x 32 30 31 72 35 30 30 31 31 32 32 61 61 ...

Страница 112: ...112 6 Get FW version example Assumed the FW version is 3 02 001 Send 0x 38 30 31 67 38 30 30 30 0D Get FW version Reply 0x 32 30 31 72 38 33 2E 30 32 2E 30 30 31 00 00 00 00 0D ...

Страница 113: ...ors for Video wall 1 2nd digital for H monitors 2 3rd digital for V monitors Get Tiling position 8 g y 79 000 OFF 001 025 for Video wall Copy the screen of Position to identi fied display Get Date Year 8 g 2 32 Y00 Y00 Last 2 digits 20 17 20 99 Get Date Month 8 g 2 32 M00 M00 2 digits Get Date Day 8 g 2 32 D00 M00 2 digits Get Time Hour 8 g 3 33 H00 H00 24 hr format 2 digits Get Time Min 8 g 3 33 ...

Страница 114: ...31 72 33 48 31 36 0D H16 Send 0x 38 30 31 67 33 4D 30 30 0D Get Time Min Reply 0x 38 30 31 72 33 4D 32 37 0D M27 Send 0x 38 30 31 67 33 53 30 30 0D Get Time Sec Reply 0x 38 30 31 72 33 53 35 39 0D S59 3 Get RS232 Version example Assumed the version is 3 0 1 Send 0x 38 30 31 67 36 30 30 30 0D Get RS232 version Reply 0x 38 30 31 72 36 33 30 31 0D 301 ...

Страница 115: ...status automatically without getting a query from the host whenever the following data status is changed by the user through any of the available ways like remote control unit front keys or touch screen Power On Off Input Select Brightness Backlight Volume Mute On Off ...

Страница 116: ...e PC over the RS 232 port IR Pass Through Function format Reply Command Type p Name Length ID Command Type RCU Code1 MSB RCU Code2 LSB CR Byte Count 1 Byte 2 Byte 1 Byte 1 Byte 1 Byte 1 Byte Bytes order 1 2 3 4 5 6 7 Example 1 Remote Control Pass through when VOL key is pressed for Display 5 Send Hex Format Name Length ID Command Type RCU Code1 MSB RCU Code2 LSB CR Hex 0x36 0x30 0x35 0x70 0x31 0x3...

Страница 117: ...IGHT 1E V OK ENTER SET 1F V EXIT 20 V 21 22 23 24 25 26 27 28 29 2A 2B RED F1 2C GREEN F2 2D YELLOW F3 2E BLUE F4 2F NOTE 1 This IR pass through code is different from the RCU key code 2 Special control sequence for POWER key under IR pass through mode 2 1 When Display is OFF and receives the IR POWER code Display will turn itself on then forward the POWER code to the host via RS 232 ...

Страница 118: ... Display will forward the POWER code to the host via RS 232 then turn off itself 2 3 When SET POWER LOCK is enabled the Display will not respond to POWER key pressing 3 The VOLUME UP and VOLUME DOWN code will repeatedly output when you press and hold the keys ...

Страница 119: ...S 232 Communication Power Voltage 162V 264V 10 AC 50 60Hz Operating Conditions Temperature 32 F to 104 F 0 C to 40 C Humidity 10 90 non condensing Altitude 2 000 m Storage Conditions Temperature 4 F to 140 F 20 C to 60 C Humidity 10 90 non condensing Altitude 2 000 m Dimensions Physical mm 1488 x 897 x 90 1710 x 1020 x 90 1958 x 1160 x 90 Weight Physical kg 38 3 51 8 66 7 Power Consumption On 174 ...

Страница 120: ... 60Hz 1920 x 1080 60Hz HDMI Mode Resolution Refresh Rate 640 x 480 60Hz 800 x 600 60Hz 1024 x 768 60Hz 1280 x 960 60Hz 1920 x 1080 60Hz 3840 x 2160 24Hz 25Hz 30Hz 50Hz 60Hz 480p 59Hz 60Hz 576p 50Hz 720p 50Hz 59Hz 60Hz 1080i 50Hz 59Hz 60Hz 1080p 23Hz 24Hz 25Hz 29Hz 30Hz 50Hz 59Hz 60Hz ...

Страница 121: ... off unexpectedly 1 Check whether Sleep mode is enabled 2 Check if there is a power outage in your area 3 Turn on the display and see if the problem is with the signal and control system PC Mode Problem or Issue Possible Solutions No PC signal 1 Check the display settings 2 Check the display resolution 3 Adjust the Hs Vs synchronization settings using the OSD menu Background streaking 1 Choose aut...

Страница 122: ...led correctly Picture is unclear or cuts in and out 1 Check the signal cable 2 Check if other electronics are interrupting the signal Poor picture 1 Adjust chroma brightness and contrast settings in the menu 2 Check the signal cable Audio Not Working Properly Problem or Issue Possible Solutions No sound 1 Press the Mute Unmute button 2 Adjust the volume 3 Check the audio cable One speaker only 1 A...

Страница 123: ... of non ammonia non alcohol based glass cleaner onto a clean soft lint free cloth then wipe the screen Cleaning the Case Use a soft dry cloth If the case is still not clean apply a small amount of non ammonia non alcohol based mild non abrasive detergent onto a clean soft lint free cloth then wipe the surface Disclaimer ViewSonic does not recommend the use of any ammonia or alcohol based cleaners ...

Страница 124: ...CES 003 B NMB 003 B CE Conformity for European Countries The device complies with the EMC Directive 2014 30 EU and Low Voltage Directive 2014 35 EU The following information is only for EU member states The mark shown to the right is in compliance with the Waste Electrical and Electronic Equipment Directive 2012 19 EU WEEE The mark indicates the requirement NOT to dispose of the equipment as unsor...

Страница 125: ...lybrominated biphenyls PBB 0 1 0 1 Polybrominated diphenyl ethers PBDE 0 1 0 1 Bis 2 ethylhexyl phthalate DEHP 0 1 0 1 Butyl benzyl phthalate BBP 0 1 0 1 Dibutyl phthalate DBP 0 1 0 1 Diisobutyl phthalate DIBP 0 1 0 1 Certain components of products as stated above are exempted under the Annex III of the RoHS2 Directives as noted below Copper alloy containing up to 4 lead by weight Lead in high mel...

Страница 126: ... 1 weight and 0 01 weight for cadmium except for the exemptions set in Schedule 2 of the Rule Product Disposal at End of Product Life ViewSonic respects the environment and is committed to working and living green Thank you for being part of Smarter Greener Computing Please visit the ViewSonic website to learn more USA Canada https www viewsonic com us company green go green with viewsonic recycle...

Страница 127: ...tion DPMS DisplayPort and DDC are trademarks of VESA Disclaimer ViewSonic Corporation shall not be liable for technical or editorial errors or omissions contained herein nor for incidental or consequential damages resulting from furnishing this material or the performance or use of this product In the interest of continuing product improvement ViewSonic Corporation reserves the right to change pro...

Страница 128: ...onic com my Middle East www viewsonic com me Myanmar www viewsonic com mm Nepal www viewsonic com np New Zealand www viewsonic com nz Pakistan www viewsonic com pk Philippines www viewsonic com ph Singapore www viewsonic com sg 臺灣 Taiwan www viewsonic com tw ประเทศไทย www viewsonic com th Việt Nam www viewsonic com vn South Africa Mauritius www viewsonic com za Americas United States www viewsonic...

Страница 129: ...mps Please refer to What the warranty excludes and does not cover section Who the warranty protects This warranty is valid only for the first consumer purchaser What the warranty excludes and does not cover Any product on which the serial number has been defaced modified or removed Damage deterioration or malfunction resulting from Accident misuse neglect fire water lightning or other acts of natu...

Страница 130: ...rmation about receiving service under warranty contact ViewSonic Customer Support Please refer to the Customer Service page You will need to provide your product s serial number To obtain warranty service you will be required to provide a the original dated sales slip b your name c your address d a description of the problem and e the serial number of the product Take or ship the product freight p...

Страница 131: ...repair by anyone not authorized by ViewSonic Effect of state law This warranty gives you specific legal rights and you may also have other rights which vary from state to state Some states do not allow limitations on implied warranties and or do not allow the exclusion of incidental or consequential damages so the above limitations and exclusions may not apply to you Sales outside the U S A and Ca...

Страница 132: ...C0 M91 Y72 K24 Process Color C0 M0 Y0 K100 Process Color C0 M91 Y72 K24 Process Color Pantone Black C Spot Color Pantone 187 C Spot Color ...

Отзывы: