Capture and Trigger Setup
Chapter 4, Xgig TraceControl Capture Configuration
Xgig Analyzer User’s Guide
121
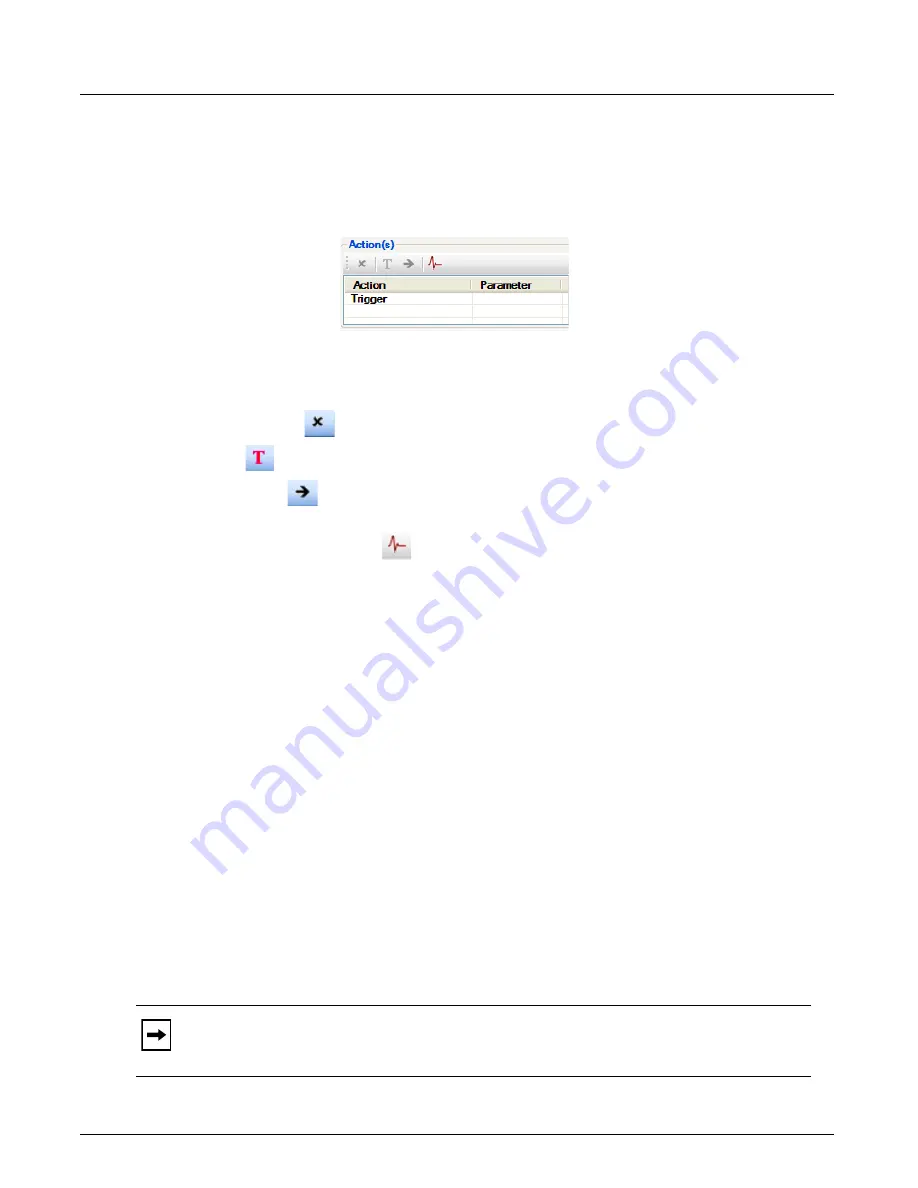
Actions Pane
The Actions pane in the Transition Editor defines the actions that will be performed during a
transition. When a transition is highlighted, the action and its parameter are listed. For example,
Transition To State1
.
The icons in the Actions pane are only available for 6G SAS/SATA, 12G SAS, and PCIe ports.
The icons are active when a transition is highlighted. If an action does not apply to the selected
transition, the icon for that action is grayed out. The following action icons are available.
Remove Action
This button deletes the selected item from the Actions pane.
Trigger
This button designates the selected transition as the trigger.
Transition To
This button allows you to select another state to transition to or create a new
state to transition to.
Pulse Intra Chassis Signal
Selecting Intra Chassis Signal #1 or #2 in a link sends a signal
that can be picked up by the ports in another link when this transition occurs. To use this option,
select a transition bubble, click the
Pulse Intra Chassis Signal
button in the
Actions
pane, and
select either #1 or #2. When the transition occurs in the first link, a signal is sent out and picked up
by the second link, and the two links transition in sync.
When the Pulse Intra Chassis Signal option is selected for a transition, the Action in the
Actions
pane will read “Pulse Intra Chassis Signal”.
Trigger Modes
There are six trigger modes to choose from in the
Capture and Trigger Setup
tab in the
Configuration Editor. Select one of the options from the
Trigger Mode
drop-down menu near the
top of the tab. The options are:
•
Stop When Buffer is Full (preset trigger condition)
•
Stop When Stop Button is Clicked (no trigger condition)
•
Trigger (two-state triggering)
•
Arm and Trigger (three-state triggering)
•
Arm, Trigger or Rollback (three-state triggering)
•
Advanced (multi-state triggering)
Note:
The Advanced menu item is only available for 6G SAS/SATA, 12G SAS, and PCIe
ports. This menu item is not visible for domains with mixed ports. All ports in a domain must
be 6G SAS/SATA, 12G SAS, or PCIe for this menu item to be visible.
Содержание Xgig
Страница 1: ...Xgig Analyzer Version 7 3 User s Guide ...
Страница 2: ......
Страница 3: ...Viavi Solutions 1 844 GO VIAVI www viavisolutions com Xgig Analyzer Version 7 3 User s Guide ...
Страница 6: ...Xgig Analyzer User s Guide Page iv Version 7 3 December 2015 ...
Страница 7: ...v CONTENTS ...
Страница 15: ...1 PART ONE Using Xgig Analyzer ...
Страница 16: ...PART ONE Using Xgig Analyzer 2 Xgig Analyzer User s Guide ...
Страница 27: ...13 PART TWO Using Xgig TraceControl ...
Страница 28: ...PART TWO Using Xgig TraceControl 14 Xgig Analyzer User s Guide ...
Страница 29: ...15 Chapter 2 About Xgig TraceControl In this chapter Introduction to TraceControl ...
Страница 156: ...Chapter 4 Xgig TraceControl Capture Configuration Segment Capture Options 142 Xgig Analyzer User s Guide ...
Страница 157: ...143 Chapter 5 Template Browser Template Editor In this chapter Template Browser Template Editor ...
Страница 173: ...159 Chapter 6 Xgig TraceControl Hints and Tips In this chapter TraceControl Hints and Tips Keyboard Shortcuts ...
Страница 176: ...Chapter 6 Xgig TraceControl Hints and Tips Keyboard Shortcuts 162 Xgig Analyzer User s Guide ...
Страница 177: ...163 PART THREE Using Xgig Performance Monitor ...
Страница 178: ...PART THREE Using Xgig Performance Monitor 164 Xgig Analyzer User s Guide ...
Страница 179: ...165 Chapter 7 About Xgig Performance Monitor In this chapter Introducing Xgig Performance Monitor ...
Страница 181: ...167 Chapter 8 Getting Started with Xgig Performance Monitor In this chapter Launching Xgig Performance Monitor ...
Страница 192: ...Chapter 9 Xgig Performance Monitor Port Configuration Changing Port Functions 178 Xgig Analyzer User s Guide ...
Страница 223: ...209 PART FOUR Using Xgig TraceView ...
Страница 224: ...PART FOUR Using Xgig TraceView 210 Xgig Analyzer User s Guide ...
Страница 225: ...211 Chapter 11 About Xgig TraceView In this chapter Introducing Xgig TraceView ...
Страница 227: ...213 Chapter 12 Getting Started with Xgig TraceView In this chapter Launching Xgig TraceView Working With Domains ...
Страница 379: ...365 Chapter 15 Xgig TraceView Histograms In this chapter Histogram Overview Histogram Controls ...
Страница 382: ...Chapter 15 Xgig TraceView Histograms Histogram Controls 368 Xgig Analyzer User s Guide ...
Страница 383: ...369 Chapter 16 Xgig TraceView Template Editor In this chapter Using Template Editor ...
Страница 394: ...Chapter 16 Xgig TraceView Template Editor Using Template Editor 380 Xgig Analyzer User s Guide ...
Страница 414: ...Chapter 18 Converting Files from Other Platforms Converting I Tech Files 400 Xgig Analyzer User s Guide ...
Страница 429: ...415 Chapter 20 Xgig Trace View Hints and Tips In this chapter Trace View Hints and Tips Toolbar Keyboard Shortcuts ...
Страница 437: ...423 PART FIVE Using Xgig Expert ...
Страница 438: ...PART FIVE Using Xgig Expert 424 Xgig Analyzer User s Guide ...
Страница 439: ...425 Chapter 21 Xgig Expert In this chapter Key Features of Xgig Expert Opening a Trace Switching to TraceView ...
Страница 442: ...Chapter 21 Xgig Expert 428 Xgig Analyzer User s Guide Figure 194 Xgig Expert Graph View ...
Страница 443: ...429 PART SIX Appendices ...
Страница 444: ...PART SIX Appendices 430 Xgig Analyzer User s Guide ...
Страница 454: ...Appendix C Protocol Display Color Coding 440 Xgig Analyzer User s Guide ...
Страница 461: ...447 INDEX ...
Страница 467: ......


