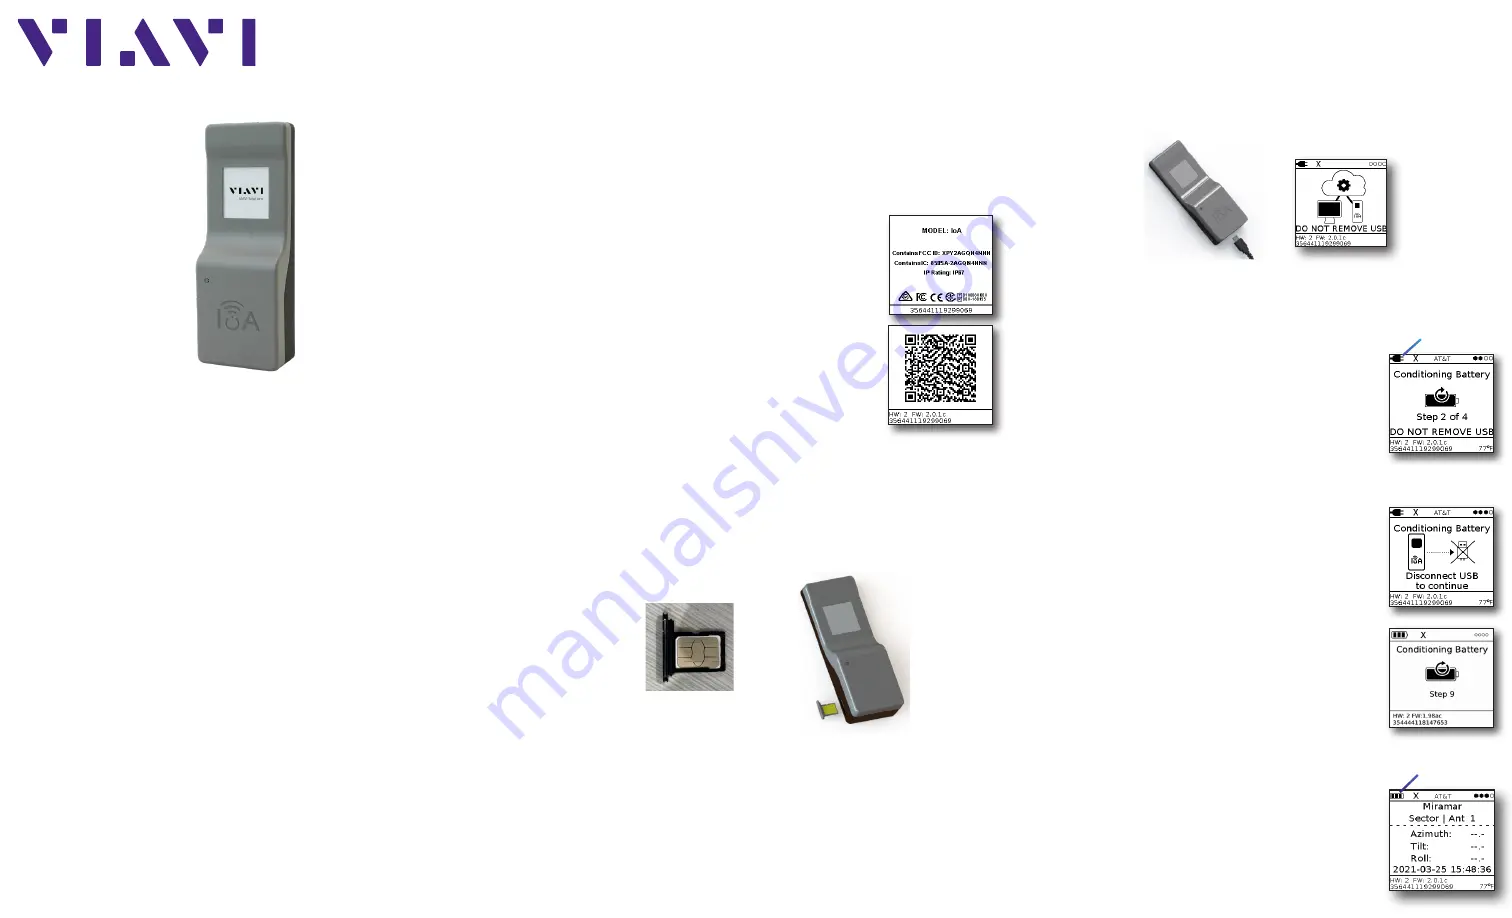
5.
After the battery check and conditioning is complete, the
device will show the configuration that it obtained from
the server. The device will show the default reporting
screen, as shown here.
4.
Once the power is disconnected, another “Conditioning
Battery” screen will appear, this time it will take at least
10 iterations.
Note:
You do not need to be present during this step
and the IoA can be left to complete this task completely
autonomously. This step can take around 20 mins
depending on the signal strength of the device.
2.
Next, the device will show the following “Conditioning
Battery” screen. This step is to ensure that the batteries
within the device are ready for field deployment.
A message is shown on the screen depicting which step
the device is currently on. Depending on the signal
strength, this procedure can take up to 10 mins.
If Error 103 displays, please ensure you have the correct
SIM card. Check with your IoA Administrator or your local IoT cellular network
provider. It should be provisioned for automatic APN and not require a PIN.
Preparation for use
When you unpack the unit, do the following:
y
Inspect the unit for damage. If damaged, put back in box and contact VIAVI customer
service (see the Technical assistance section).
y
If undamaged, save the box and packing materials in case the unit needs to be
returned in the future.
3Z IoA-1000
Quick Start Guide
Benefits
y
Easily attach to and monitor antenna alignment in real time from the field to your
desk using your own customized software
y
Easy to set up
Device preparation (before physical installation)
The device preparation is recommended to be done prior to arriving onsite. This ensures the
IoA is ready to install without any issues.
Note: For best results and minimum delay of setup, the unit should be within
59º F to 122º F (15º–50º C) during device preparation.
Important:
Prior to installing the IoA unit on the antenna, set up the IoA using the
VIAVI IoA Manager website or your company’s IoA Console software. See the
IoA
Manager User’s Guide
or your IoA Administrator for more information.
The IoA Manager will help you add sites, add IoAs to sites, and configure IMEI,
Azimuth, Tilt, and Roll values of IoAs added to sites.
See the
IoA User’s Guide
for more details on setup and configuration.
1.
Remove the IoA, SIM card tray, and alcohol pad from the
packaging. The device will show a standard welcome
screen with the IMEI number of the device at the bottom,
as shown here.
Important:
The SIM card is not provided by VIAVI.
Check with your IoA Administrator or your local IoT
cellular network provider. It should be provisioned for
automatic APN and not require a PIN.
2.
Place the SIM card in the tray. Notice the contacts of the
SIM card should be facing up, with the notch of the SIM
card in the upper left, as you face the front of the IoA.
3.
Carefully insert the SIM card tray into the IoA.
Once the SIM card tray is inserted, listen for two “clicks”.
The second “click” may take up to 7 seconds to occur.
After the second “click”, the screen should show the QR code containing the IMEI of
the device, showing the device is ready for setup.
The IMEI from this screen will be required as part of IoA configuration using
the IoA Manager or your organization’s IoA Console software. See your IoA
Administrator for more information.
If Error 101 displays, please ensure the SIM card is seated properly in the tray.
SIM card placed
in tray
Important:
THE SIM TRAY MUST BE INSERTED BEFORE MOVING TO THE NEXT
STEP.
Connecting to the IoA server
The next step is to connect the IoA to the server for final configuration.
1.
Remove the USB cover sticker and provide power via the USB connection on
the bottom of the IoA in order to download the configuration from the server
immediately (approx. 1-2 mins).
Once connected to USB power, the IoA screen will indicate it is retrieving its
configuration from the server, as shown here.
Important:
DO NOT REMOVE USB POWER UNTIL INSTRUCTED TO DO SO.
3.
Once the first cycle has finished, a “Disconnect to
Continue” message will appear. You may now safely
remove the USB power while the device continues with
its automated battery check.
USB
power
Battery
power
Inserting SIM
tray in IoA
Features
y
LTE CAT-M1/NB-IoT ready
y
E-paper display for status & alerts
y
5+ year battery life (depending on
reporting interval)
y
IP67 rated
y
Alarm capable
y
Weather-resistant adhesive
y
No maintenance required
y
Cloud data management capabilities
IoT SIM card requirements
y
Nano SIM card
y
NB-IoT or LTE CAT-M1 enabled, with
automatic APN provisioning and no
PIN
y
PCO or ePCO enabled
Important:
The SIM card is not
provided by VIAVI. Check with your IoA
Administrator or your local IoT cellular
network provider.


