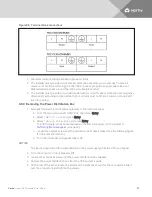
3.3.2 Installation Clearances
Maintain at least 4 in. (100 mm) clearance in the front and rear of the GXT4. Do not obstruct the air inlets
on the front panel and rear panel of the UPS. Blocking the air inlets reduces ventilation and heat
dissipation, shortening the service life of the Liebert GXT4.
3.4 Installing the UPS
The Liebert GXT4 may be installed as a tower or in a rack, depending on available space and use
considerations. Determine the type of installation and follow the appropriate instructions. See
Tower
Installation
on page 22 or
Rack Installation
on page 23.
NOTE: When installing the UPS or making input and output connections, comply with all relevant
safety codes and standards
3.4.1 Tower Installation
To install the GXT4 as a tower:
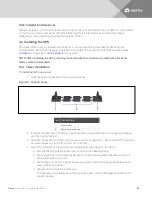
1. Take the support bases out of the accessories box.
Figure 3.1 Support bases
NO.
DESCRIPTION
1
Support bases
2
Spacers with connectors
2. If optional, Liebert external battery cabinets will be connected, take out the spacers shipped
with the battery cabinet.
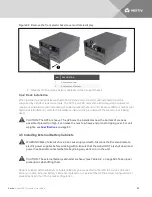
3. Connect the spacers and the support bases as shown in Figure 3.1 above. Each GXT4 requires
2 support bases, one in the front and one in the rear.
4. Adjust the direction of the operation and display panel and logo on the GXT4.
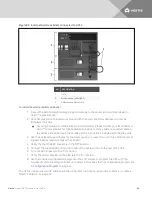
a. Remove the front plastic bezel cover as shown the following figure.
b. Pull the operation and display panel gently, rotate it 90 degrees clockwise and snap it
back into position, as shown.
c. Pull the logo on the front plastic bezel cover gently, rotate it 90 degrees clockwise and
snap it back into position.
d. Replace the front plastic bezel cover.
The operation and display panel and logo have been rotated 90 degrees clockwise, for
upright viewing.
Vertiv
| Liebert GXT4 Installer/User Guide |
22
Содержание GXT4-10000RT230
Страница 1: ...Liebert GXT4 UPS 230 V 5000 VA 10 000 VA Installer User Guide...
Страница 6: ...Vertiv Liebert GXT4 Installer User Guide 6...
Страница 10: ...Vertiv Liebert GXT4 Installer User Guide 10 This page intentionally left blank...
Страница 20: ...Vertiv Liebert GXT4 Installer User Guide 20 This page intentionally left blank...
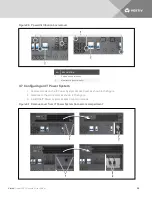
Страница 29: ...NO DESCRIPTION 1 Remove screws 2 IT power system connectors Vertiv Liebert GXT4 Installer User Guide 29...
Страница 30: ...Vertiv Liebert GXT4 Installer User Guide 30 This page intentionally left blank...
Страница 40: ...Vertiv Liebert GXT4 Installer User Guide 40 This page intentionally left blank...
Страница 48: ...Vertiv Liebert GXT4 Installer User Guide 48 This page intentionally left blank...
Страница 56: ...Vertiv Liebert GXT4 Installer User Guide 56 This page intentionally left blank...
Страница 64: ...Vertiv Liebert GXT4 Installer User Guide 64 This page intentionally left blank...
Страница 65: ......


