W A R N IN G ! B efo re cables co n n ectio n , m ak e su re th at all extern al an d in tern al po wer switch es
o f th e UP S are o ff, an d po st n ecessary warn in g sign s to preven t in adverten t o peratio n o f th e
switch es. M ean wh ile, m easu re th e vo ltages between th e UP S term in als an d th e vo ltages
between th e term in als an d th e earth .
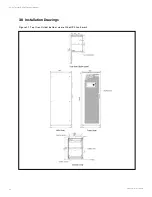
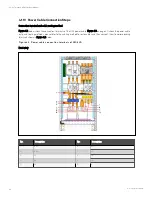
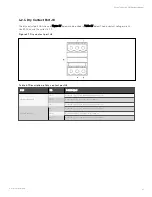
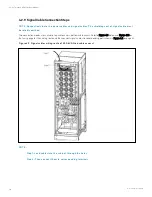
Refer to Figure 4.2 on page 38 to Figure 4.3 on the previous page, open the front door of the UPS, and remove the protective
cover to reveal the power cable connection terminals (see Figure 4.3 on the previous page). Connect the protective earth
cable to the PE input terminal in the cabinet.
W A R N IN G !
1. T h e earth cables an d n eu tral lin e m u st be co n n ected in acco rdan ce with lo cal an d n atio n al
co des o f practice.
2. F ailu re to o bserve th is co u ld resu lt in electric sh o ck o r fire risk .
Connection of system input
1.
Common input configuration
Connect the AC input cables to the bypass input terminals (bA-bB-bC) in the cabinet. Connect the input
neutral line to the neutral terminal N in the cabinet. Ensure correct phase rotation.
2.
Split bypass configuration (factory default)
Connect the rectifier input cables to the rectifier input terminals (mA-mB-mC) in the cabinet, and connect the
bypass input cables to the bypass input terminals (bA-bB-bC) in the cabinet. Connect the rectifier input
neutral line and bypass neutral line to the neutral terminal N in the cabinet. Ensure correct phase rotation.
Connection of system output
Connect the system output cables between the output terminals (oA-oB-oC-N) in the cabinet and the load. Refer to Table
4.1 on page 34 for the torque value. Ensure correct phase rotation.
W A R N IN G ! If th ere is n o requ irem en t o f po wer su pply fo r th e lo ad befo re arrival o f th e service
en gin eer, en su re th at th e system o u tpu t cables are safely iso lated at th eir en ds.
Connection of batteries
Ensure correct polarity of the connections from the battery string terminals to the BCB and from the BCB to the battery
input terminals (+, N, -) in the UPS cabinet, that is, (+) to (+) and (-) to (-), (N) to (N), but disconnect one or more battery cell
links in each tier. Do not reconnect these links and do not close the BCB before authorized to do so by the service engineer.
N O T E: W h en co n n ectin g th e cables between battery term in als an d B CB , th e co n n ectio n sh o u ld begin
fro m th e B CB term in al.
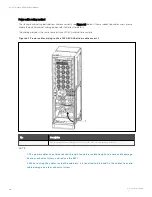
Now the connection is finished. Then replace the protective covers.
N O T E: A fter co n n ectio n , tak e appro priate m easu res to seal th e cable en try h o les.
4 Electrical Installation
41
Vertiv™ Liebert® APM Plus User Manual
Содержание APM 0250kMK16FN02000
Страница 1: ...Vertiv Liebert APM Plus User Manual 50 250 kVA UPS...
Страница 8: ...vi This page intentionally left blank Vertiv Liebert APM Plus User Manual...
Страница 16: ...1 Important Safety Instructions 8 This page intentionally left blank Vertiv Liebert APM Plus User Manual...
Страница 30: ...2 Overview 22 This page intentionally left blank Vertiv Liebert APM Plus User Manual...
Страница 60: ...4 Electrical Installation 52 This page intentionally left blank Vertiv Liebert APM Plus User Manual...
Страница 73: ...Figure 5 11 Customize the display 5 Operator Control and Display Panel 65 Vertiv Liebert APM Plus User Manual...
Страница 97: ...5 Operator Control and Display Panel 89 Vertiv Liebert APM Plus User Manual...
Страница 154: ...Figure 8 8 LBS port J4 on bypass control module 8 Parallel System and LBS System 146 Vertiv Liebert APM Plus User Manual...
Страница 182: ...11 Service and Maintenance 174 This page intentionally left blank Vertiv Liebert APM Plus User Manual...
Страница 188: ...12 Specifications 180 This page intentionally left blank Vertiv Liebert APM Plus User Manual...
Страница 191: ...Vertiv Liebert APM Plus User Manual...

