User manual
M A N U E L D ' U T I L I S A T I O N
G E B R U I K S A A N W I J Z I N G
G E B R A U C H S A N W E I S U N G
M A N U A L E D I I S T R U Z I O N I
M A N U A L D E I N S T R U C C I O N E S
I N S T R U K C J A O B S
Ł
U G I
N Á V O D K O B S L U Z E
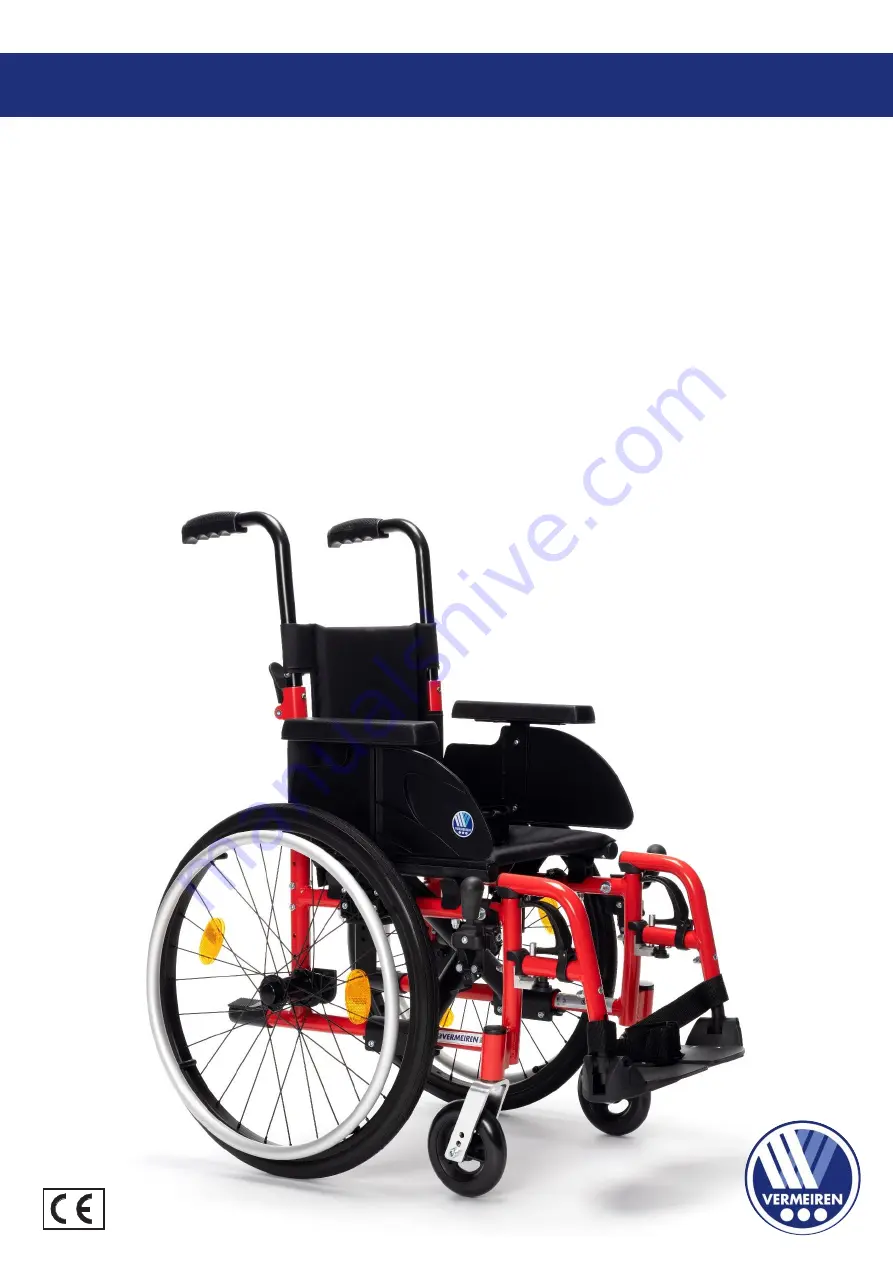
Eclips X2 Kids
Eclips X2 30° Kids


