background image

Veritas NetBackup™ 5230
Appliance Initial
Configuration Guide

Release 2.7.2

Содержание NetBackup 5230

Страница 1: ...Veritas NetBackup 5230 Appliance Initial Configuration Guide Release 2 7 2 ...

Страница 2: ... be reproduced in any form by any means without prior written authorization of Veritas Technologies LLC and its licensors if any THE DOCUMENTATION IS PROVIDED AS IS AND ALL EXPRESS OR IMPLIED CONDITIONS REPRESENTATIONS AND WARRANTIES INCLUDING ANY IMPLIED WARRANTY OF MERCHANTABILITY FITNESS FOR A PARTICULAR PURPOSE OR NON INFRINGEMENT ARE DISCLAIMED EXCEPT TO THE EXTENT THAT SUCH DISCLAIMERS ARE H...

Страница 3: ...Veritas Technologies LLC 500 E Middlefield Road Mountain View CA 94043 http www veritas com ...

Страница 4: ...l business hours or 24 hours a day 7 days a week basis Premium service offerings that include Account Management Services For information about our support offerings you can visit our website at the following URL www veritas com support All support services will be delivered in accordance with your support agreement and the then current enterprise technical support policy Contacting Technical Supp...

Страница 5: ...pport Customer service Customer service information is available at the following URL www veritas com support Customer Service is available to assist with non technical questions such as the following types of issues Questions regarding product licensing or serialization Product registration updates such as address or name changes General product information features language availability local de...

Страница 6: ... you want to contact us regarding an existing support agreement please contact the support agreement administration team for your region as follows CustomerCare veritas com Worldwide except Japan CustomerCare_Japan veritas com Japan ...

Страница 7: ...ation procedures 31 Performing the initial configuration on a NetBackup 52xx appliance from the NetBackup Appliance Web Console 31 Performing the initial configuration on a 52xx master server appliance from the NetBackup Appliance Shell Menu 49 Configuring a master server to communicate with an appliance media server 57 Performing the initial configuration on a 52xx media server appliance from the...

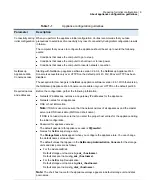
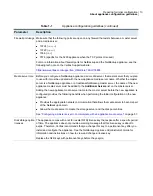
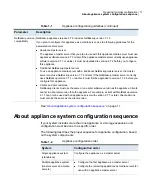
Страница 8: ...ut IPv4 IPv6 based network support About the initial configuration pages in the NetBackup Appliance Web Console About the NetBackup 52xx Appliance initial configuration checklist NetBackup appliance initial configuration checklist About configuring the maximum transmission unit size About appliance configuration guidelines Use the following configuration guidelines when you deploy new appliances 1...

Страница 9: ...nfiguration gather the following information Network IP addresses netmask and gateway IP addresses for the appliance Network names for all appliances DNS or host information Note If DNS is used make sure that the network names of all appliances and the master server are DNS resolvable FQDN and short name If DNS is not used make sure that you enter the proper host entries for the appliance during t...

Страница 10: ...w appliance media server name to the master server before the new appliance is configured provides the following benefits when performing the initial configuration on the new appliance Provides the appropriate network communication that allows the media server to become part of the NetBackup domain Allows the media server to create the storage server and the disk pool entries See Configuring a mas...

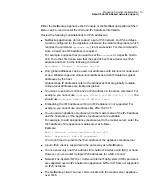
Страница 11: ... client add ons NetBackup clients must use the same or an earlier software version as the appliance Clients cannot run at a later version than the appliance For example a client with NetBackup version 2 7 1 can only be used with an appliance server with version 2 7 1 or later Client add ons must also be the same as the client version NetBackup version compatibility See About appliance system confi...

Страница 12: ... also identify the master server that you plan to use with this appliance The master server can be either a traditional NetBackup master server or a NetBackup appliance master server When you select the media server role you must also define the storage names for the following disk volumes Deduplication volume AdvancedDisk volume Media See About the initial configuration pages in the NetBackup App...

Страница 13: ...v6 address in the same command For example you cannot use Configure 9ffe 9 255 255 255 0 1 1 1 1 You should use Configure 9ffe 46 64 9ffe 49 eth1 Embedding the IPv4 address within an IPv6 address is not supported For example you cannot use an address like 9ffe 10 23 1 5 You can add an appliance media server to the master server if the IPv6 address and the host name of the appliance media server ar...

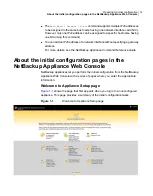
Страница 14: ...e Guide About the initial configuration pages in the NetBackup Appliance Web Console NetBackup appliances let you perform the initial configuration from the NetBackup Appliance Web Console with a series of pages where you enter the appropriate information Welcome to Appliance Setup page Figure 1 1 shows the page that first appears when you log in to an unconfigured appliance This page provides a s...

Страница 15: ...figuration page Figure 1 2 shows the page that is used to enter your corporate network information Figure 1 2 Network configuration page Host Configuration page Figure 1 3 shows the page that is used to enter the host identification for this appliance server 15 Preparing for initial configuration About the initial configuration pages in the NetBackup Appliance Web Console ...

Страница 16: ... page Password change page Figure 1 4 shows the page that is used to change the password for this appliance server 16 Preparing for initial configuration About the initial configuration pages in the NetBackup Appliance Web Console ...

Страница 17: ... and Time page Figure 1 5 shows the page that is used to set the date the time and the time zone for this appliance server 17 Preparing for initial configuration About the initial configuration pages in the NetBackup Appliance Web Console ...

Страница 18: ...ting and Call Home page Figure 1 6 shows the page that is used to configure system alerts and the Call Home feature 18 Preparing for initial configuration About the initial configuration pages in the NetBackup Appliance Web Console ...

Страница 19: ...age Registration page Figure 1 7 shows the page that is used to identify the physical location for this appliance server 19 Preparing for initial configuration About the initial configuration pages in the NetBackup Appliance Web Console ...

Страница 20: ...e Role Configuration page Master Figure 1 8 shows the page that is used to select the Master role for this appliance server 20 Preparing for initial configuration About the initial configuration pages in the NetBackup Appliance Web Console ...

Страница 21: ...aster Appliance Role Configuration page Media Figure 1 9 shows the page that is used to select the Media role for this appliance server 21 Preparing for initial configuration About the initial configuration pages in the NetBackup Appliance Web Console ...

Страница 22: ... page AdvancedDisk Figure 1 10 shows the page that is used to allocate storage space for the AdvancedDisk partition and to name the storage unit and the disk pool 22 Preparing for initial configuration About the initial configuration pages in the NetBackup Appliance Web Console ...

Страница 23: ...on Disk MSDP Figure 1 11 shows the page that is used to allocate storage space for the MSDP Media Server Deduplication Pool partition and to name the storage unit and the disk pool 23 Preparing for initial configuration About the initial configuration pages in the NetBackup Appliance Web Console ...

Страница 24: ...n on a 52xx master server appliance from the NetBackup Appliance Shell Menu on page 49 See Performing the initial configuration on a 52xx media server appliance from the NetBackup Appliance Shell Menu on page 59 About the NetBackup 52xx Appliance initial configuration checklist Use the initial configuration checklist to help plan for the initial configuration and for any future appliance reconfigu...

Страница 25: ...Welcome page Click on the link to open the checklist file You can also access the checklist by clicking the online Help icon from any page and searching for checklist NetBackup appliance online documentation You can obtain a PDF version of the checklist to download and save to a location of your choice To access the latest version of this checklist see the following link www symantec com docs DOC6...

Страница 26: ...f this checklist make sure to place the completed checklist in a secure location You can also obtain a PDF version of the checklist to download and save to a location of your choice To access the latest version of this checklist see the following link www symantec com docs DOC6675 Table 1 4 Network Configuration Create Bond Setting Field Network Interface Bond Mode IP Address Subnet Mask Table 1 5...

Страница 27: ...S IP Address Search Domain s No DNS ________________________________ ________________________________ ________________________________ Host Name Resolution no DNS IP address Fully qualified host name Short host name Table 1 8 Password change Setting Field Old admin password New admin password Confirm new admin password Table 1 9 Date and time configuration Setting Field Time zone NTP Server IP Dat...

Страница 28: ...address Hardware administrator email address Sender email address SMTP account Password Table 1 11 Call Home Configuration Setting Field Enable Call Home Enable proxy server Enable proxy tunneling Proxy server required only if you check Enable proxy server Proxy port required only if you check Enable proxy server Proxy user name Proxy password 28 Preparing for initial configuration NetBackup appli...

Страница 29: ... Configuration Setting Field Master or Media Master server name required only if you check Media Table 1 14 AdvancedDisk storage configuration Setting Field Storage Unit name Disk Pool Name Size Table 1 15 Deduplication MSDP Disk Configuration Setting Field Storage Unit name Disk Pool Name 29 Preparing for initial configuration NetBackup appliance initial configuration checklist ...

Страница 30: ... and switching must all support jumbo frames Additionally each server interface that is used to transfer data to the appliance must be configured for jumbo frames Veritas recommends that if you configure the MTU property of an interface to values larger than 1500 bytes make sure that all systems that are connected to the appliance on the specific interface have the same maximum transmission unit s...

Страница 31: ...Shell Menu Performing the initial configuration on a NetBackup 52xx appliance from the NetBackup Appliance Web Console After you have installed connected and turned on all appliance system components you are ready to configure the server If you plan to configure this appliance as a media server complete the following tasks on the master server before you start the initial configuration The followi...

Страница 32: ...tas Technical Support in case you need future troubleshooting assistance Change the maintenance password through the NetBackup Appliance Shell Menu with one of the following commands Main Settings Password maintenance or Main Support Maintenance passwd For complete information see the NetBackup Appliance Command Reference Guide To perform the initial configuration on a NetBackup 52xx appliance fro...

Страница 33: ...ate Configuration tab perform the following tasks Click User Configured 33 Initial configuration procedures Performing the initial configuration on a NetBackup 52xx appliance from the NetBackup Appliance Web Console ...

Страница 34: ...rform the initial configuration Download Configuration Checklist To help with the initial configuration click this link to open a file where you can record all of the configuration settings Veritas recommends that you print this file and fill it out for use as you perform the configuration Then store it in a secure location for future reference Setup Appliance After you have filled out the configu...

Страница 35: ...essary data entry fields to configure network connectivity Expand taskbar to enter the relevant network configuration information Create Bond Use to create a bond between two or more network interfaces Tag VLAN Starting with NetBackup Appliances version 2 6 0 3 you can configure VLANs in your existing network environments using this taskbar Add Static Route Use to add a route configuration for you...

Страница 36: ...ore information about bond modes see the following documentation http www kernel org doc Documentation networking bonding txt After you have entered the appropriate data into all fields you must click to add and immediately plumb the selected network interface To configure bonding you must select multiple interfaces from the Bond Mode drop down box For IPv6 addresses enter 64 as the Subnet Mask IP...

Страница 37: ... be either IPv4 or IPv6 Only global scope and unique local IPv6 addresses are allowed See About IPv4 IPv6 based network support on page 12 Destination Subnet Mask Enter the subnet value that corresponds to the Destination IP address For the initial configuration this field contains a default value that cannot be changed When you configure another route you must enter the appropriate value Gateway ...

Страница 38: ...nclude the short name that was used before the factory reset For example if myhost was used before the factory reset use myhost domainname com as the new FQDN If you want to change the host name to a short host name it must be derived from the FQDN that was used before the factory reset For example if myhost domainname com was used before the factory reset use myhost as the new short host name Not...

Страница 39: ...ork support on page 12 To remove an address select it from the list that appears below the data entry field and click the x icon Search Domain s Enter a search domain name then click the icon to add the name Repeat as necessary for the number of search domains that you want to add To remove a search domain select it from the list that appears below the data entry field and click the x icon After y...

Страница 40: ...name Enter the short name of the appliance To enter two or more names add a comma with no space between each name After you have populated all fields click the icon The added entries now appear below the fields After you have entered all of the necessary information click Next For the systems that do not use DNS 8 On the Password change page enter a new password to replace the default password as ...

Страница 41: ... To assign a time zone to the appliance click on the Time zone drop down box and select the appropriate region country and time zone Time zone To enter the date and the time manually select this option and enter the following information In the first field enter the date by using the mm dd yyyy format Or click on the calendar icon and select the appropriate month day and year In the second field e...

Страница 42: ...me like admin_group public or private If you do not enter anything the default value is Public View SNMP MIB file To set up the appliance SNMP Manager to receive hardware monitoring related traps click this link to view the content of the MIB file Then copy the file to another location and use the content to update the SNMP Manager The appliance can only accept traps in the SNMPv2c format SMTP ser...

Страница 43: ...llows Enable proxy Tunneling To enable proxy tunneling click this check box and provide the following proxy information Proxy server Enter the IP address of the server The IP address can be either IPv4 or IPv6 For IPv6 only global scope and unique local addresses are allowed Proxy port Enter the port number of the proxy server to allow communication with this appliance Proxy username Enter the use...

Страница 44: ... server resides State Province Enter the ZIP or the Postal Code where this server resides Zip or Postal Code Enter the country where this server resides Country Enter the name of the primary contact such as a network or a backup administrator for your backup environment Contact Name Enter the primary phone number for the contact name This number should be the one that is most likely to reach the c...

Страница 45: ...dia server on page 57 Make sure that the master server and this media server have compatible software versions Add the name of this media server to the master server that you plan to use with it Open the following ports on the master server to allow communication to this media server vnetd 13724 bprd 13720 PBX 1556 Open the following ports if the master server is an appliance master server and TCP...

Страница 46: ...reate names for the storage units and the disk pools that you plan to use and configure the size of the disk partitions You can configure storage partitions for AdvancedDisk for Deduplication MSDP or for both Note If you choose to configure MSDP storage a policy is automatically created to protect the MSDP catalog Veritas recommends reviewing this policy and activating it once your appliance is co...

Страница 47: ...ool The name can contain any letters numbers or special characters The name can include up to 256 characters Note The name should not start with the minus character and spaces should not be used anywhere in the name Size Set the size for this partition by entering a precise number in the Size field or click and drag the box on the gray slide bar to the desired size The size can be set in GB or TB ...

Страница 48: ... maximum available space Deduplication Disk MSDP After you have entered all of the necessary information click Next 14 On the Configuration Progress page you can monitor the progress of the appliance as it applies all of the data input from the configuration pages The amount of time for the configuration to complete varies and depends on the complexity of your environment 15 On the Summary of Conf...

Страница 49: ...ng NetBackup appliances do not support configuring two IP addresses that belong to the same subnet The appliance runs on the Linux operating system and this type of networking is a current limitation Each bond that you create must use an IP address that belongs to a different subnet Note You cannot remove an IP address if the appliance host name resolves to that IP address Caution Before or immedi...

Страница 50: ...rt navigate to the Local Area Connection Properties dialog box On the General tab select Internet Protocol TCP IP so that it is highlighted then click Properties On the Alternate Configuration tab perform the following tasks 50 Initial configuration procedures Performing the initial configuration on a 52xx master server appliance from the NetBackup Appliance Shell Menu ...

Страница 51: ...92 168 229 233 and log on to your appliance The logon is admin and the default password is P ssw0rd After you log on the welcome message appears in the shell menu and the prompt is at the Main_Menu view 3 Before performing the reconfiguration process make sure you have followed the re image procedure 51 Initial configuration procedures Performing the initial configuration on a 52xx master server a...

Страница 52: ...tworks you must first configure the IP address of each network that you want to add Then you configure the Gateway address for each network you added You must make sure that you add the default Gateway address first Use the following two commands Use either of the following commands depending on whether you want to configure an IPv4 or an IPv6 address for the network interface Configure the IP add...

Страница 53: ...oceed to Step 8 DNS Domain Name Where Name is the new domain name for the appliance 6 From the Main_Menu Network view use the following command to add the DNS name server to your appliance configuration DNS Add NameServer IPAddress Where IPAddress is the IP address of the DNS server The address can be either IPv4 or IPv6 Only global scope and unique local IPv6 addresses are allowed See About IPv4 ...

Страница 54: ...has been factory reset and you want to import any of its previous backup images the appliance host name must meet one of the following rules The host name must be exactly the same as the one used before the factory reset If you want to change the host name to an FQDN it must include the short name that was used before the factory reset For example if myhost was used before the factory reset use my...

Страница 55: ...nd to tag a VLAN to a physical interface or bond interface For detailed information about the LinkAggregation and the VLAN command options refer to the NetBackup Appliance Command Reference Guide 11 From the Main_Menu Network view use the following commands to set the time zone the date and the time for this appliance Set the time zone by entering the following command TimeZone Set Select the appr...

Страница 56: ...rompts appear for the NetBackup Catalog AdvancedDisk and MSDP partitions To configure storage partitions you must do the following Enter a size for the NetBackup Catalog on the master server To skip the configuration for the NetBackup Catalog partition enter 0 when prompted for its size To keep the partition at its current size press Enter Enter a storage pool size in GB or TB To skip the storage ...

Страница 57: ...u are ready to install client software on the computers that you want to back up See Downloading NetBackup client packages to a client from a NetBackup appliance on page 72 Configuring a master server to communicate with an appliance media server Before you configure a new appliance for the Media server role you must first update the configuration on the master server that you plan to use with it ...

Страница 58: ...e media server that is not yet configured If the appliance has more than one host name you must add all of the names For an appliance master server Log on to the NetBackup Administration Console as the administrator On the main console window in the left pane click NetBackup Management Host Properties Master Servers In the right pane click on the master server host name On the Host Properties wind...

Страница 59: ...tBackup Appliance Shell Menu on page 59 Performing the initial configuration on a 52xx media server appliance from the NetBackup Appliance Shell Menu After you have installed connected and turned on all appliance system components you are ready to configure the server If you plan to configure this appliance as a media server you must complete the following tasks on the master server before you sta...

Страница 60: ...diately after initial configuration you must change the default maintenance password P ssw0rd for your appliance This password must be provided to technical support in case you need future troubleshooting assistance You must change the maintenance password through the NetBackup Appliance Shell Menu with one of the following commands Main Settings Password maintenance or Main Support Maintenance pa...

Страница 61: ...te Configuration tab perform the following tasks Click User Configured 61 Initial configuration procedures Performing the initial configuration on a 52xx media server appliance from the NetBackup Appliance Shell Menu ...

Страница 62: ...233 and log on to your appliance The logon is admin and the default password is P ssw0rd After you log on the welcome message appears in the shell menu and the prompt is at the Main_Menu view 3 Before performing the reconfiguration process make sure you have followed the re image procedure 62 Initial configuration procedures Performing the initial configuration on a 52xx media server appliance fro...

Страница 63: ...tworks you must first configure the IP address of each network that you want to add Then you configure the Gateway address for each network you added You must make sure that you add the default Gateway address first Use the following two commands Use either of the following commands depending on whether you want to configure an IPv4 or an IPv6 address for the network interface Configure the IP add...

Страница 64: ...roceed to Step 8 DNS Domain Name Where Name is the new domain name for the appliance 6 From the Main_Menu Network view use the following command to add the DNS name server to your appliance configuration DNS Add NameServer IPAddress Where IPAddress is the IP address of the DNS server The address can be either IPv4 or IPv6 Only global scope and unique local IPv6 addresses are allowed See About IPv4...

Страница 65: ...has been factory reset and you want to import any of its previous backup images the appliance host name must meet one of the following rules The host name must be exactly the same as the one used before the factory reset If you want to change the host name to an FQDN it must include the short name that was used before the factory reset For example if myhost was used before the factory reset use my...

Страница 66: ...o tag a VLAN to a physical interface or bond interface For detailed information about the LinkAggregation and the VLAN command options refer to the NetBackup Appliance Command Reference Guide 11 From the Main_Menu Network view use the following commands to set the time zone the date and the time for this appliance Set the time zone by entering the following command TimeZone Set Select the appropri...

Страница 67: ...nt option identifies the name of the account that was used or the authentication to the SMTP server The Password option is the password for authentication to the SMTP server Enter the SMTP server name Email Software Add Addresses Where Addresses is the user s email address To define multiple emails separate them with a semi colon Enter email addresses 67 Initial configuration procedures Performing...

Страница 68: ...an example of how the command would appear Media MasterServerName In this scenario the master server has more than one host name that is associated with it You must use a Multihomed master server comma as a delimiter between the host names The following is an example of how the command would appear Media MasterNet1Name MasterNet2Name In this scenario the master server is in a cluster Veritas recom...

Страница 69: ...e prompts appear for the AdvancedDisk and the Deduplication MSDP partitions To configure storage partitions you must do the following Enter a storage pool size in GB or TB To skip the storage pool size configuration for any partition enter 0 when prompted for its size To keep the storage pool at its current size press Enter Enter a disk pool name The default names are dp_adv_ hostname for Advanced...

Страница 70: ...e 192 168 x x IP address range refer to the following topic for important information See About NIC1 eth0 port usage on NetBackup appliances on page 71 16 After all appliances are configured and operational you are ready to install client software on the computers that you want to back up See Downloading NetBackup client packages to a client from a NetBackup appliance on page 72 70 Initial configu...

Страница 71: ...s typically not connected to your network environment Once the initial configuration has been completed you can connect NIC1 eth0 to an administrative network that does not provide any backup data transfer However you may need to change the default IP address if your primary network uses the same IP address range NetBackup appliances do not support the use of any network configuration in the same ...

Страница 72: ...e to any client that you want to back up The NetBackup Appliance Web Console logon page provides a Download Packages section to download the client packages The packages are listed by operating system type in a drop down box as follows All Windows Linux Solaris AIX HP BSD Mac OS VMware vCenter Plug in Note If you download Linux UNIX Solaris AIX or BSD packages Veritas recommends GNU tar version 1 ...

Страница 73: ...ears after you make a selection that client package is not currently installed on the appliance This situation is most likely to occur if the appliance has been re imaged from the USB flash drive To download and install client packages on to the appliance see the NetBackup Appliance Administrator s Guide In the chapter Managing a NetBackup Appliance from the NetBackup Appliance Web Console refer t...

Страница 74: ...ly qualified host name of the appliance master server and click OK Close the Backup Archive and Restore interface Restart the NetBackup Client Services by opening a Windows Command prompt Then enter services msc and press Enter See Downloading the NetBackup Administration Console to a Windows computer from a NetBackup appliance on page 74 Downloading the NetBackup Administration Console to a Windo...

Страница 75: ...t Windows 4 When the package file name appears under the drop down box right click on it and select either Download Linked File or Download Linked File As then specify the location to download the package onto the Windows computer For example download the package to C temp or to the desktop 5 Unzip the package 6 Install the administration console software as follows On the client navigate to the A...

Страница 76: ...kup appliance 72 G guidelines appliance configuration 8 I initial configuration 52xx appliance from NetBackup Appliance Web Console 31 pages in the NetBackup Appliance Web Console 14 initial configuration checklist about NetBackup 52xx 24 NetBackup appliance 25 initial configuration of 52xx master server appliance from NetBackup Appliance Shell Menu 49 initial configuration of 52xx media server ap...

Страница 77: ...R reconfiguration of 52xx master server appliance from USB and NetBackup Appliance Shell Menu 49 S sequence for appliance system configuration 11 77 Index ...

Отзывы: