background image

Page 3

L114A 0808A

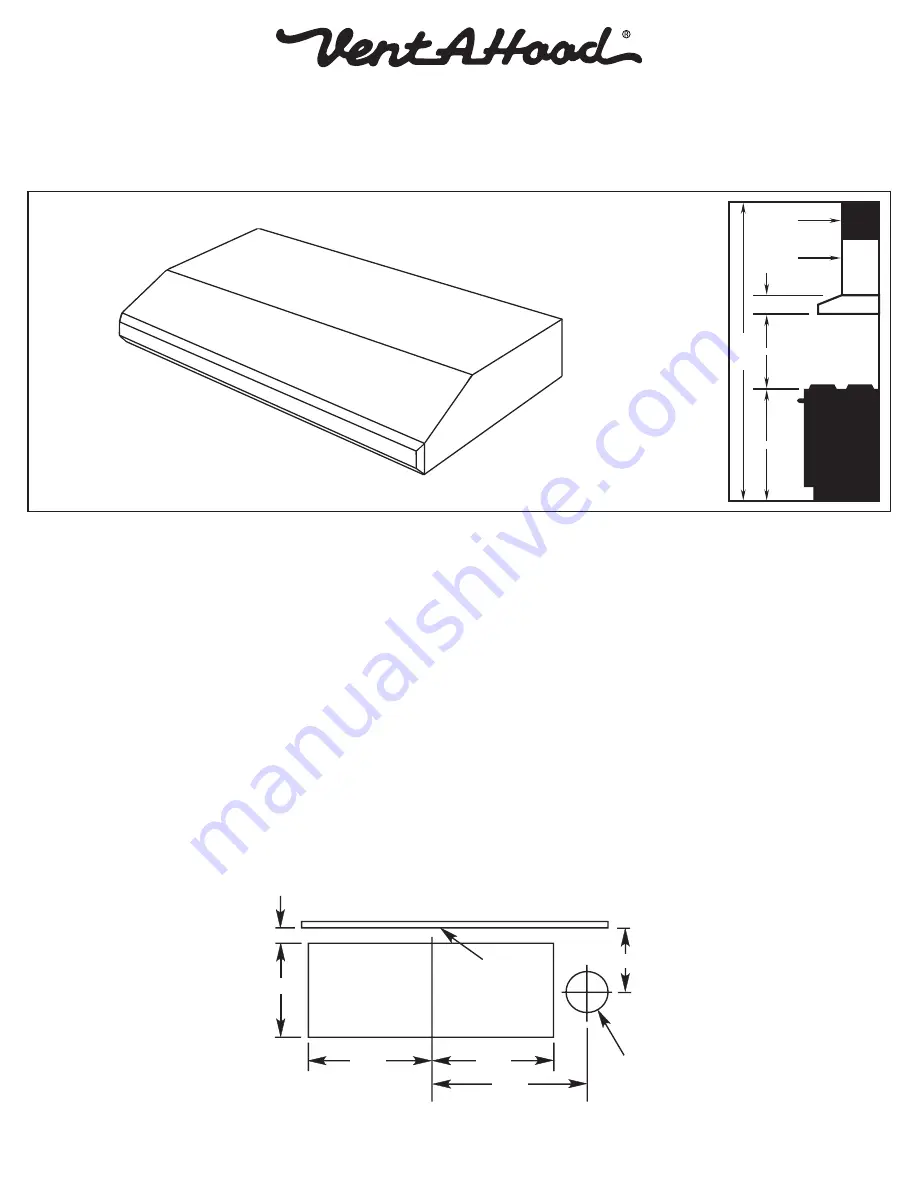
36”

8’ Ceiling

21”-24”

6”

Soffit

Cabinets

Ceiling Cutout for Vertical Ducting

Viewed from Above

Back of Cabinet

Electrical

�⁄�"

3 ½"

5 �⁄�"

5 �⁄�"

6 ¼"

2 �⁄�"

CL

Installation Details

1)  Read all instructions thoroughly before beginning installation.

2)  When installing the SLH6-K under cabinet hood, it is recommended that the bottom edge of the hood be located no more 

than 21” - 24” from the cooking surface. Exceeding recommended mounting height may compromise performance.

3)  Inspect the underside of the cabinet for a flush mounting surface. If the underside of the cabinet is recessed, install 

wood strips to provide a flush surface for the hood mounting screws to engage.

4)  Determine whether the hood will discharge horizontally or vertically. The hood is shipped to discharge vertically but is 

easily converted to horizontal discharge by exchanging the discharge adapter on top of the hood (4 screws) with the 

discharge cover on the back of the hood (2 screws). Use duct tape to seal the discharge adapter and discharge cover 
to the hood.

5)  IF THE HOOD IS TO BE “BACK VENTED”, PROCEED DIRECTLY TO STEP 6.


Install the duct from the outside of the home down to the location of the hood exhaust outlet allowing room for the 

VP521 transition on the top of the hood (if applicable). If a VP521 transition is used, install the duct down to the location 
of the transition outlet plus 1”. This will allow the transition to engage 1” inside of the duct. Consult the connection 

diagram (below) for further details on exhaust outlet placement.


Use duct tape to seal all joints. A complete listing of available Vent-A-Hood ducting materials is provided on the back 
page of this instruction sheet.

Transition height:  3 1/4” x 10” duct will connect directly to the exhaust outlet of the hood. Optional VP521 transition 

to 7” round (sold separately) is 7 1/2” tall.

Содержание SLH6-K

Страница 1: ...he service disconnecting means to prevent power from being switched on accidentally during installation B When cutting or drilling into wall or ceiling do not damage electrical wiring and other hidden utilities C Ducted fans must always be vented to the outdoors D Sufficient air is needed for proper combustion and exhausting of gases through the flue chimney of fuel burning equipment to prevent ba...

Страница 2: ...angled turns Instead use smooth gradual turns such as adjustable elbows or 45 degree angled turns For duct runs over 20 feet increase the duct diameter by one inch for every ten feet of duct A 90 degree elbow is equal to 5 feet of duct Using Vent A Hood roof jacks or wall louvers back page will ensure proper efficiency Airflow must not be restricted at the end of the duct run Do not use screen wir...

Страница 3: ...izontal discharge by exchanging the discharge adapter on top of the hood 4 screws with the discharge cover on the back of the hood 2 screws Use duct tape to seal the discharge adapter and discharge cover to the hood 5 IF THE HOOD IS TO BE BACK VENTED PROCEED DIRECTLY TO STEP 6 Install the duct from the outside of the home down to the location of the hood exhaust outlet allowing room for the VP521 ...

Страница 4: ... wall prior to installing the hood Starting 2 1 8 above the bottom edge of the hood cut a hole 3 1 2 high x 10 1 4 wide see diagram at right 11 Install the duct from the outside of the home to the duct access hole in the wall Where possible use duct tape to seal joints 12 While aligning the duct and guiding the wires position the hood under the cabinet The duct should connect together as the hood ...

Страница 5: ...9 3 x 10 4 10 14 3 3 MULTI BLOWER TRANSITION MODEL DIM VP562 VP563 6 8 to 10 8 8 to 12 VP562 17 VP563 16 10 12 VP562 23 VP563 30 3 x 10 TO 7 TRANSITION MODEL DIM VP521 3 x 10 to 7 7 7 3 10 LOW PROFILE ROOF JACK MAXIMUM 4 12 PITCH MODEL DIM 6 VP539 VP540 VP541 6 Round 7 Round 8 Round 16 16 LOW PROFILE ROOF JACK MAXIMUM 4 12 PITCH MODEL DIM 10 VP552 VP553 10 Round 12 Round 22 20 ADJUSTABLE ELBOW MOD...

Отзывы: