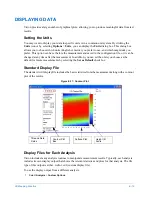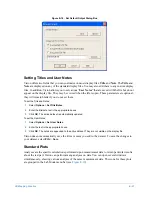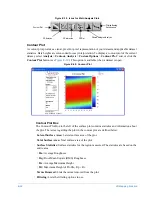
3D Mapping Function
E-33
3
Check the
Apply Mask to Stored Data
box to apply the mask.
To save a mask to the current Configuration file, click
Save
in the
Mask Editor
window.
Creating and Editing Masks
NOTE –
Analysis and terms masks are automatically saved with the dataset. Datasets are
stored as raw data and processed data. If a mask is applied during analysis, the mask will be
stored with the processed data. When you reopen the dataset, the mask can be reapplied to
the dataset by turning on the mask. Remember that with a detector mask, masked regions of
data are permanently blocked in the raw data.
To create or edit Analysis, Terms or Height Threshold masks:
1
Open a dataset.
2
Select
Edit
>
Edit Masks
to access the
Mask Editor
window (see
To create or edit a Detector Mask:
1
Select
Measurement Options
>
PSI Options
.
2
Click the
Edit
Detector Mask
button to open the
Detector Mask Editor
window.
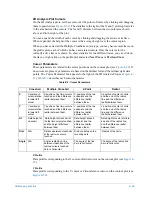
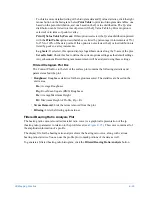
You can use several cursor tools to create and change the mask. To use cursor tools, first select a
cursor type from the
Cursor
menu. Move your cursor to the Mask Editor plot to begin creating a
mask.
For Local (Area) masks, use the
Crosshair
tool to set an insertion point wherever you click on your
plot. You can also drag to move the cursor point. Once you have an insertion point you can choose to
perform functions to the selected
Point
of data, to data
Above
or
Below
the cursor, or to data to the
Left
or
Right
of the cursor.
Use the four
Area
tools to create shapes within the mask area:
•
Rectangle:
Press the left mouse button and drag to create a rectangular area.
•
Circle:
Press the left mouse button and drag to create a circular area.
•
Ellipse:
Press the left mouse button and drag to create an elliptical area.
•
Polygon:
Place the mouse pointer over the location of one point on the polygon. Click to set
your starting point, position the cursor and click once for each side you want to create, then
double-click to set the shape in place. A polygon can have up to 50 sides.
After you have created an area, you can move it by holding down the Shift key while clicking and
dragging it with the left mouse button.
NOTE –
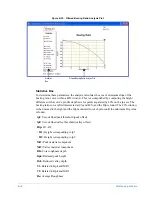
By right-clicking in the Mask viewing region, you can select the size and the location
of the mask to be displayed in pixels or in mm.
You can also perform the following functions on an area:
•
Block:
Block out sections of data. For example, if you are working with a circular cursor tool
and you select
Block
, when you click on the
Inside
button the program will define a mask that
Содержание Dektak 150
Страница 1: ......
Страница 2: ...P N 980 294 Standard P N 980 298 Cleanroom Revision A DEKTAK 150 SURFACE PROFILER USER S MANUAL ...
Страница 7: ......
Страница 17: ......
Страница 81: ......
Страница 105: ......
Страница 149: ......
Страница 191: ......
Страница 251: ......
Страница 257: ...A 6 Facilities Specifications Figure A 6 Dektak 150 without Enclosure Side View ...
Страница 258: ...Facilities Specifications A 7 Figure A 7 Dektak 150 Dimensions without Enclosure Top View ...
Страница 259: ...A 8 Facilities Specifications Figure A 8 Dektak 150 without Enclosure Center of Mass ...
Страница 273: ......
Страница 283: ......
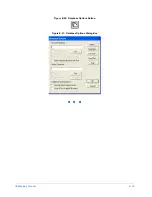
Страница 320: ...3D Mapping Function E 37 Figure E 26 Database Options Button Figure E 27 Database Options Dialog Box ...
Страница 321: ......
Страница 331: ......
Страница 333: ......
Страница 336: ......
Страница 337: ......
Страница 349: ......

