VARO Powerplus POWEG2010 Скачать руководство пользователя страница 10


POWEG2010


EN


Copyright © 2021 VARO 

P a g e

 | 

10


www.varo.com 

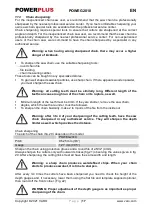
WARNING:  Never  start  or  operate  the  saw  unless  the  bar  and  chain  are 
properly installed. 


Fill the fuel tank (A) with correct fuel mixture. 


Fill the oil tank (B) with correct chain and bar oil... 

9.2 

Starting a cold engine 


Activate the chain brake (move the hand guard forward and engage it) (Fig 9a) 


To start the saw, push the switch (ON/OFF switch) to the ON (I) position. (Fig. 9b) 


Pull out the choke (A) to the point where it latches in place. (Fig. 9c) 


Press primer bulb 3 to 5 times. 


Place the saw on a firm and level surface. Hold the saw securely with your foot as 
illustrated. Tug sharply on the starter several times until first firing sound is heard. (Fig. 9d) 


Choke will be turned off  automatically when you pull the throttle. (Fig. 9e) 


Forcefully pull the starter until the motor engages. (Fig 9f) 


Slightly press in the throttle (Fig 9g) 


Pull back the brake lever to release the chain brake (Fig 9h) 

9.3 

Warm start 


Activate the chain brake (Fig 9i) 


Set the switch (on/off) to ON(I) position (Fig 9j) 


Forcefully pull the starter until the motor engages (Fig 9k) 


Slightly press down on the throttle (Fig 9l) 


Release the chain brake (Fig 9m) 

9.4 

When engine is saturated with fuel 


Remove the air filter 


Remove the spark plug 


Position the machine in an angle of 45° with the sword upwards  


Pull the starters rope a few times 


Clean the spark plug and place back 


Place back the air filter and start without choke 

9.5 

To stop engine (Fig 9n) 


Release trigger and allow engine to return to idle speed. 


Push the I/O (on/off) switch to O (off) to stop engine. 

Note:  for  emergency  stopping,  simply  activate  chain  brake  and  switch  the 
I/O (on/off) switch to o (off). 

9.6 

Chain brake operational test 

Test the chain brake periodically to ensure proper function. 
Perform  a  chain  brake  test  prior  to  initial  cutting,  following  extensive  cutting,  and  definitely 
following any chain brake service. 
Test chain brake as follows: 


Place saw on a clear, firm, flat surface. 


Start engine. 


Grasp the rear handle (A) with your right hand (fig. 10). 


With your left hand, hold the front handle (B) [not chain brake lever (C)] firmly (fig. 10). 


Squeeze the throttle trigger to 1/3 throttle, then immediately activate the chain brake lever 
(C) (fig. 10). 

Warning:  activate  the  chain  brake  slowly  and  deliberately.  Keep  the  chain 
from touching anything; don t let the saw tip forward. 

Содержание Powerplus POWEG2010

Страница 1: ...ain tension adjustment 7 7 3 4 To adjust saw chain 8 7 3 5 Chain brake mechanical test 8 7 3 6 To test chain brake 8 8 FUEL AND LUBRICATION 9 8 1 Fuel 9 8 2 Mixing fuel 9 8 2 1 Fuel and lubrication sy...

Страница 2: ...0 1 Preventive maintenance 14 10 2 Winter maintenance 14 10 3 Air filter 15 10 4 Fuel filter Fig 17 15 10 5 Spark plug 15 11 CLEANING AND MAINTENANCE 16 11 1 Sprocket tip lubrication 16 11 2 Guide bar...

Страница 3: ...icantly reduce kickback or the intensity of kickback due to specially designed depth gauges and guard links CHAIN BRAKE is a safety feature designed to reduce the possibility of injury due to kickback...

Страница 4: ...on the machine the following symbols are used Wearing of protection against noise advised Wearing eye protection is advised Always wear gloves Wear a mask In dusty conditions Denotes risk of personal...

Страница 5: ...ne is running USE THE RIGHT TOOL Cut wood only Do not use the chain saw for purposes for which it was not intended For example do not use the chain saw for cutting plastic masonry or non building mate...

Страница 6: ...ion which could be hit while you are operating the saw Cut at high engine speeds Do not overreach or cut above shoulder height Follow manufacturer s sharpening and maintenance instructions for the saw...

Страница 7: ...s wear heavy duty gloves when handling saw chain or making saw chain adjustments Spread chain out in a loop with cutting edges 1 pointing clockwise fig 4a Slip the chain around the sprocket B behind t...

Страница 8: ...f saw chain is too loose or too tight the sprocket bar chain and crankshaft bearings will wear more rapidly Study fig 6 for information concerning correct cold tension A correct warm tension B and as...

Страница 9: ...the gasoline to allow incoming gasoline to mix with oil Shake container to ensure thorough mix Warning Lack of lubrication voids engine warranty Gasoline and oil must be mixed at 40 1 8 2 1 Fuel and...

Страница 10: ...otor engages Fig 9k Slightly press down on the throttle Fig 9l Release the chain brake Fig 9m 9 4 When engine is saturated with fuel Remove the air filter Remove the spark plug Position the machine in...

Страница 11: ...POWEG2010 EN Copyright 2021 VARO P a g e 11 www varo com Chain should stop abruptly When it does immediately release the throttle trigger...

Страница 12: ...increases so does the oil flow to the bar pad Do not adjust the chain lubrication system unless the motor has been turned off The chain lubrication system has been preset to medium oil flow at the fac...

Страница 13: ...bystanders have entered the range of the falling tree before you push it over Warning before making the final cut always recheck the area for bystanders animals or obstacles Felling cut Use wooden or...

Страница 14: ...arm as straight as possible Keep weight on both feet Caution while the saw is cutting be sure the chain and bar are being properly lubricated 10 MAINTENANCE INSTRUCTIONS All chain saw service other th...

Страница 15: ...nce of burning hands or fingers 10 4 Fuel filter Fig 17 Remove the fuel tank cap Bend a piece of soft wire to from a hook at the end Reach into fuel tank opening and hook fuel line Carefully pull the...

Страница 16: ...he lube gun is equipped with a needle nose tip which is necessary for the efficient application of grease to the sprocket tip To lubricate sprocket tip Warning wear heavy duty work gloves when handlin...

Страница 17: ...eth must be similarly long Different length of the teeth can cause rough run of the chain or its rupture as well Minimum length of the teeth must be 4mm If they are shorter remove the saw chain Angles...

Страница 18: ...ment after as few as 5 cuts This is normal during the break in period and the interval between future adjustments will begin to lengthen quickly Warning never have more than 3 links removed from a loo...

Страница 19: ...ry place and away from possible sources of ignition such as a furnace gas hot water heater gas dryer etc Removing a unit from storage Remove spark plug Pull starter rope briskly to clear excess oil fr...

Страница 20: ...tre for Powerplus tools You can always obtain more information at the number 00 32 3 292 92 90 Any transportation costs shall always be borne by the customer unless agreed otherwise in writing At the...

Страница 21: ...rmonized standards Any unauthorized modification of the apparatus voids this declaration European Directives including if applicable their amendments up to the date of signature 2006 42 EC 2014 30 EU...

Отзывы: