background image


POWDPG7545 

EN


Copyright © 2017 VARO 

P a g e

 | 

9


www.varo.com 

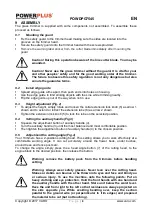
Warning: Before starting work, make sure that the wire is long enough. Do 
not start work before the engine running at full speed.  

10 OPERATION 

If  the  line  is  too  long  when  you  use  the  equipment  for  the  first  time,  the 
surplus end of it will be cut by the blade on the guard hood. 

Your grass trimmer will work at its best if you observe the following instructions: 


Never use the grass trimmer without its safety devices. 


Do not cut grass when it is wet. The best results are had on dry grass. 


Do not move the grass trimmer against the grass until the switch is pressed, i.e. wait until 
the trimmer is running. 


For the correct cutting action, swing the grass trimmer to the side as you walk forward, 
holding it at an angle of approx. 30° as you do so. 


Make several passes to cut long grass shorter step by step from the top. 


Use the edge guide and the guard hood to prevent unnecessary wear on the line. 


Keep the grass trimmer away from hard objects in order to avoid unnecessary line wear. 

10.1 

Switching on and off (Fig. 5) 


Press the lock-off button (1) and squeeze the ON/OFF switch (2) to start the trimmer. 


To switch the appliance off, release the on/off switch. 

CAUTION! After switching off, the nylon line will continue to rotate for a few 
more seconds.  

10.2 

Replacement of the spool and line 


Press the sides of the spool cover and remove the cover 


Remove the empty line spool. 


Thread the ends of the line on the new line spool through the eyelets in the spool 
receptacle. 


Fit the spool cover back in the spool holder. 


When you start the equipment again the line will be cut to the perfect length automatically. 

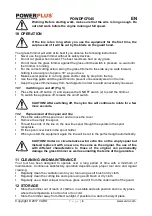
CAUTION! Under no circumstances wind extra line on the empty spool but 
instead replace it with a new one, the same as the original. The use of line 
with  different  characteristics  to  those  of  the  original  can  permanently 
damage the grass trimmer as well as annulling the terms of the guarantee. 

11 CLEANING AND MAINTENANCE 

Your  tool  has  been  designed  to  operate  over  a  long  period  of  time  with  a  minimum  of 
maintenance.  Continuous  satisfactory  operation  depends  upon  proper  tool  care  and  regular 
cleaning. 


Regularly clean the ventilation slot in your tool using a soft brush or dry cloth. 


Regularly clean the cutting line and spool using a soft brush or dry cloth. 


Regularly use a blunt scraper to remove grass and dirt from the underneath of the guard. 

12 STORAGE 


Store the trimmer out of reach of children, in a stable and safe position and in a dry place 
where the temperature is not too hot or too cold. 


Store the trimmer away from direct sunlight, if possible in a dark or barely lit place. 

Содержание PowerPlus POWDPG7545

Страница 1: ...ETY INSTRUCTIONS FOR BATTERIES AND CHARGERS 6 7 1 Batteries 6 7 2 Chargers 7 8 CHARGING AND INSERTION OR REMOVAL OF BATTERY 7 8 1 Charger indications 7 8 2 Removal insertion of battery 7 8 3 Battery c...

Страница 2: ...POWDPG7545 EN Copyright 2017 VARO P a g e 2 www varo com 13 TECHNICAL DATA 10 14 NOISE 10 15 WARRANTY 10 16 ENVIRONMENT 11 17 DECLARATION OF CONFORMITY 12...

Страница 3: ...attery pack NOT INCLUDED 16 Battery pack release button 17 Charger NOT INCLUDED 18 Battery capacity indicator 19 Button for battery capacity indicator 3 PACKAGE CONTENT LIST Remove all packaging mater...

Страница 4: ...areas invite accidents Do not operate power tools in explosive atmospheres such as in the presence of flammable liquids gases or dust Power tools create sparks which may ignite the dust or fumes Keep...

Страница 5: ...re Do not force the power tool Use the correct power tool for your application The correct power tool will do the job better and safer at the rate for which it was designed Do not use the power tool i...

Страница 6: ...IONAL SAFETY INSTRUCTIONS FOR BATTERIES AND CHARGERS Use only batteries and chargers applicable for this machine 7 1 Batteries Never attempt to open for any reason Do not store in locations where the...

Страница 7: ...the battery pack to cool completely before using it 4 Store the charger and battery pack indoors out of reach of children NOTE If battery is hot after continuous use in the tool allow it to cool down...

Страница 8: ...hten the extension lock knob 5 to lock the tube on the selected position 9 4 Setting the auxiliary handle Fig 3 Squeeze the adjustment button of auxiliary handle 4 Turn the auxiliary handle 3 until th...

Страница 9: ...tching off the nylon line will continue to rotate for a few more seconds 10 2 Replacement of the spool and line Press the sides of the spool cover and remove the cover Remove the empty line spool Thre...

Страница 10: ...defects resulting from maltreatment accidents or alterations nor the cost of transportation Damage and or defects resulting from inappropriate use also do not fall under the warranty provisions We als...

Страница 11: ...our dealer in an acceptably clean state in its original blow moulded case if applicable to the unit accompanied by proof of purchase Your tool must be charged at least 1x per month to ensure optimal o...

Страница 12: ...Any unauthorized modification of the apparatus voids this declaration European Directives including if applicable their amendments up to the date of signature 2011 65 EU 2006 42 EC 2014 30 EC 2000 14...

Отзывы: