Liquid Level Indicator
24
Installation and Operations Manual
Reassembly
1. Reinstall the covers, gaskets, and bolts on the elbows.
2. Close the tank manholes and inspection covers.
Cone Roof Tank (Bolted Installation)
Note
Be sure to read General Preparation at the beginning of this section before pro
-
ceeding with this installation.
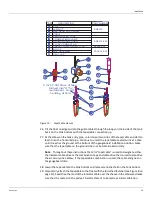
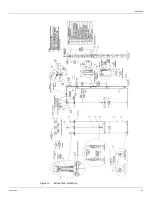
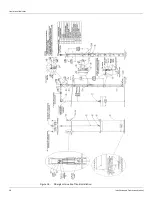
Refer to Table 2 on page 4. See Figure 15 on page 31.
1. Determine the position on the tank roof, beneath which the center of the float will rise and
fall. Notice that this position is located a minimum of 16 inches [406 mm] and a maximum
of 36.00 inches [914 mm] from the wall of the tank.
2. Provide the roof holes shown in the figure, centered on this position. The float diameter is
14.50 inches [368 mm]. The guide cable holes are centered 8.50 inches [216 mm], each
side of the center of the float. The tape pipe is centered on a 17.00 inch [432 mm] diame
-
ter.
3. Check the angle of the roof. The roof pitch for the furnished gaugeboard is 1 inch [25.4
mm] in 12 inches [305 mm].
4. Connect a pipe deck flange to the 1.5-inch vertical pipe that is to be attached to the roof.
5. Bolt the flange to the roof. Check that it is plumb.
Note
Failure to place the flange coupling and pipe in a true vertical position may affect
the accuracy of the indicator. Make sure that the interior of all pipes are clean and free of
corrosion.
6. After the deck flange and pipe are checked to make certain that they are plumb, unscrew
the pipe from the coupling. Apply pipe thread compound and reconnect the pipe to the
coupling.
7. Center the base of a top cable anchor in its hole. Hold it plum and bolt it to the roof. Do
the same for the other top cable anchor.
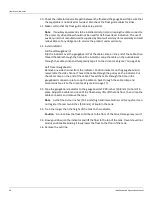
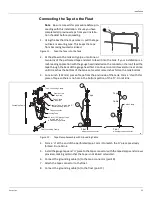
8. Remove the housing nipple and cap from the top cable anchors and hang plumb lines from
them at the center to mark the position where the bottom cable anchor will be attached.
A hanging weight anchor may be ordered from Varec if it is not practical to bolt or weld
the bottom guide cable anchor to the floor of the tank. For tanks that are in service, the
hanging anchor must be used.
9. Mark the plumb bob string at the height of the tank bench mark. This will assure that the
plumb bob just touches the bottom when the reference is made from the bench mark dis
-
tance to the bottom.
10. Hang a plumb line through the center of the top tape/cable pipe to the bottom to mark
the float center. This should be 8.50 inches [216 mm] at the bottom from each of the bot
-
tom cable anchor positions. When the positioning has been checked, attach the bottom
cable anchor into place.
Содержание 6700
Страница 2: ......
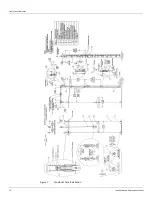
Страница 24: ...Liquid Level Indicator 16 Installation and Operations Manual Figure 7 Cone Roof Tank Installation 12 50 318...
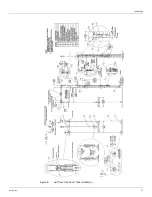
Страница 25: ...Installation Varec Inc 17 Figure 8 Half Travel Cone Roof Tank Installation 16 50 419...
Страница 31: ...Installation Varec Inc 23 Initial Lubrication Apply a light oil to the elbow and indicator sheaves...
Страница 37: ...Installation Varec Inc 29 Initial Lubrication Apply a light oil to the elbow and indicator sheaves...
Страница 39: ...Installation Varec Inc 31 Figure 15 Bolted Tank Installation 16 50 419...
Страница 51: ...Installation Varec Inc 43 Figure 20 Severe Service Cone Roof Tank Installation 12 50 318...
Страница 70: ...Liquid Level Indicator 62 Installation and Operations Manual...
Страница 73: ......

