Liquid Level Indicator
34
Installation and Operations Manual
Connecting the Tape to the Float
Note
Be sure to read this procedure before pro
-
ceeding with this installation. Ensure you have
completed all previous steps from your installa
-
tion checklist before proceeding.
1. Using the box that the tape came in, pull the tape
out like a measuring tape. This keeps the tape
from becoming twisted or kinked.
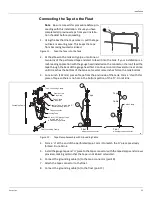
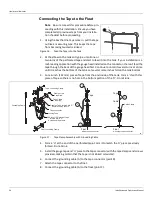
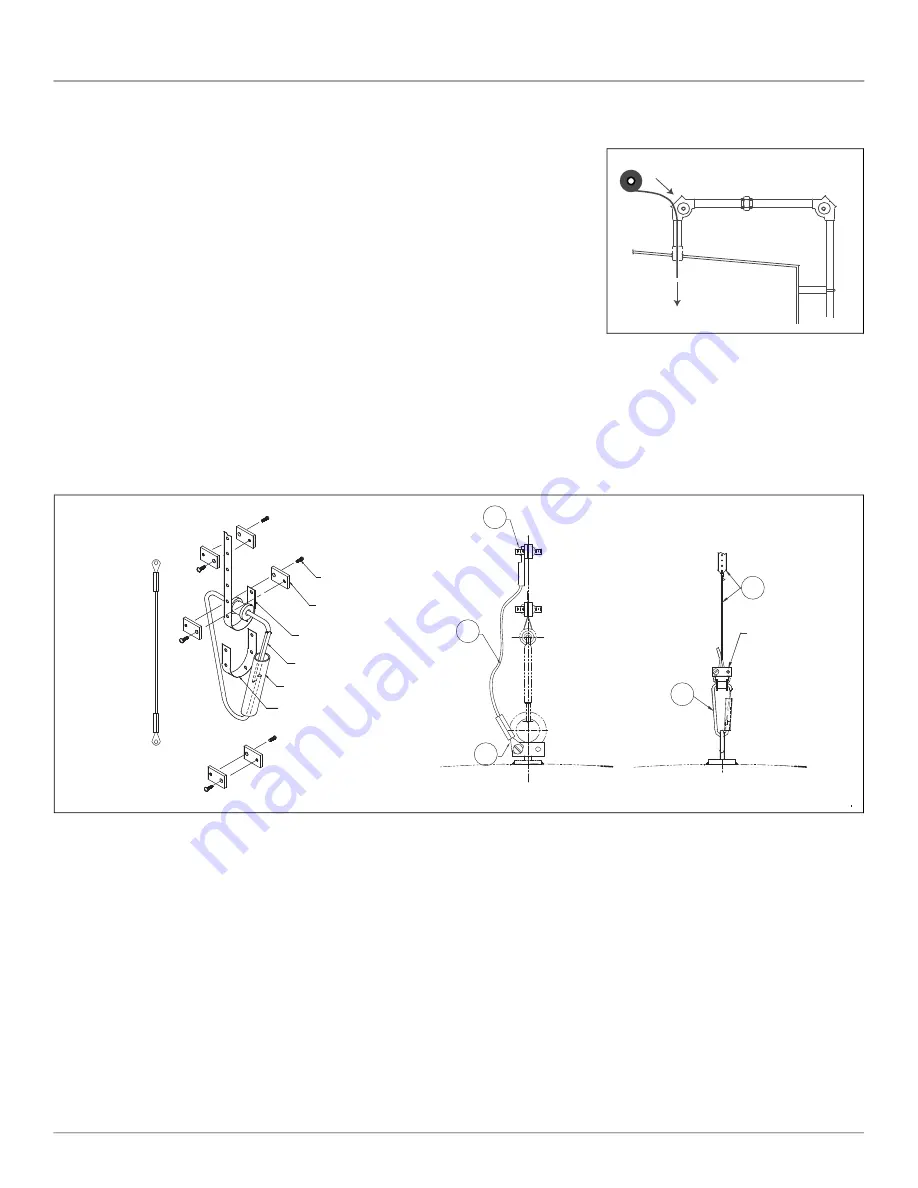
Figure 16:
Feed the Tape into the Tank
2. At the elbow on the tank entry pipe, unroll one or
two turns of the perforated tape and start to feed it into the tank. If your installation is a
roof-reading application with the gauge head installed on the conduit on the roof, feed the
tape through the back of the gauge head first. Continue to unroll it several turns at a time
until it reaches the bottom of the tank. Let several more inches fall on the tank bottom.
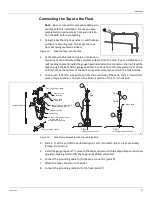
3. Cut a 6-inch (152 mm) piece of tape from the end inside of the tank. Form a 'U' with this
piece of tape so there is no hole in the bottom portion of the 'U'. Do not kink.
Figure 17:
Tape Clamp Assembly with Grounding Cable
4. Form a 'U' at the end of the perforated tape. Form it to match the 'U' piece previously
formed. Do not kink.
5. Install the gauge tape and 'U' piece to the tape connector with the tape clamps and screws
provided, making certain that the tape is not kinked or twisted.
6. Connect the grounding cable (A) to the tape connector (point B).
7. Attach the tape connector to the float.
8. Connect the grounding cable (A) to the float (point C).
1
2
Float
Tape
Tape connector
Locking Tube
Clamp screw
2 required
Tape Clamp
2 required
Gauging Tape formed into "U"
Avoid bending at hole
6.00 Inch [155] piece of tape
formed into a "U"
Avoid bending at hole.
Grounding Cable
Float Grounding Clamp
3
Float
Tape
Cable
with ground connector
without ground connector
Cable Clamp
Tape Grounding Clamp
B
A
C
4
Содержание 6700
Страница 2: ......
Страница 24: ...Liquid Level Indicator 16 Installation and Operations Manual Figure 7 Cone Roof Tank Installation 12 50 318...
Страница 25: ...Installation Varec Inc 17 Figure 8 Half Travel Cone Roof Tank Installation 16 50 419...
Страница 31: ...Installation Varec Inc 23 Initial Lubrication Apply a light oil to the elbow and indicator sheaves...
Страница 37: ...Installation Varec Inc 29 Initial Lubrication Apply a light oil to the elbow and indicator sheaves...
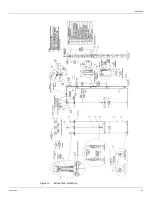
Страница 39: ...Installation Varec Inc 31 Figure 15 Bolted Tank Installation 16 50 419...
Страница 51: ...Installation Varec Inc 43 Figure 20 Severe Service Cone Roof Tank Installation 12 50 318...
Страница 70: ...Liquid Level Indicator 62 Installation and Operations Manual...
Страница 73: ......

