V A R C O P R U D E N B U I L D I N G S
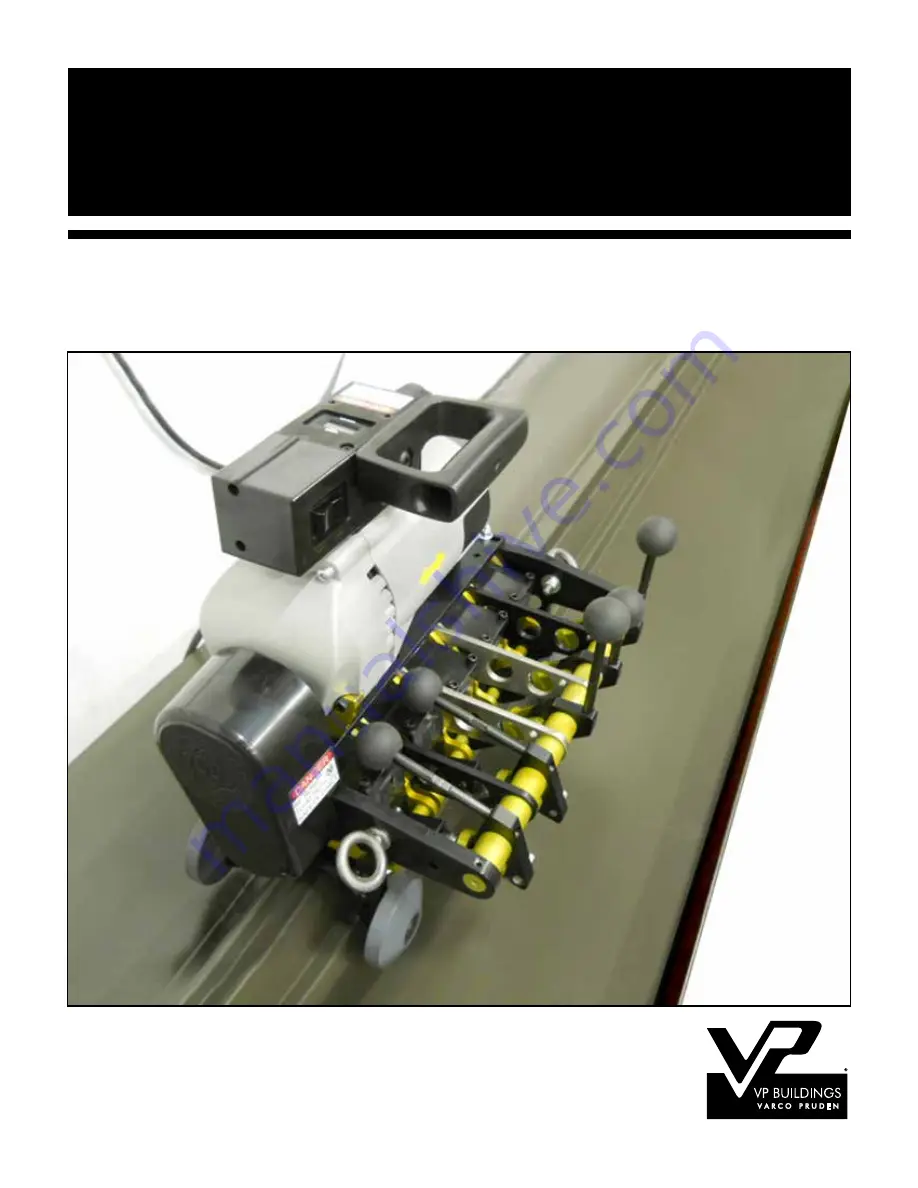
VP-16 Seamer Tool Manual
The field guide for proper use of the Model VP-16 SSR Seamer Tool.
Страница 1: ...V A R C O P R U D E N B U I L D I N G S VP 16 Seamer Tool Manual The field guide for proper use of the Model VP 16 SSR Seamer Tool...
Страница 2: ......
Страница 3: ...performing any service on the seamer tool Check and maintain all electrical cords and connections Power source and electrical cords should have a 3 wire grounding system Discontinue seaming operation...
Страница 4: ...________________________________________________________________________________ Page 4 Bi Directional Seamer Tool Manual VP Buildings 4037...
Страница 5: ...leshooting 14 15 7 Seaming Information 16 8 Hand Crimping Information 17 B Hand Crimping Tool Model No VP 43600 Item Page 1 VP SSR Hand Crimping Tool 18 2 Uses of Hand Crimping Tool 19 3 Step 1 Positi...
Страница 6: ...t Components 1 Bi directional SSR Seamer Tool 2 This Field Manual 3 One 1 Finish Seam Gauge 4 Shipping Box Do Not Discard Save for Storage Shipping ____________________________________________________...
Страница 7: ...feet 12192mm per minute 5 Power required 20 Amp breaker minimum 6 Control on off switch forward single speed 7 Tool is equipped with 5 sets of forming rolls 8 For correct seam only leading 3 sets sho...
Страница 8: ...econd Set Rolls 2 5 Fig 2 Force the two parts of the seam together and begin the finishing process 2 roll fiber roller c Third set Rolls 3 6 Fig 3 Finish the seaming process by compressing the seam FI...
Страница 9: ...urce if seamer tool slows down or voltage appears to drop A There are three 3 possible reasons 1 A lower rate cord than required is being used 2 The power source is too far from seaming area 3 Make su...
Страница 10: ...rolls and electrical connections Repair replace as required 5 Lubricate drive chain which is enclosed under rear chain cover Loosen and remove one 1 set screw from cover Apply one 1 shot of grease to...
Страница 11: ...d crimp at least eighteen inches 18 457mm to allow the first two 2 sets of forming rolls to engage See Hand Crimping Information 2 Position seamer on the beginning edge of the SSR Panel so that the fi...
Страница 12: ...oper seaming operation 5 After seam is checked and proper operation is verified continue to seam remainder of panel inspecting seam continuously Seamer should travel approximately 40 feet 12192mm per...
Страница 13: ...use extreme caution and stop seamer while rear wheels remain on panel Roll machine back to a safe working area Note The SSR Seamer Tool is designed to operate in both directions See caution and safet...
Страница 14: ...and crimping 12 inches 305mm Then place the seamer on that area 1 The alignment of the forming rolls is important See fig 1 2 3 for proper placement 6 Field Maintenance Troubleshooting FIG 1 FIG 2 FIG...
Страница 15: ...rming rolls and the SSR panel seams Panel Module Must Be Maintained REF Fig 1 2 3 24 PANEL MODULE 610mm 2 3 8 60mm 2 3 8 60mm 1 7 8 48mm 3 76mm 1 1 8 29mm 3 610mm 4 3 4 121mm HOLD WIDTH SPREAD HEIGHT...
Страница 16: ...is an SSR Finish Seam Gauge This gauge is to be used to check the finished SSR seam for proper compression and proper seam configuration 0 45 Max Center of 11 4 mm SSR Clip A Acceptable Seam B Accepta...
Страница 17: ...crimping at Start of Seaming Operation 1 Crimping the female lip seam into position A Hand crimping at endlap ensure proper engagement of seam for the continuing seaming operation 1 Crimping the femal...
Страница 18: ...1 VP SSR Hand Crimping Tool Model No VP 43600 ________________________________________________________________________________ Page 18 Bi Directional Seamer Tool Manual VP Buildings 4037...
Страница 19: ...R for Complete Tightness as shown in STEP 3 page 19 5 Other uses of Hand Crimping Tool SSR Seam ends at upper and lower seams at roof curbs SSR Seam ends at upper and lower seams at roof stacks SSR Se...
Страница 20: ...l on SSR rib over female leading edge female edge will fit into notch on left hand side right hand side will fit flush on back side of vertical leg ____________________________________________________...
Страница 21: ...imp female leading edge until edge is turned up into male location Crimping of female leading edge may require more than one crimping action ___________________________________________________________...
Страница 22: ...round so the flat side right hand side is against the open seam then finish crimping More than one crimping action may be required for an acceptable seam in order to close seam 0 45 Max 11mm _________...
Страница 23: ......
Страница 24: ...uring and is not cause for rejection For field installation questions call your local VP Service Center The job number is included on all building plans Arkansas 870 534 6030 California 209 667 4951 M...