


RD 300-450 F
Ver.1.3 07/06/01
65
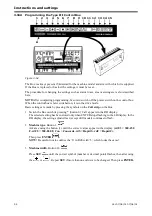
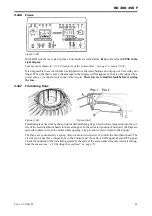
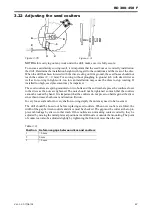
3.18 Adjusting the following harrow
Fit the following harrow, see ”2.14 Fitting the following harrow” on page 22
1 Select a suitable operating angle using the series of holes (B)
2 Check that the tines of the following harrow are centred midway between the wheels and in the
centre of the wheel tracks respectively. When the tines of the following harrow run between
the rows in this way, a lot of effect can be used on the harrow without the seed being disturbed.
This allows an evaporation layer to be harrowed up during sowing. The working pressure
on the following harrow can be adjusted to the required level by turning screw (A). Do not
over-extend this screw to the end of the spring as this will limit movement and ground clearan-
ce . The following harrow should be adjusted so that it remains in working position when tur-
ning with the drill in Low lift at headlands. This eradicates the tracks left by the drill during
turning.
Do not reverse without raising the drill fully so that the following harrow has
sufficient ground clearance.
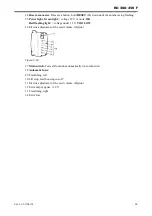
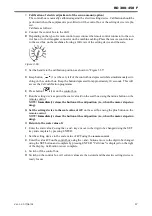
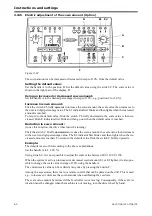
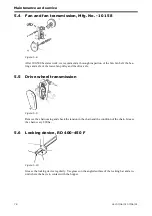
3.19 Adjusting Low lift height
Figure 3.66
Low lift height can be adjusted by moving the reed switch up or down in its holder using the wing
bolt (A) which is tightened using the wing nut (B).
NOTE!
This setting must be exact. The Low lift height must not be set either too high or too low.
Too high a setting reduces the pressure on the following harrow in the headlands (unless this is
required). Too low a setting means that tool bars and discs do not have sufficient ground clearance
when raised. Too low a setting can also cause malfunction of Autostep in the Control Box. See
”6.2 Troubleshooting list” on page 91.
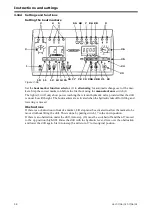
Figure 3.64
Figure 3.65
Содержание RAPID RD F Series
Страница 1: ...Ver 1 3 07 06 01 900107 en Instructions Seed drill RAPID series RD 300 450 F No 10 026 11 999...
Страница 2: ...2 Ver 1 3 07 06 01...
Страница 6: ...6 Ver 1 3 07 06 01...
Страница 16: ...Assembly instructions 16 Ver 07 06 01 07 06 01...
Страница 23: ...RD 300 450 F Ver 1 3 07 06 01 23...
Страница 41: ...RD 300 450 F Ver 1 3 07 06 01 41...
Страница 47: ...RD 300 450 F Ver 1 3 07 06 01 47...
Страница 108: ...Appendices 108 Ver 07 06 01 07 06 01 7 4 Electrical diagram Figure 7 8 307335...


