


Prepare for a successful installation:
n
Be sure you can identify all cables correctly.
n
Check Cat-5 cables for continuity.
n
Ensure that the video resolution rotary switch and the DIP switches (if any) are set appropriately.
n
Talk to the network administrator.
If installing the camera in a non-DHCP network (one that does not
automatically assign IP addresses), you may need to configure the camera with a static IP address as
directed by the network administrator before connecting it to the network. Work with the network
administrator to determine how to configure the equipment.
Installing the Wall Mount
The camera is shipped with a Thin Profile Wall Mount. Other mounting options are available as well.
Contact us if you don't have the camera mount you need.
If you are installing a OneLINK camera extension system with the camera, attach the EZIM (the smaller
unit) to the camera mount and route the camera cables through the opening before you install the mount.
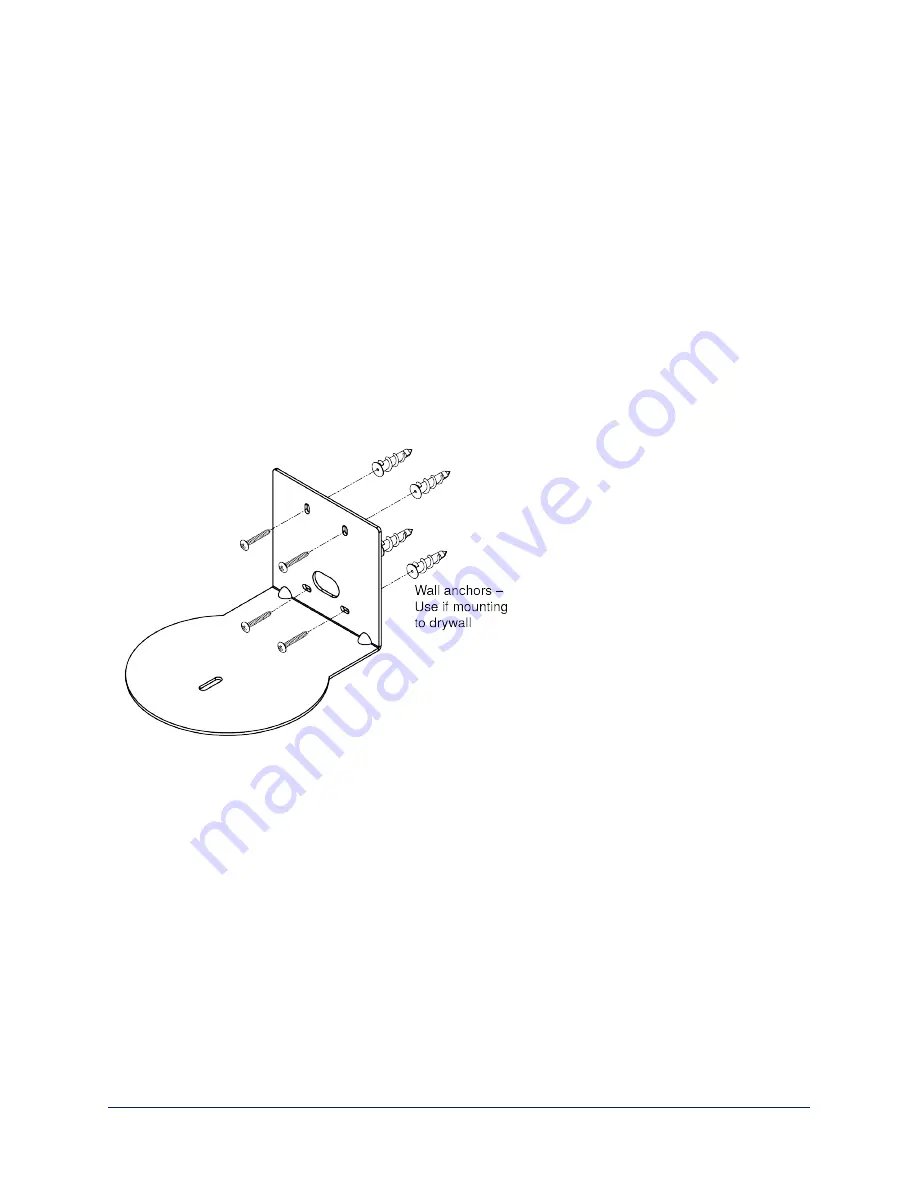
You can install the camera wall mount to a 2-gang wall box or directly to the drywall.
n
If you mount it to drywall, use the wall anchors provided with the wall mount.
n
If you mount it to a wall box, use the cover plate screws supplied with the wall box.
About Ceiling-Mounted Cameras
If you use an inverted mount, set the camera's Image Flip DIP switch ON for inverted operation. For
RoboSHOT Elite series cameras, this switch is available to the administrator on the System page of the
web interface.
Note
If mounting this camera using the Half-Recessed Ceiling Mount, you will need to power the mount's IR
receiver separately to use the IR remote with the camera. Use Power Extension Module 999-1005-021.
This camera does not supply power to the mount's IR receiver.
9
Complete Manual for RoboSHOT HD-SDI and SDI Professional A/V Presentation Cameras


