page 38 of 152
Use a suitable valve (see “Accessories / Spare
parts”, pg. 93) to isolate the pump from the
vacuum application. This is to allow the pump
to warm up before pumping condensable va-
pors and to clean the pump after use before it
is switched off.
NOTICE
+
Particles and dust must not be aspirated. If necessary,
you must install appropriate filters. You must ensure
their suitability concerning gas flow, chemical resis
-
tance and resistance to clogging prior to use.
• A power failure may cause accidental ventilation of the
pump, especially if the gas ballast valve is open. If this
constitutes a potential source of danger, take appropri-
ate safety measures.
When assembling, ensure
vacuum-tightness
. After as-
sembly, check the whole system for leaks.
NOTICE
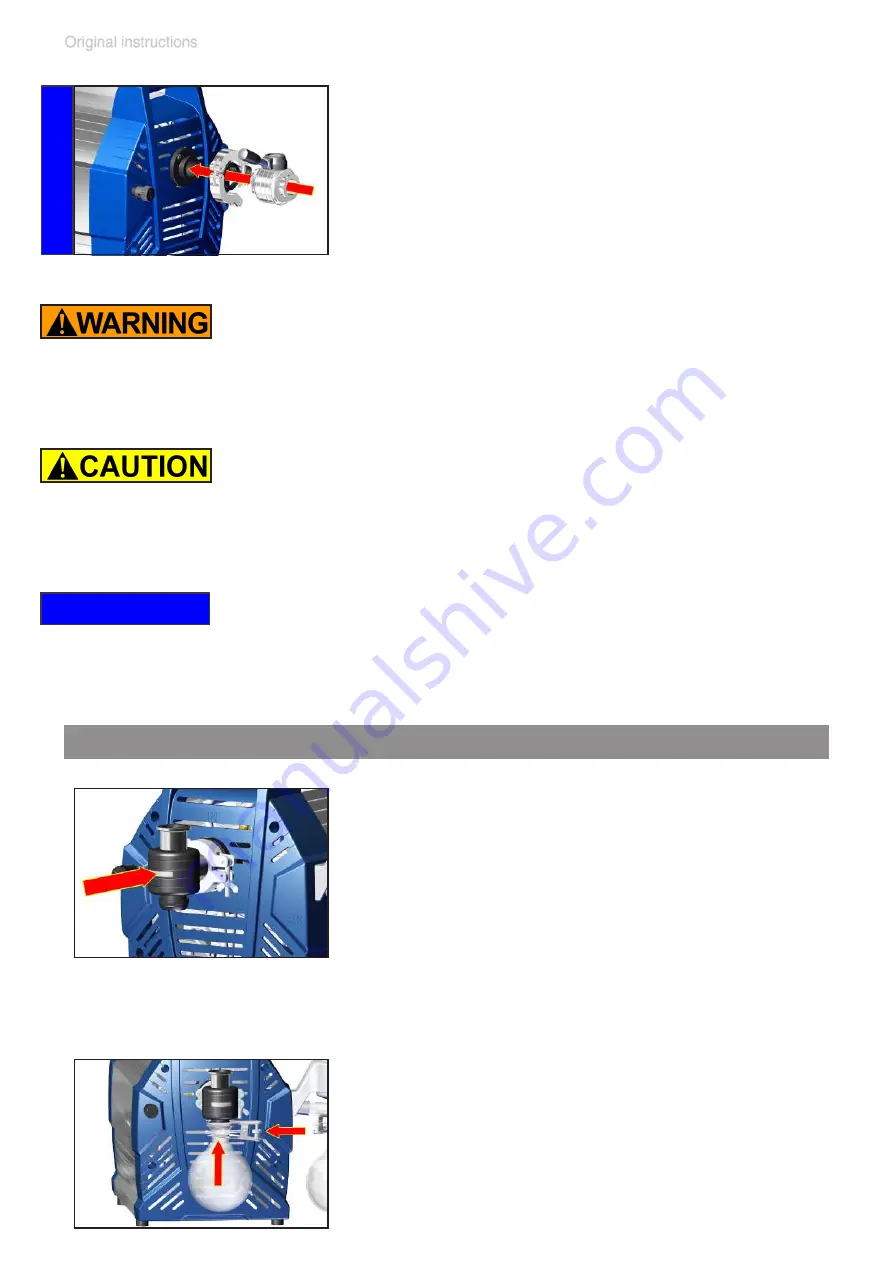
Separator (AK) at the inlet
The separator at the inlet protects against
droplets and particles from entering the pump.
+
Enhances lifetimes of diaphragms and
valves.
+
Improves vacuum performance in applica-
tions with condensable vapors.
➨
Assemble the separator (AK) with clamping
ring and centring ring KF DN 25.
Catchpot:
The catchpot is coated with a protective layer
to protect against shattering in case of break-
age or implosion.
➨
Assemble the catchpot at the inlet using a
joint clip.
Содержание MV 10C NT VARIO o.C.
Страница 34: ...page 34 of 152 1 8 2 9 18 PC 3012 NT VARIO EK Peltronic 12 11 16 8 17 3 4...
Страница 104: ...page 104 of 152 2 3 size 1 2x 4...
Страница 105: ...page 105 of 152 6 5 7 4 4x...
Страница 106: ...page 106 of 152 9 8 1 2 2 5 mm 2 5 mm 10 ME 16C NT VARIO MD 12C NT VARIO MV 10C NT VARIO...
Страница 107: ...page 107 of 152 11 9A 2 5 mm Emission condenser Peltronic Emission condenser Peltronic 4 2x 10A...
Страница 108: ...page 108 of 152 12 Emission condenser Peltronic 4 4x 11A 13 4 2x...
Страница 109: ...page 109 of 152 15 14 4 4x Don t loosen this screw 15A 16...
Страница 110: ...page 110 of 152 16 17 5 2x 15A 1 2 3 1 4 1 4 3 2x 5...
Страница 111: ...page 111 of 152 19 20 18 5 2x...
Страница 113: ...page 113 of 152 21 2 5 mm Replacing the diaphragms 22 23 696867 696839 Clean 5 8x...
Страница 114: ...page 114 of 152 24 25 26 1 2...
Страница 115: ...page 115 of 152 27 3 28 29 Pay attention to number of washers...
Страница 118: ...page 118 of 152 36 37 38 Clean...
Страница 119: ...page 119 of 152 39 40 41 IN IN EX EX 696867 696839 4x...
Страница 120: ...page 120 of 152 42 43 44 IN EX T20 4x 2 2 ft lbf 3 Nm...
Страница 121: ...page 121 of 152 45 46 47 Maintain all pump heads in the same way...
Страница 123: ...page 123 of 152 48D ME 16C NT VARIO MD 12C NT VARIO MV 10C NT VARIO PC 3016 NT VARIO PC 3012 NT VARIO PC 3010 NT VARIO...
Страница 125: ...page 125 of 152 2 size 2 2x 3 4A Version A valve 24 4 mm...
Страница 126: ...page 126 of 152 5A 696839 24 4 mm 26 mm 4B 5B 696839 37 mm 40 mm Version B valve 37 mm...
Страница 127: ...page 127 of 152 6 7 size 2 2x 7A ME 16C NT VARIO MD 12C NT VARIO MV 10C NT VARIO size 2 2x...
Страница 129: ...page 129 of 152 49 Assembling the pump housing 50 51 5 2x 8 9 ft lbf 12 Nm...
Страница 130: ...page 130 of 152 52 53 54 5 2x 8 9 ft lbf 12 Nm...
Страница 131: ...page 131 of 152 55 55A 1 2 3 3 2x 55A 56...
Страница 132: ...page 132 of 152 56 4 4x 3 7 ft lbf 5 Nm 58 4 4x 3 7 ft lbf 5 Nm 57 4 2x 3 7 ft lbf 5 Nm...
Страница 133: ...page 133 of 152 59 60 61...
Страница 134: ...page 134 of 152 Emission condenser Peltronic 59A 60A Emission condenser Peltronic 4 2x Emission condenser Peltronic 61A...
Страница 135: ...page 135 of 152 62 63 4 4x 3 7 ft lbf 5 Nm 64...
Страница 136: ...page 136 of 152 65 66 67 size 1 2x...
Страница 137: ...page 137 of 152 68 69...
Страница 140: ...page 140 of 152 4 638821 638821 5 6...
Страница 141: ...page 141 of 152 7 T20 4x size 1 4x 8...
Страница 149: ...page 149 of 152...
Страница 150: ...page 150 of 152...
Страница 151: ...page 151 of 152...


