


30
20901544_E12C+16C_NT Vsel_V1.2_260922
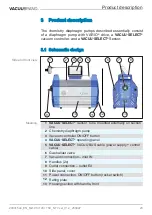
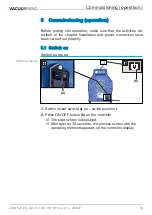
Installation and connection
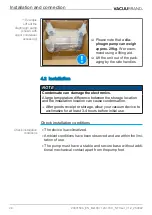
4.3
4.3 Controller base
Controller base
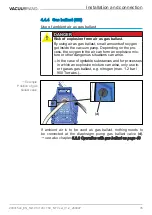
The base, controller, screw fittings and vacuum sensor are en
‑
closed separately. Before installation, the base can be mounted
on the pump and the controller clipped into place.
Alternatively, the controller can be clipped into a recess in the lab
furniture or used as a freestanding unit (unfold the stand).
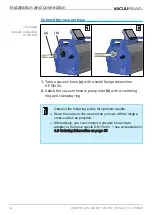
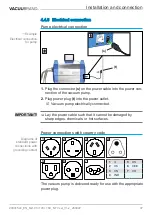
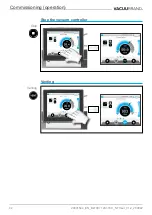
Mount the base
1
Top
Top
1
Top
Top
2
1.
Unscrew the screws; Phillips
screwdriver size 1.
2.
Position the base on the dia‑
phragm pump.
3
4
3.
Screw the base onto the dia‑
phragm pump.
4.
Clip the controller into the
base.
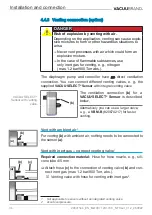
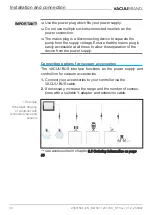
5
6
5.
Plug the VACUU·BUS cable
into the power connection on
the back of the controller.
6.
Also plug in the VACUU·BUS
cables from peripheral devices.
Use Y adapters (accessories) if
there are not enough connec
‑
tions.
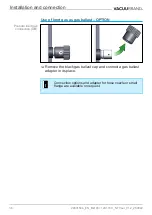
Mount the base to
the diaphragm pump
(option)
Содержание MD 12C NT VARIO o.C.
Страница 26: ...26 20901544_EN_Mx10C 12C 16C_NT Vsel_V1 2_260922 Product description...
Страница 46: ...46 20901544_EN_Mx10C 12C 16C_NT Vsel_V1 2_260922 Commissioning operation...
Страница 90: ...90 20901544_EN_Mx10C 12C 16C_NT Vsel_V1 2_260922...
Страница 91: ...91 20901544_EN_Mx10C 12C 16C_NT Vsel_V1 2_260922...


