5
www.
usautomatic
.com
5
Programming
Terms to Understand
Access Code
–
Is the 5 digit code entered on the keypad to operate the gate.
Option available is to create a code containing less than 5 numbers and use the # sign as the
last key in the code. Example code "5#" or "123
4
#" the # is part of the access code.
ACCESS CODE CAN NOT BE THE SAME AS THE MASTER PASSWORD.
Master Password
– The 5-digit code used to access programming features. Factory default
is “11111”. This should be changed for security reasons.
NOT USED TO OPEN GATE
-
CANNOT BE THE SAME AS THE
PUK or
ACCESS CODE.
Channel
1 – P1 (relay 1) is pre-wired to the
Push Button input.
Channel
2 – P2 (relay 2) is pre-wired to the “Open/Free Exit”
input.
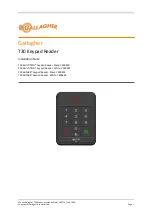
Keypad Security Code (Dip Switch Code)
– This code makes your keypad unique to your
installation. Keypad does not have dip switches like the transmitter; instead it has virtual dip
switches which m
ay
be programmed.
PUK Code
– “Password Unblocking Key.” The PUK code is located inside the keypad and is
needed when the master password has been lost.
Record PUK code: ____________
Quick beeps
– the keypad is sending a signal to the receiver. Valid access code was entered.
NOTE: Do not install keypad until
“Create Communication with Receiver
"
has been completed.
create Access code: code you use to operate the gate
•
Enter the current Master Password
•
Enter “9”.
If correct, 2 short beeps (if 1 long beep is heard, start over with first step)
•
Enter the new Access Code (up to 5 digits), if less than 5 digits, “#” is required.
•
Enter “9”
.
•
Enter the new Access Code again to verify.
•
Enter “1”, “2”, “3”, “4”
iden
t
ifying which keypad
channel
the Access Code is
Create Communication with Receiver
•
Enter the Access Code created above
•
Holding the last key of the code - keypad beeps while last key is depressed.
•
Press the P1 button on the receiver and hold until LD light comes ON.
Programming is complete
•
*For Open Only
or Hold Open
function program to P2 channel.
*For Hold Open function receiver P2 channel must be set to Latch Mode.
Latch mode - press the P2 button on receiver and hold once the LD light comes ON
immediately release and press the P1 button one time.
Example:
Access code created using a 1 in the last step could be programmed to P1 channel.
Access
code created with a 2 in the last step could be programmed to P2 channel.
If this was done
then both access codes would have to create communication with receiver in the steps below.
learned to
.
If correct, 2 short beeps (If 1 long beep, start over with
first step
).
Enter # to exit (long Beep) or wait for time-out (long Beep) or start again from
step 2 to add more access codes.


