z6 Setup Guide
Package Contents
The z6 package includes:
●
Power cable
●
Rack mounting hardware
●
z6 appliance
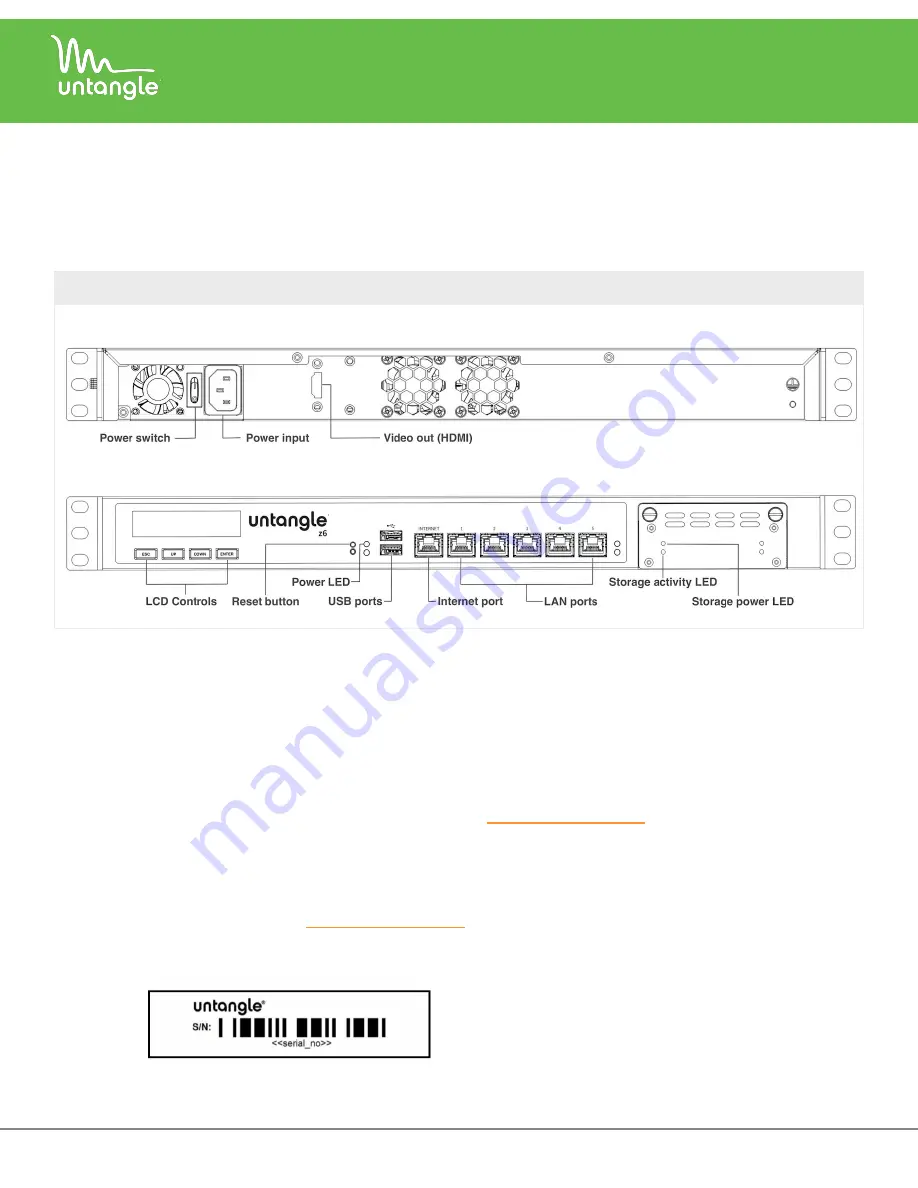
z6 rear and front panels
Rear Panel
Front Panel
Installation
1. Prepare the appliance for rack installation by fastening the bracket ears to the sides of the chassis using the provided hardware.
2. Mount the appliance to your rack enclosure using the provided hardware.
3. Connect an ethernet cable from your Internet modem or router to the Internet port.
4. Connect an ethernet cable from your LAN switch to LAN port 1.
5. Plug in the power cable to a power source and connect it to the power input on the rear panel.
6. Power on the system by toggling the power switch on the rear panel.
Connect to the appliance
You can connect to your appliance via the online
Command Center
portal at
. Alternatively, you can connect to your
appliance from the local network, or directly using a monitor, keyboard, and mouse.
Via Command Center
Provisioning a new hardware appliance via Command Center is a convenient way to deploy and configure NG Firewall. To set up and
manage your new appliance from Command Center follow these steps:
1. Navigate your web browser to
2. Log in with your Untangle Command Center account, or click
Create Account
to set up an account.
3. Navigate to the Appliances screen and click
Add
.
4. Enter the Untangle serial number located on the top right front of your appliance.
5. Click
Add
to confirm the new appliance.
| © Copyright 2019. Untangle, Inc. All rights reserved.
z6 Setup Guide - Page 1


