GB│IE
│
19
■
UAVK 180 A1
First use
NOTE
►
Make sure the
AUTO/OFF/REV
switch
!
is in the
OFF
position before
connecting the appliance to a power outlet.
►
As every appliance is tested for functionality after manufacture, it is possible
that you may find paper residue in the cutting blades.
►
This appliance is equipped with a safety switch
. The cutter attachment
must be placed fully on the waste collector
so that the cutter attach-
ment
clicks audibly into place. Otherwise, the appliance will not start!
♦
Remove all packaging materials from the appliance.
♦
Place the cutter attachment
onto the waste collector
using the integrat-
ed carrying handles
so that the mains cable protrudes to the rear.
♦
Insert the plug into a mains power socket.
Operation
Switching the appliance on
♦
Flip the lid
up.
♦
Slide the
AUTO/OFF/REV
switch
!
to the
AUTO
position for shredding.
The
power/bin full
LED
-
continuously lights up blue. The appliance is
now ready for use.
Inserting paper (manual feed)
CAUTION! PROPERTY DAMAGE!
►
Remove any paper clips larger than 25 mm. These could
damage the cutting blades!
Staples (sizes: 24/6 and 23/6 [11.5 x 6 mm], B-8 [11.5 x 7 mm],
No10 [8.4 x 5 mm]) and small paper clips (up to 25 mm) can be
left on the paper.
NOTE
►
You can shred up to 7 sheets (80 g/m2 paper) at the same time.
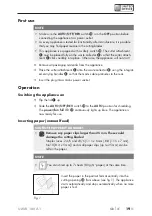
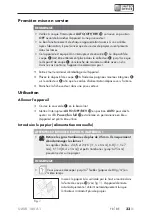
Fig. 1
Insert the paper in the portrait format centrally into the
cutting opening
.
from above (see fig. 1). The appliance
starts automatically and stops automatically when no more
paper is fed.
Содержание 320246 1901
Страница 3: ...A B...
Страница 17: ...14 DE AT CH UAVK 180 A1...
Страница 31: ...28 GB IE UAVK 180 A1...
Страница 45: ...42 FR BE UAVK 180 A1...
Страница 59: ...56 NL BE UAVK 180 A1...
Страница 73: ...70 PL UAVK 180 A1...
Страница 87: ...84 CZ UAVK 180 A1...
Страница 101: ...98 SK UAVK 180 A1...


