P O R T A L
Document Number:
PTL1028
Document Title:
Portal 3 Owners Manual
8.
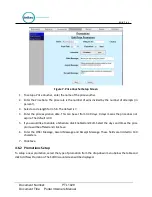
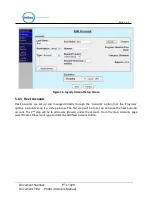
Enter the name of the account program. Chose whether or not to force a receipt with each
transaction.
9.
Select the product from the drop-down menu.
10.
Enter the Issue Price (or selling price) that will be reported when a new account is issued (or sold)
and then enter the Value for which the account can be redeemed. This field is not present on
Subscription accounts.
11.
If desired, enable and enter the recurring bill amount. This amount will show up on reports ONLY.
The entry unit WILL NOT automatically bill the customer, your credit processor wil.
12.
You may limit the use and only allow a certain amount of washes per day, week, month or year.
To do this, click Limit Use and enter the amount of washes and the time increment from the drop-
down menu.
13.
If you wish for the account to have an expiration date, click Enable, then enter the duration of the
account program.
NOTE:
This schedule runs in calendar months. The account will expire on the
last day of the month, not 30 days from the issue date.
14.
If you wish to limit usage of the account to certain days and hours, click Enable under the schedule
block and enter the valid times and days of the week.
15.
Click Save.
5.6
Accounts
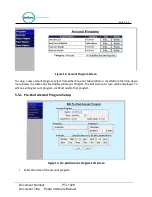
When the accounts option is selected, a list of current accountholders will be displayed along with search
functions to find a specific account. To view details of an account, click Edit next to the account. To setup a
new account, select the account type from Fleet, Pre-paid or Subscription from the drop-down menu
below the table. For new Pre-paid or Subscription accounts, you may select a Program from the additional
drop-down menu.
5.6.1
Prepaid and Subscription Accounts
For prepaid and subscription accounts, it’s recommended that you first set up an account program, then
select the program from the drop down list. Select add new account.

