background image

DEC21V1

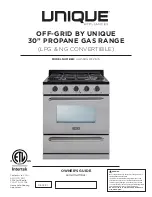
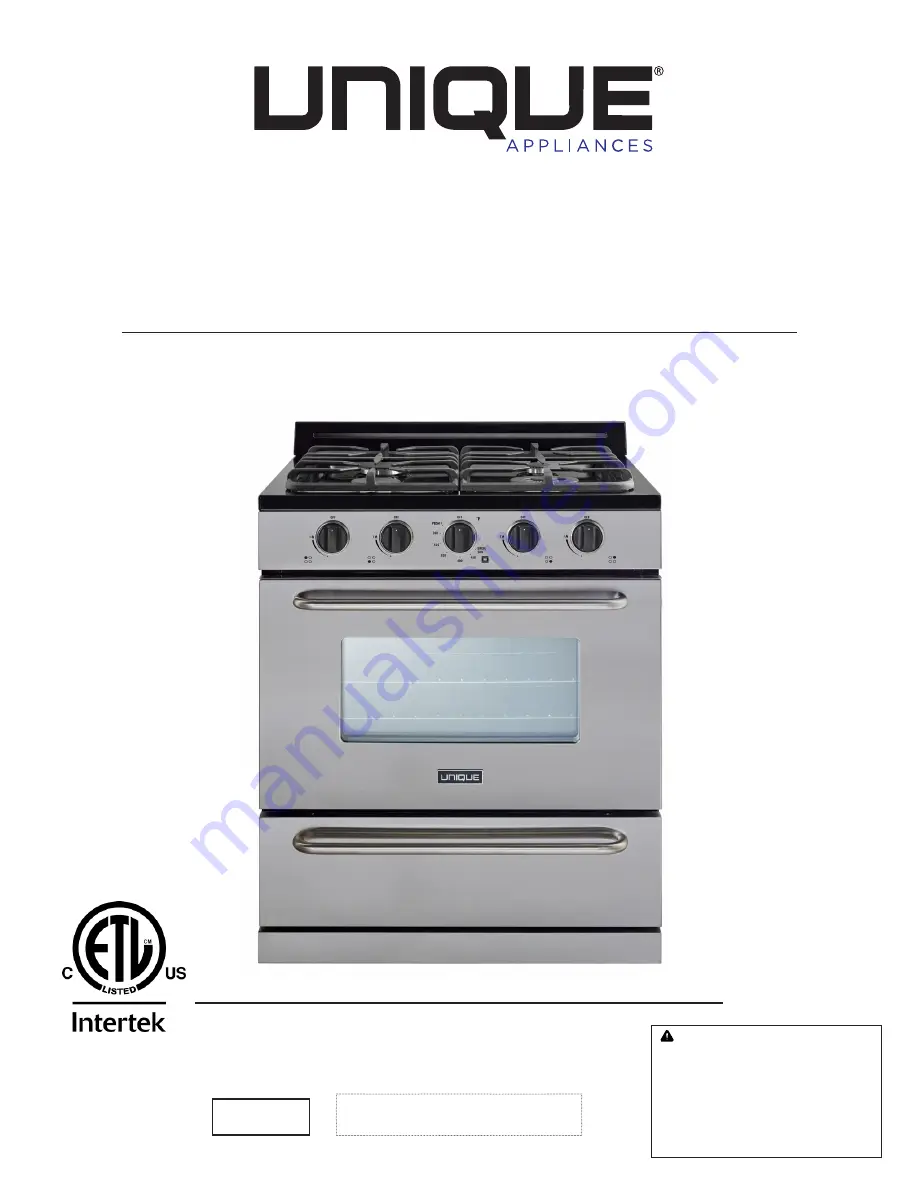
OWNER’S GUIDE

serial number:

OFF-GRID BY UNIQUE 

30” PROPANE GAS RANGE 

(LPG & NG CONVERTIBLE)

MODEL NUMBER:

 UGP-30G OF2 S/S,  

Never Operate the Top Surface Cooking Section of 
this Appliance Unattended

 Failure to follow this warning statement could 

result in fire, explosion, or burn hazard that could 
cause property damage, personal injury, or death.

 If a fire should occur, keep away from the appliance 

and immediately call your fire department.
DO NOT ATTEMPT TO EXTINGUISH AN OIL/GREASE 
FIRE WITH WATER.


WARNING:

Conforms to CSA/

ANSI STD Z21.1 

2018 Certified to 

CSA STD 1.1 2018 

Household Cooking 

Appliances.

Содержание UGP-30G

Страница 1: ...Failure to follow this warning statement could result in fire explosion or burn hazard that could cause property damage personal injury or death If a fire should occur keep away from the appliance and immediately call your fire department DO NOT ATTEMPT TO EXTINGUISH AN OIL GREASE FIRE WITH WATER WARNING Conforms to CSA ANSI STD Z21 1 2018 Certified to CSA STD 1 1 2018 Household Cooking Appliances...

Страница 2: ...ion Use and Care Important TO THE OWNER OF THE RANGE Retain this owner s manual for future reference TO THE INSTALLER Leave this owner s manual with the range Certain ranges come equipped with special features Determine from a study of your range which of the instructions given in this booklet pertain to your range This booklet gives valuable instructions covering the installation adjustment and u...

Страница 3: ...ach your gas supplier call the fire department Installation and service must be performed by a qualified installer service agency or the gas supplier WARNING To reduce the risk of tipping the appliance by abnormal usage or improper door loading the appliance must be secured by properly installing the Anti Tip device packed with the appliance To check if the device is installed and engaged properly...

Страница 4: ...ANIFOLD GAS PRESSURE 25 ADJUSTING THE TOP BURNER AND OVEN FLAME 26 OPERATION OF RANGE 28 ALIGNMENTS AND ADJUSTMENTS 31 BROILING 34 CLEANING THE RANGE 35 REMOVING THE OVEN DOOR FOR CLEANING 38 REMOVING THE KICKPLATE FOR CLEANING 39 HOW TO GAIN ACCESS TO THE BATTERY 39 TROUBLESHOOTING GUIDE 40 WIRING DIAGRAM 41 PARTS DIAGRAM AND LIST 42 WARRANTY 47 RATING LABEL 48 PRODUCT REGISTRATION 48 CONTACT US ...

Страница 5: ...d in this manual These instructions are not meant to cover every possible condition and situation that may occur Common sense and caution must be practiced when installing operating and maintaining the appliance Record in the space provided below the Model No and Serial No of this appliance These numbers are found on the serial plate located at the back of the range Model No ______________________...

Страница 6: ...refully read and follow all instructions WARNING The California Safe Drinking Water and Toxic Enforcement Act of 1986 Proposition 65 requires the Governor of California to publish a list of substances known to the State of California to cause cancer or reproductive harm In addition businesses must warn customers of potential exposure to such substances Users of this appliance are hereby warned tha...

Страница 7: ...RANGE THE RANGE MUST BE SECURED BY A PROPERLY INSTALLED ANTI TIP BRACKET PROVIDED WITH THE RANGE TO CHECK IF THE DEVICE IS INSTALLED AND ENGAGED PROPERLY CAREFULLY TIP THE RANGE FORWARD THE ANTI TIP DEVICE SHOULD ENGAGE AND PREVENT THE RANGE FROM TIPPING OVER REFER TO THE INSTALLATION INSTRUCTIONS PACKAGED WITH THE ANTI TIP BRACKET FOR PROPER ANTI TIP BRACKET INSTALLATION Never leave children alon...

Страница 8: ...EN BURNERS OR INTERIOR SURFACES OF THE OVEN Both surface burners and oven burners may be hot even though the flame is not visible Areas near surface burners may become hot enough to cause burns During and after use do not touch or let clothing or other flammable materials touch these areas until they have had sufficient time to cool Among these areas are the range surfaces facing the range the ove...

Страница 9: ...rd Refer to the cleaning section of this manual for more information on the use of aluminum foil Placement of oven racks Always place an oven rack in the desired location while the oven is cool If a rack must be moved when the oven is hot use potholders and grasp the rack with both hands to reposition Do not let potholders contact hot oven walls Remove all cookware from the rack before moving Do n...

Страница 10: ...asy deposits in the fan could catch fire Refer to the hood manufacturer s instructions for cleaning Do not use a cyclonic range hood with this product Some range hoods circulate air by blowing downward toward the range top then drawing the air back up into the hood This creates a cyclonic air wash that is designed for electric ranges only A cyclonic hood may cause the burners of a gas range to ope...

Страница 11: ...ther location Connectors must comply with ANSI Z21 24 It s good practice for each household to have an appropriate fire extinguisher for use in the event of a house fire NOTE The instructions appearing in this owner s guide are not meant to cover every possible condition and situation that may occur Common sense and caution must be practiced when operating and maintaining any appliance WARNING On ...

Страница 12: ...quipment through the ANSI Std Z21 1 The EPA reports that a maximum CO Carbon Monoxide level of 9 PPM over a 24 hour period is the residential interior ambient level standard A properly ventilated home will have a normal CO level of less than 5 PPM NON VENTED GAS COOKING APPLIANCES Non vented gas cooking appliances in a residential application are normally used for a short period of time The CO gen...

Страница 13: ...ittle water as possible to reduce cooking time Oven Cooking Preheat the oven only when a recipe tells you Put roasts and casseroles into a cold oven then turn on the oven Opening the oven door often to check on foods wastes energy Use the oven to prepare complete meals For instance start a roast add vegetables when the meat is half cooked and then warm rolls or dessert after the main dishes are co...

Страница 14: ...lly filled with water or a level on the oven rack Adjust the leveling legs until the range is level The top of the side panels should be level with the counter top WARNING A child or adult can tip the range and be killed Install the anti tip device to the structure and or the range Verify the anti tip device has been properly installed and engaged Engage the range to the anti tip device by ensurin...

Страница 15: ...ash to the rear part of the cooktop as shown in the diagram 2 Secure the backsplash to the cooktop from the back using the 2 Phillips head screws provided as shown in the diagram HOW TO INSTALL THE BACKSPLASH 23页 15页 15页 23页 ...

Страница 16: ...ould be held securely at the pressure regulator to prevent twisting Hold the pressure regulator with a wrench during the tightening of the connection or the manifold pipe may be twisted and split and cause a dangerous leak The installation of ranges designed for manufactured mobile home installation must conform with the Manufactured Construction and Safety Title 24 CFR Part 3280 formerly the Fede...

Страница 17: ...old connector when installing a new range Check for leaks using a leak detector or soapy water with a recommended ratio of 75 water 25 dish washing soap Installation It is the responsibility of the installer to make certain that the range is properly adjusted at the time of installation Situations caused by improper adjustments or improper installation are not covered under the warranty Any expens...

Страница 18: ...ped connection Never reuse an old connector when installing a new range If the hard piping method is used you must carefully align the pipe the range cannot be moved after the connection is made To prevent gas leaks use pipe joint compound resistant to LP or NG gases depending on set up on all male external pipe threads 1 In an easily accessible location install a service manual gas shut off valve...

Страница 19: ...ted at the back of the range ANY OPENINGS IN THE WALL BEHIND THE UNIT AND IN THE FLOOR UNDER THE UNIT MUST BE SEALED Note Due to potential hazards it is recommended that storage cabinets NOT be installed above the cooking surface IN THE EVENT OVERHEAD CABINETS ARE INSTALLED THE MAXIMUM DEPTH OF CABINETS INSTALLED ABOVE COOKING TOPS SHOULD BE 13 WALL CLEARANCES 30 CABINET CUT OUT ...

Страница 20: ...20 WALL CLEARANCES continued Anti Tip Bracket Location ...

Страница 21: ... by a qualified service agency in accordance with the manufacturer s instructions and all applicable codes and requirements of the authority having jurisdiction If the information in these instructions is not followed exactly a fire explosion or production of carbon monoxide may result in property damage personal injury or loss of life The qualified service agency is responsible for the proper ins...

Страница 22: ...the gas supply to the appliance prior to disconnecting the electrical power if applicable 2 Locate convertible regulator at the back of the range left side facing appliance Remove cap and pop out the pin that s attached 3 On the side you will see the pin position for use with LPG 4 Unscrew pin and flip it to the NG position long end outwards spring on inside 5 Below is an example of additional pos...

Страница 23: ...el and the lid 15 Next the oven orifice needs to be replaced 16 Remove all racks then the bottom pan by lifting up the back first to release the front then pull pan out 17 Locate the burner tube and locate the retaining screw at the front of the tube Once this screw has been removed lift up the burner and pull away slightly to the right to expose the oven orifice GAS RANGE CONVERSION continued FLA...

Страница 24: ...ommended ratio of 75 water 25 dish washing soap 21 Once you have completed the conversion check the operations of ignition making sure each of the 4 burners pilot flame and oven burner flame are functioning correctly Please refer to pages 21 through 24 GAS RANGE CONVERSION continued OVEN ORIFICE In the pilot assembly shown below the LPG orifice is 0 14 mm When doing the conversion from Propane to ...

Страница 25: ...ssure is 11 for LP propane gas or 4 for natural gas NOTE There is no adjustment for the pilot flame you must use the NG pilot orifice included in the conversion kit and this will ensure the pilot flame is the correct size see image NOTE Once the unit has been converted fill out the included sticker and place it on the back of the range beside the rating plate see image Once you have completed the ...

Страница 26: ...indling point the dark blue center cone and the outer mantel Cooktop Burner Operation The top burner flame size should be adjusted so that is does not extend beyond the edge of the cookware As a matter of safety it s recommended that you comply with these instructions A high flame on a surface burner is both inefficient and unsafe The flame should always be adjusted so that it is no larger than th...

Страница 27: ...service B or C is normal burner flames depending on the type of gas you use With LP gas some yellow tipping on outer cones is normal QUALITY OF FLAMES The combustion quality of burner flames needs to be confirmed visually A Yellow flames Call for service B Yellow tips on outer cones It is normal for LP gas C Soft blue flames It is normal for natural gas Incorrect flame lifting off the burner Good ...

Страница 28: ...dicates the position of the burner you re igniting 3 To light a burner press the burner knob in and turn counter clockwise to high flame ignition position You will hear the electronic ignition clicking as you continue to hold the knob down until the flame lights 4 After lighting the flame turn the control knob to adjust the flame size as required OPERATION OF RANGE OFF OFF HIGH FLAME IGNITION BURN...

Страница 29: ... has not been used in several days it may take multiple attempts to successfully light If the ignitor pilot will not stay lit after 5 attempts contact an authorized service technician If the oven pilot does not ignite and maintain the flame check the following 1 The pilot burner has gone out Relight the oven pilot 2 The thermocouple may not be properly located Locate the thermocouple into the flam...

Страница 30: ...s may happen in areas with high humidity or if food having high water content is cooked This moisture can be driven out of the ignitor by lighting the pilot and operating the oven for a few minutes NEVER LEAVE THE CONTROL KNOBS IN ANY POSITION OTHER THAN OFF IF THE IGNITORS OR BURNERS AREN T WORKING PROPERLY With the oven control OFF open the broiler door and position yourself so you can see the o...

Страница 31: ...ease size of air shutter opening The air shutter should be set approximately 2 3 open for natural gas and approximately full open on LP gas Preheating Heat the oven to the desired temperature before placing the food in the oven Preheat for 10 to 12 minutes Opening Oven Door Let hot air or steam escape before removing or replacing food Arranging Oven Racks The oven racks should be arranged before t...

Страница 32: ...n racks should be arranged before the oven knob is operated Place the racks so the food is centered in the oven not the rack When more than one cookware is used be sure to stagger them allowing space between each one Do not allow the cookware to touch any part of the oven especially the glass window It is best to use two racks and place food so one cookware is not directly over another Rack Remova...

Страница 33: ...ause uneven heat in the oven If a spillover does occur on the oven bottom allow the oven to cool first You can clean the bottom with soap and water a mild abrasive cleanser soap filler abrasive pads or an oven cleaner following package directions Broiler Compartment The broiler pan is held in place by a wire broiler rack To open the broiler gently lift up and pull forward on the drop down broiler ...

Страница 34: ...s are harder for the oven to clean without a little assistance For heavy spillovers such as from an overfilled fruit pie or casserole put a cookie sheet or aluminum foil on the oven bottom Be sure the foil does not cover the air openings so do not extend foil beyond oven bottom If you should get a heavy spillover on the oven bottom 1 Brush off heavy soil with a nylon brush or plastic pad DO NOT US...

Страница 35: ...e the thermostat sensing device the long tube in the oven so that it will not respond to temperature accurately If you use an oven cleaner do not let it contact the sensing bulb or any chrome aluminum or plastic part of the range Do not apply or allow the cleaner to come in contact with any parts or surfaces other than the oven interior Grates Main Tops Surface Burners The grates are made of porce...

Страница 36: ...the vents located along the sides of the oven bottom are blocked poor cooking will result Never cover a rack completely A piece of foil slightly larger than the cookware can be placed on the rack beneath the cookware Remove and discard aluminum foil after each use This will help prevent greases and spilled food from accumulating and becoming a fire hazard Cleaners and Cleaning Materials Do not use...

Страница 37: ...stributors must be well dried and correctly replaced It is very important to check that the burner flame distributor and the cap has been correctly positioned failure to do so can cause serious problems In appliances with electric ignition keep the electrode clean so that the sparks always strike Note To avoid damage to the electric ignition do not use it when the burners are not in place Correct ...

Страница 38: ...d help removing and replacing the door To remove the door Open the door to fully Lift the left and right hooks on the hinge figure A B Hold the door as shown in figure C on a 45 degree angle Gently close the door until the hooks touch the door then lift at a 45 degree angle Set the door on a soft flat surface To replace the door repeat the above steps in reverse order DO NOT ATTEMPT TO CLOSE THE D...

Страница 39: ...ent How to change the D volt battery 1 Locate the battery holder which is fastened to the bottom right side of the range 2 Remove D volt battery 3 Ensure you replace with a quality battery This will ensure a stronger spark and reduce the number of times you will have to replace the batteries REMOVING THE KICKPLATE FOR CLEANING It is possible to remove the magnetic kickplate at the bottom of the ra...

Страница 40: ...aced evenly onto burners Oven does not light a Oven pilot is out a Relight oven pilot b Moisture buildup in ceramic sleeve of oven electrode b Heat up ceramic sleeve with BBQ lighter to remove moisture Oven Temperature seems to be inaccurate Food takes too long to cook Food cooks too fast Overbrowning a Oven was not preheated a Preheat oven for 10 minutes b Incorrect use of aluminum foil b Refer t...

Страница 41: ...DULE IGNITION SWITCHES TOP BURNER IGNITION LEADS OVEN IGNITION LEAD 1 5V DC G RR RF LF LR TSTAT MODULE D ALLUMAGE INTERRUPTEURS D ALLUMAGE BRÛLEUR SUPÉRIEURE CÂBLES D ALLUMAGE CÂBLE D ALLUMAGE DU FOUR 1 5 V c c Ar D Av D Av G Ar G ...

Страница 42: ...42 PARTS DIAGRAM AND LIST Please visit our website www UniqueAppliances com to view a PDF version of the schematics which will allow you to zoom in and out ...

Страница 43: ...ove Top Stop Plate for 20 24 30G 24CR 30CR ON1 OF1 14 UGP DPJ99002 Control Panel Heat Insulated Fiber for UGP 30G 30CR 15 UGP SYJ00117 Control Panel S S for UGP 30G S S OF2 16 UGP DCY07049 Knob Bezel for Classic Range 17 UGP SYJ00005 Knob for UGP 20G 24G 30G 20 20 24 CC1 18 N A 19 UGP DPJ99004 Liner Heat Insulated Fiber for UGP 30G Ranges 20 UGP DWWJ01002 Bellow for UGP 30G 20 24 24CR ON1 OF1 21 U...

Страница 44: ...ued NO PART NUMBER DESCRIPTION 1 UGP QJG00131 Backsplash ASSY S S for UGP 30G OF2 2 UGP DWWJ01019 Cast Iron Grate with Dimplets for UGP 30G CR Ranges 3 UGP DCY14516 Backsplash Fixed Plate for UGP 30G 24G 24 24CR 30CR 4 UGP QJG00129 Small Burner ASSY for UGP 30G S S OF2 5 UGP QJG00027 Dual Burner 3 Orifices UGP 24 30CR 30G OF1 6 UGP QJG00130 Medium Burner ASSY for UGP 30G S S OF2 7 UGP CY14515 Back...

Страница 45: ...ontrol Panel S S for UGP 30G S S OF2 16 UGP DCY07049 Knob Bezel for Classic Range 17 UGP SYJ00005 Knob for UGP 20G 24G 30G 20 20 24 CC1 18 N A 19 UGP DPJ99004 Liner Heat Insulated Fiber for UGP 30G Ranges 20 UGP DWWJ01002 Bellow for UGP 30G 20 24 24CR ON1 OF1 21 UGP CY14239 Smoke diffuser A for UGP 24 30G 30CR 22 UGP CY14240 Smoke diffuser B for UGP 24 30G 30CR 23 N A 24 UGP DWWJ01012 Oven Rack fo...

Страница 46: ...ne detatch along dotted line To make care and servicing of your range easy and efficient please record the following information for future reference Model Serial Number Purchased From Date Purchased Installed By To make care and servicing of your range easy and efficient please record the following information for future reference Model Serial Number Purchased From Date Purchased Installed By ...

Страница 47: ...Unique or its authorized distributors and all other warranties conditions representations or guarantees including any warranties conditions representations or guarantees under any Sale of Goods Act or like legislation or statute is hereby expressly excluded Save as herein provided Unique shall not be responsible for any damages to persons or property including the unit itself howsoever caused or a...

Страница 48: ... registration to register your product Toll free 1 877 427 2266 or 1 905 827 6154 available during regular business hours 8 30 am to 4 30 pm EST Website www UniqueAppliances com Email info UniqueAppliances com Please visit our website for more quality Unique products www UniqueAppliances com Unique Appliances Ltd 2245 Wyecroft Road 5 Oakville Ontario Canada L6L 5L7 RATING LABEL CONTACT US PRODUCT ...

Страница 49: ... 2021 Unique Appliances Ltd 2245 Wyecroft Road 5 Oakville Ontario Canada L6L 5L7 www UniqueAppliances com ...

Отзывы: