106636-04 - 8/22
36
X-2
Installation, Operating & Service Manual
15
Troubleshooting
1. Before Troubleshooting.
When using troubleshooting tables, keep in mind:
A. Troubleshooting should be completed by a
professional heating technician.
B. Before seeking technical assistance, the
servicing technician should have a electrical
meter and gas pressure gauge available for
use.
C. Check electrical connections on boiler before
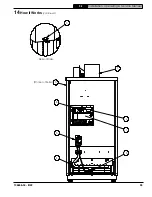
proceeding (see Figure 9-1 and Figure 9-2).
i. Ensure 120 VAC power polarity is correct,
and boiler is properly grounded.
ii. Ensure control power supply 24 VAC
(minimum 18 VAC - maximum 30 VAC)
polarity is correct.
D. Controls are tested during manufacturing
process. Defective control is least likely cause
of failure.
E. When checking voltage across wiring
harness, be careful not to insert meter probes
into pins. Doing so may damage pin,
resulting in loose connection when harness
is reconnected.
WARNING
A low water condition is a serious and
potentially dangerous condition. In the event
the IDL 1200 detects a low water condition,
the system must be inspected by a qualified
service technician before the boiler is returned
to service. Do not attempt to add water to a
hot boiler. Allow the boiler to fully cool before
adding water.
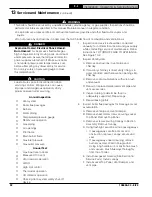
2. IDL 1200 LWCO: Amber "LOW WATER" LED
indicates the boiler is not sensing water in boiler.
A. If AMBER LED is ON and boiler is filled with
water: remove sensor from well.
i.
Make sure metal clip is protruding
enough to come in contact with inside
of well tube.
ii.
Check to ensure well does not have
any heat transfer grease or other
contaminants that may interfere with
metal sensor near contacting well.
iii.
If this does not resolve problem, drain
boiler, remove well and examine for
excessive residue build up. Clean as
needed and re-install.
B. If the AMBER LED is BLINKING, IDL 1200 is
nearing limit of its water detection range. This
is a result of either:
i.
Poor connection between metal
sensor head and inside of copper
well.
ii.
Excessive residue build up on exterior
of well . Follow steps under B1 to
address this issue.
Figure 15-1: Limit Sensor Position
!

