TVS Apache RTR 200 Fi4V with ABS Скачать руководство пользователя страница 1

FOREWORD

I

Dear Racer,

Thank you for choosing the TVS Apache RTR 200 Fi4V with ABS.

The newest member of the Apache family now comes with Dual-Channel ABS for unmatched control on the track. Every 
feature on the Apache is honed on the race track to deliver the best in racing performance.

The motorcycle has a rich racing pedigree, with the Apache Series RTR winning 16 national championships in 2016 
alone.   As a proud owner of the TVS Apache RTR 200 Fi4V with ABS, you are now part of the two million strong TVS 
Racing family.  

This manual explains the features and operations of your TVS Apache RTR 200 Fi4V with ABS. Please read it carefully and 
follow the instructions to enjoy the ultimate racing experience. 

To prolong your journey on the TVS Apache RTR 200 Fi4V with ABS, we urge you to get your TVS Apache RTR 200 Fi4V 
with ABS services only at TVS Motor Company Authorised Distributor or Dealer / Authorised Service Centers.

Here's to your new lap on the Apache RTR 200 Fi4V with ABS. 

TVS MOTOR COMPANY LIMITED

Содержание Apache RTR 200 Fi4V with ABS

Страница 1: ...As a proud owner of the TVS Apache RTR 200 Fi4V with ABS you are now part of the two million strong TVS Racing family This manual explains the features and operations of your TVS Apache RTR 200 Fi4V w...

Страница 2: ...re pleasure you will experience riding your new vehicle Ensure that anyone else riding your TVS Apache RTR 200 Fi4V with ABS does the same All information illustrations photographs and specifications...

Страница 3: ...is an important responsibility of the rider To help you make decisions on safety we have provided necessary operating procedure and other information in this manual This information alerts you on pot...

Страница 4: ...01 Antilock braking system 02 Safe riding tips 08 Know your TVS Apache RTR 200 Fi4V with ABS 12 Riding your TVS Apache RTR 200 Fi4V with ABS 33 Maintenance 39 Service record sheet 59 Technical specifi...

Страница 5: ...km is most important During running in period all the engine components and other parts will have set in All adjustments to be restored all fasteners to be tightened Engine cum transmission oil to be...

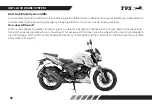
Страница 6: ...dry or wet roads loose gravels etc How does ABS work When a rider applies the brakes continuously as he detects a dangerous obstacle in dry or wet roads loose gravels etc transmits an excessive brake...

Страница 7: ...rce of the braking maneuver the ABS systems practically allow riders to use the greatest stopping force possible without locking the wheels How does the ABS understands the wheel locking The ABS uses...

Страница 8: ...operation But during hard stop the brake pedal lever feels different i e a rapid pulsation in the brake pedal lever This is absolutely normal It is not necessary to have this pulsation feel every tim...

Страница 9: ...rvice Center DO S AND DON T S Do s t Check the ABS warning lamp for any warning before driving the vehicle t Apply both front and rear brake for better performance t Apply continuous brake in ABS mode...

Страница 10: ...ot use different toner ring t Do not insert any metallic parts near wheel speed sensor t Do not test the ABS on road but use ABS it is already tested t Do not use non genuine spares like pads discs ty...

Страница 11: ...icle in conditions like wheelie stoppie on stand engine revving in gear for chain lubrication and during water wash etc for more than three minutes as it will result in ABS error and ABS warning lamp...

Страница 12: ...to be taken to ensure the safety of the rider pillion rider and other road users These precautions are Familiarise yourself with new TVS Apache RTR 200 Fi4V with ABS Riding skill and your mechanical k...

Страница 13: ...rea to thoroughly familiarise with the operation of the vehicle Posture Proper vehicle riding starts with proper posture 1 Keep your elbows relaxed and flexible 2 Sit and adjust yourself on seat so th...

Страница 14: ...the throttle 2 Hold the vehicle upright as you apply the brakes 3 Progressive application of brakes is safer 4 Never depress the clutch lever while braking at higher speeds 5 Apply both the brakes 6...

Страница 15: ...INSTALLATION AND SAFETY TIPS Use extreme caution while selecting and installing the accessories for your motorcycle The addition of unsuitable accessories can lead to unsafe operating conditions Your...

Страница 16: ...Evaporative Emission Control System The Apache RTR 200 Fi4V with ABS is equipped with an evaporative emission control system which consists of a canister and associated piping This system prevents th...

Страница 17: ...parts or referring to special information Please fill the above boxes now for future reference Frame number Engine number Control key number Frame serial number is engraved on the right side of the st...

Страница 18: ...rror L 6 High low beam switch 7 Digital speedometer 8 Ignition cum steering lock 9 Master cylinder front 10 Rear view mirror R 11 Engine cut off switch 12 Front brake lever 13 Throttle grip 14 Electri...

Страница 19: ...PACHE RTR 200 Fi4V with ABS 15 1 Front wheel axle 2 Cover fuel filter EFI 3 Gear shift lever 4 Centre stand 5 Side stand 6 Rider foot rest L 7 Pillion foot rest L 8 Rear wheel axle 9 Saree guard 10 Wh...

Страница 20: ...Front wheel axle nut 3 Caliper assembly front 4 Spark plug 5 Gauge oil level 6 Rear brake pedal 7 Rider foot rest R 8 Pillion foot rest R 9 Muffler assembly 10 Disc plate rear 11 Rear wheel axle nut...

Страница 21: ...with ABS 17 FRONT 1 Turn signal lamp front L 2 Head lamp assembly 3 Oil cooler 4 Crash guard 5 Turn signal lamp front R 6 Position lamps REAR 1 Turn signal lamp rear R 2 Reflex reflector 3 Turn signa...

Страница 22: ...diagnostic cycle once upon activation The engine can be started The key cannot be taken out from the lock 3 LOCK position Your TVS Apache RTR 200 Fi4V with ABS steering can be locked in both left and...

Страница 23: ...the left side turn signal indication is activated Caution Warning Speedometer background illumination and position lamps glow automatically once the ignition key is turned ON without activating other...

Страница 24: ...ows continuously when the fuel comes below minimum safe level 7 Turn signal indicator right Flashes when the right side turn signal indication is activated 8 Fuel gauge Digital bars indicate the appro...

Страница 25: ...ibutor or Dealer Authorised Service Center 9 Speedometer Indicates the vehicle speed in kilometer per hour by default as and when the ignition is turned ON This can be changed to miles per hour Change...

Страница 26: ...of 2 Hz Lap timer will start counting when the vehicle speed is more than 3 km h and stops blinking once it starts counting KNOW YOUR TVS APACHE RTR 200 Fi4V with ABS 10 Odometer Trip meter 1 2 Lap i...

Страница 27: ...the high speed data KNOW YOUR TVS APACHE RTR 200 Fi4V with ABS Lap timer works only when the lap timer mode is active Note Set the meter in HIGH SPEED mode to know the maximum speed achieved by any u...

Страница 28: ...and the new best time recorded will be flashed and BEST SHORTEST TIME scrolls in running display when the vehicle comes less than 3 km h 0 1 2 3 4 5 6 7 8 9 10 11 12 ABS 11 16 15 14 12 17 13 KNOW YOU...

Страница 29: ...s counting from 1 km in km h mode and 0 6 miles in mph mode 12 Tachometer Tachometer indicates the engine speed in multiples of 1000 RPM Revolutions Per Minute KNOW YOUR TVS APACHE RTR 200 Fi4V with A...

Страница 30: ...tor Company Authorised Distributor or Dealer Authorised Service Center 17 Malfunction indicator lamp MIL is turned ON when the ECU detects a fault in the system If malfunction indicator lamp glows imm...

Страница 31: ...bypassed by disconnecting the side stand switch coupler Upon detection of Side stand switch vehicle start function is enabled in all the gears and not switched off when changed from neutral to gear It...

Страница 32: ...on for a few seconds Mode and set buttons will not work when the vehicle speed exceeds above 10 km h or 6 mph in the respective modes Note 4 Press the Mode button till the display changes to to set th...

Страница 33: ...Set button once again to set hour format and to come out from clock setting Setting the Shift RPM l Press and hold the Mode button till MPH icon blinks in display l Release and press the Mode button...

Страница 34: ...ne guard arrangement for optimal engine cooling The oil cooler is mounted in front of the engine which improves the engine durability and provides better heat management without any compromising the e...

Страница 35: ...ing from the opposite direction while overtaking other vehicles during day If the pass by switch is pressed when the engine is in OFF condition the head lamp HIGH beam alone will glow with 50 of inten...

Страница 36: ...50 if the engine is kept idle for more than 20 sec approx Pass by system will not work if the engine cut off switch is turned OFF Warning 1 Electric starter switch Ensure the transmission is in neutr...

Страница 37: ...from being restarted To restart the engine return the switch to the position Note Before starting ensure to turn ON the engine cut off switch Release the electric starter switch immediately after the...

Страница 38: ...nd the fuel tank inlet 1 Filling above the inlet may result in improper breathing of fuel tank which leads to difficulty in starting as well as improper running of the vehicle Whenever refueling the b...

Страница 39: ...s will lead to rough shift or jerk while shifting the gears Remember to return to neutral position before restarting the engine Caution 2 N 1 3 4 5 Gear shift lever position can be set to your conveni...

Страница 40: ...ng or toppling of vehicle Braking performance is affected adversely with wet surfaces loose surfaces and overheating of brake system due to unnecessary continuous application of brakes For safety exer...

Страница 41: ...in the above figure To install the rear seat reverse the removal procedure Utility box is located under the passenger seat to store some important items and it provides security to things placed insid...

Страница 42: ...sist you in performing certain aspects of periodic maintenance and emergency repairs a tool kit is supplied along with the vehicle Tool kit is located under the passenger seat To access the tool kit r...

Страница 43: ...f the cover frame at the holes provided on the frame and install the mounting screws 1 2 and 3 Caution Make sure that the cover frame is locked securely in position after installation SMART PHONE CHAR...

Страница 44: ...te direction to prevent damage 4 Do not charge your mobile when engine is off 5 Do not use other device this port is for charging mobile phones only The charging time of the mobile may vary depending...

Страница 45: ...working of all lamps horn and pass by switch Low battery indication Battery voltage page no 44 Speedometer Performing self check Steering Smooth movement No play or looseness Throttle Correct free pla...

Страница 46: ...rottle smoothly Select the required gears in a similar manner STARTING THE ENGINE As you turn the ignition switch to the ON position the instrument cluster and the warning lights will go through the s...

Страница 47: ...ce speed to a safe limit before turning cornering Do not apply brake while turning cornering Do not disengage clutch before braking Since the engine and exhaust system becomes very hot make sure to pa...

Страница 48: ...necessary Visually inspect the spark plug gap If the gap is found more replace the plug with a new one However the spark plug need to be replaced every 12000 kms 1 year Always use recommended spark pl...

Страница 49: ...d evaporation and condensation of moisture inside which will result in rusting of the tank Ensure to close fuel tank cap after every filling If the fuel tank cap is kept open for a long time it leads...

Страница 50: ...y accelerate or apply brake Avoid unnecessary idling While waiting for someone or stopping in signals for long time if the engine is kept running at idle speed it causes unnecessary wastage of fuel Av...

Страница 51: ...servicing TVS Motor Company Limited strongly recommends that the jobs as per the maintenance schedule be performed by your TVS Motor Company Authorised Distributor or Dealer Authorised Service Center...

Страница 52: ...R Oil filter strainer C C C C Oil filter paper filter R R R R Spark plug I C R Replace every 12000 km Air cleaner element R Replace every 12000 km Tappet clearance I A I A I A I A Fuel filter Replace...

Страница 53: ...4th 5th Remarks Every Every km 500 750 2500 3000 5000 6000 8500 9000 11500 12000 3000 km 6000 km Period from the date of sale 1 month 3 months 6 months 9 months 12 months Steering smooth operation pla...

Страница 54: ...f found missing WSS cable I I I I I I Replace if damage Brake hose bundy tubes I I I I I I Replace every 30000 km Bundy tube mounting all joints I TI I TI I TI I TI I TI I TI Inspect for leak HECU mou...

Страница 55: ...I Evaporative emission control I I I I I I I Check for intactness of system hoses and canister Fuel tank assembly I C I C I C I C I C I C I C 7 Wheel balancing to be done every 1 year or every 12000 k...

Страница 56: ...TRU4 FULLY SYNTHETIC oil 1400 ml during engine overhaul SAE 10W30 API SL JASO Ma2 or recommended equivalent oil Front fork oil 325 2 cc KYB G10 oil Disk brake fluid DOT 3 DOT 4 Grease Bechem Bechem p...

Страница 57: ...r Dealer Authorised Service Centers 4 Do not add additional electrical accessories 5 While connecting the terminals observe the correct polarity Connect the red wire to the positive terminal and black...

Страница 58: ...the fuse fails again consult the nearest TVS Motor Company Authorised Distributor or Dealer Authorised Service Center FUSE REPLACEMENT Non working of electrical systems may be due to safety fuse fail...

Страница 59: ...s found to be more than the limit replace the spark plug with a new one After cleaning and inspecting the gap reinstall the spark plug and tighten by hand to avoid cross threading Finally tighten usin...

Страница 60: ...should be between the minimum and maximum level marks on the gauge as shown in the figure 8 If the oil level is below the minimum level top up with TVS TRU4 FULLY SYNTHETIC oil SAE 10W 30 API SL JASO...

Страница 61: ...free play is not within the specified limit 1 Ensure that the engine is cold engine oil at room temperature 2 Loosen the lock nut 2 while holding the clutch cable adjuster 3 MAINTENANCE 8 13 mm Do not...

Страница 62: ...rectification MAINTENANCE Caution Caution Adjust step by step Do not go at a stretch as it will damage the cam 2 1 3 REAR SHOCK ABSORBER TVS Apache RTR 200 Fi4V with ABS is provided with dual rated 7...

Страница 63: ...ar shock absorber load Note BRAKES Front brake You can observe a master cylinder 1 on the right side of the handle bar a caliper assembly 2 fitted to the fork leg R a disc along with a wheel speed sen...

Страница 64: ...uthorised Service Center for topping up the brake fluid air bleeding and other brake related inspections B A Note Check the brake fluid level only when the master cylinder is parallel to the ground Re...

Страница 65: ...e system contact nearest TVS Motor Company Authorised Distributor or Dealer Authorised Service Center Warning MAINTENANCE 1 Remove the cover frame R refer page no 31 for removal procedure 2 Check the...

Страница 66: ...PSI 2 25 kg cm 32 PSI Tyre tread condition Operating the vehicle with excessively worn tyres will decrease riding stability and can lead to loss of control It is recommended to replace the tyre when t...

Страница 67: ...balancing to be done every 1 year or every 12000 km In addition after every tyre puncture repair or tyre replacement wheel balancing to be done Caution Use of a tyre other than the standard may cause...

Страница 68: ...ent of rear wheel or sprockets can cause abnormal wear of chain and sprockets and results in unsafe riding condition Caution MAINTENANCE 20 25 mm 1 Place the vehicle on centre stand with the transmiss...

Страница 69: ...g of disc in the caliper assembly while reassembling the wheel Warning REAR WHEEL REMOVAL AND REASSEMBLY 1 Remove the wheel hugger rear 2 Remove the axle nut 1 and along with the washer and partially...

Страница 70: ...er to avoid damages to the toner ring Damaged toner ring affects ABS function STORAGE PROCEDURES For storage of your motorcycle for longer periods of over a month and above we recommend to carry out t...

Страница 71: ...e head lamp and other lamp assemblies Caution TAKING THE VEHICLE OUT OF STORAGE FOR REGULAR USE 1 Take the vehicle out of the garage and clean it thoroughly 2 Remount the battery after bench charging...

Страница 72: ...all cables and their free plays 7 Smoothness of steering operation 8 Slackness and lubrication of chain page no 54 9 Front rear brake functioning and rear brake lamp switch adjustment 10 Front fork f...

Страница 73: ...earlier 2 2nd service between a 2500 3000 km or b 3 months from the date of purchase whichever of the two occurs earlier 3 3rd service between a 5000 6000 km or b 6 months from the date of purchase w...

Страница 74: ...arlier 6 6th service between a 14500 15000 km or b 15 months from the date of purchase whichever of the two occurs earlier 7 7th service between a 17500 18000 km or b 18 months from the date of purcha...

Страница 75: ...ween a 23500 24000 km or b 24 months from the date of purchase whichever of the two occurs earlier 10 10th service between a 26500 27000 km or b 27 months from the date of purchase whichever of the tw...

Страница 76: ...onic paper filter Lubrication system Forced wet sump Maximum power in kW 13 7 8500 rpm Maximum torque in Nm 16 96 Nm 6500 rpm Maximum speed 128 km h Engine idling rpm 1550 100 rpm Starting system Elec...

Страница 77: ...justable with rectangular swing arm Trail length 95 5 mm TYRE Tyre size Front 90 90 x 17 Tubeless Rear 130 70 x 17 Tubeless Tyre pressure Front 1 75 kg cm 25 PSI Rear solo 2 00 kg cm 28 PSI Rear dual...

Страница 78: ...SYNTHETIC oil oil grade SAE 10W30 API SL JASO Ma2 or recommended equivalent oil Engine cum transmission 1200 ml during servicing oil and capacity 1400ml during engine overhaul Front fork oil grade KY...

Отзывы: