background image

EnTire Solution TPMS User Manual

9

© 2011 TRW Automotive, Parts & Service

2.7

Sensor Malfunction Alarm and Sensor Low-Battery Power
Alarm

Function and Operation

Sensor Malfunction Alarm

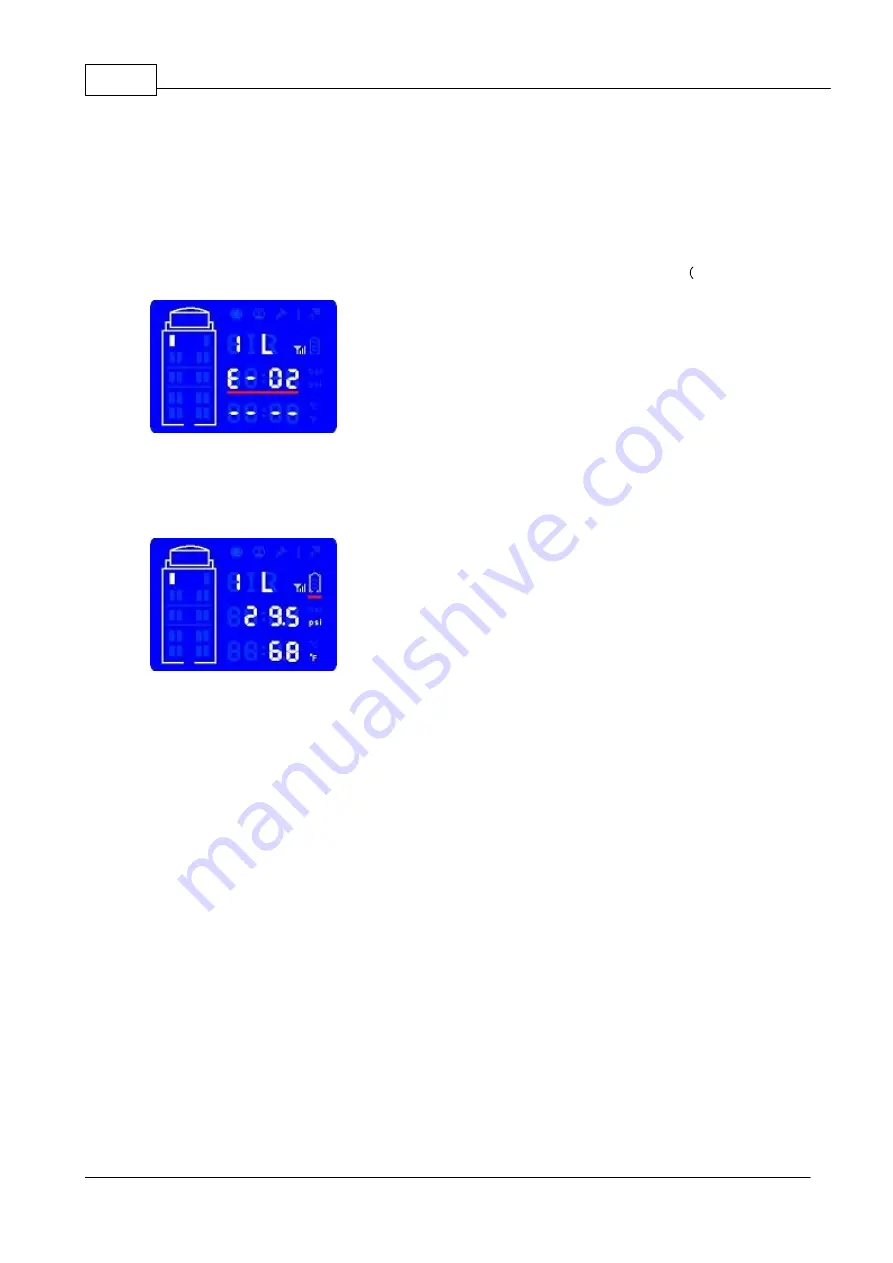
When a sensor malfunctions or monitor fails to receive tyre signal for over 20 minutes, the
corresponding 

Tyre Position will flash

. Pressure Display Field will display “E-02”.  fig.2.7.1)

fig.2.7.1

Sensor Low-Battery Power Alarm (Panel ICON 8)

The LCD Display Monitor indicates sensor’s battery level. When it is low, 

Sensor Battery Indicator

will flash

. (fig.2.7.2)

fig.2.7.2

Содержание EnTire Solution TPMS

Страница 1: ......

Страница 2: ...essure information automatically monitored while you are driving EnTire Solution Tyre Pressure Monitoring System TPMS consists of sensors installed on valve stems and a LCD display monitor mounted in...

Страница 3: ...able protection against harmful interference or susceptibility Information on Disposal for Users of Waste Electrical Electronic Equipment private households This symbol on the product s and or accompa...

Страница 4: ...pressure checks EnTire Solution TPMS Installation and Usage EnTire Solution TPMS system user must install and set up the system strictly following instructions of this user manual Standard tyre pressu...

Страница 5: ...Alarm Indicator Panel ICON 4 10 9 Monitor Working Mode 11 10 Monitor Tyre Configuration 14 11 Year Setting and Date Setting 15 12 Time Setting and Standard Pressure Setting 15 13 Alarm Temperature Se...

Страница 6: ...The sensor is equipped with a replaceable 3V Mn Li battery Type CR1632 2 LCD Display Monitor Receives and displays tyre s information from sensors An external signal relay is available EPK500 for vehi...

Страница 7: ...wrench Step 1 Select a suitable location to mount the monitor window suction holder on your windshield Clean and dry the suction cup holder and the selected area of the windshield Make sure the distan...

Страница 8: ...t plug the power cable into the cigar lighter outlet in your vehicle fig 2 1 5 Connect the smaller end of the power cord into the LCD Display Monitor fig 2 1 3 To fully charge your LCD Display Monitor...

Страница 9: ...Pressure Alert Indicator 4 Rapid Leakage Alert Indicator 5 High Temperature Alert Indicator 6 Monitor Battery Indicator 7 Sensor Signal Indicator 8 Sensor Battery Indicator 9 Pressure Unit 10 Tyre Po...

Страница 10: ...nel icon 6 fig 2 3 1 Note Your LCD Display Monitor contains a rechargeable battery When your LCD Display Monitor flashes the monitor low battery alert Refer page 4 Item 1 connect the power cable into...

Страница 11: ...information alternatively The display time for each tyre is 3 seconds fig 2 4 1 Press Set button once will hold the display on the current tyre displayed Panel Item 15 Press Set button again to resume...

Страница 12: ...he Tyre Position will flash fig 2 5 1 fig 2 5 1 High Temperature Alert Panel ICON 5 When tyre temperature is above the preset threshold the system will beep The Alarm Indicator the High Temperature In...

Страница 13: ...rresponding Tyre Position will flash at the same time fig 2 6 1 fig 2 6 1 Second Low Pressure Alert The system will have a second low pressure alert at 20 below standard pressure value The Alarm Indic...

Страница 14: ...on Alarm When a sensor malfunctions or monitor fails to receive tyre signal for over 20 minutes the corresponding Tyre Position will flash Pressure Display Field will display E 02 fig 2 7 1 fig 2 7 1...

Страница 15: ...stop the vehicle ONLY when it is safe to do so Check the tyre at your earliest convenience fig 2 8 1 2 9 Monitor Working Mode Function and Operation Monitor Working Mode When the monitor is powered on...

Страница 16: ...ng Parameter Setting Mode Tyre Sensor Mapping Diagram The EnTire Solution TPMS can be configured to manage 4 6 8 10 12 and 14 tyre s in 12 different configurations To configure your LCD Display Monito...

Страница 17: ...LCD Display Monitor 12 2011 TRW Automotive Parts Service 4 4 4 6 6 0 EPK101 6 2 6 4 6 6 EPK101 EPK500...

Страница 18: ...EnTire Solution TPMS User Manual 13 2011 TRW Automotive Parts Service 8 0 EPK102 8 2 8 4 8 6 EPK102 EPK500...

Страница 19: ...move cursor around and Up or Down button to increase or decrease the display value Year Setting The LCD Display Monitor indicates Se y Set year based on above mentioned operation Press the Set button...

Страница 20: ...your vehicle s operation manual for this value Tyre standard pressure is set axle by axle Factory preset standard pressure values bar will be shown fig 2 11 2 fig 2 12 2 Input your tyre s standard pr...

Страница 21: ...ervice 3 Sensor 3 1 Sensor Name and Tyre Diagram Sensor Name and Tyre Diagram Ensure that the LCD Monitor is installed and powered on The sensors are to be installed on valve stems For correct sensor...

Страница 22: ...se to open the sensor fig 3 2 1 Step 2 Release sensor s bottom cover from the sensor by pushing down on sensor s valve stem connector fig 3 2 2 Step 3 Slip sensor s bottom cover through the valve stem...

Страница 23: ...or other sensors fig 3 2 8 Step 8 Verify if the sensor works properly The LCD Display Monitor should indicate the tyre status within 1 minute after installation fig 3 2 5 fig 3 2 6 fig 3 2 7 fig 3 2 8...

Страница 24: ...harge Time Less than 3 5hrs Battery Standby Time More than96hrs Charge when power meter is lower than 2nd grid Coding and Transmission Rate Adopted Manchester Coding Transmission rate9600bps Receiver...

Страница 25: ...pper cover by turning it anti clockwise with a spanner wrench fig 5 1 1 Turn the sensor body anti clockwise to remove it from the valve stem fig 5 1 2 Inflate the tyre to the standard pressure Measure...

Страница 26: ...o replace a battery 1 Loosen the upper cover of the sensor with a spanner wrench Take out the inside sensor enclosure fig 5 1 3 2 Open the inside sensor cap by aligning spanner wrench to the 3 recess...

Страница 27: ...re installing the sensors If replacements are necessary we suggest replacing the valve stems with a metal type stem This improves the life of the stem due to premature failure from drying out and crac...

Страница 28: ...erform Learning Mode operation ONLY when programming a new replacement or additional sensors E g For trailers 5 4 Programming of Replacement Sensor Step 1 Remove replacement sensor s outer cap and inn...

Страница 29: ...y does not cover the following situations Charge may apply 1 Sensors and monitor are lost or damaged by user s improper operation 2 Original invoice can not be provided 3 Unit is purchased from unauth...

Страница 30: ...to the programmed value Usually when the pressure is 15 or more under inflation LCD Display Monitor The electronic module which can receive tyre pressure and temperature info from sensor and have a v...

Страница 31: ...apter 5 4 Programming of Replacement Sensor in the appropriate tyre position i e 7R 8L according to tyre diagram fig 20 in Chapter 2 10 Monitor Tyre Configuration Please write appropriate sensor name...

Страница 32: ...Way power connector socket is within the reach of the enclosed relay 7 Way connector extension 1 2 meter fig 8 1 3 fig 8 1 1 7 Way Connector fig 8 1 2 7 Way Connector Step 2 Attach to the vehicle s ex...

Страница 33: ...ill transmit 4 signals to the monitor in 4 second intervals You have 12 seconds to return to the LCD Display Mount position before the sensor returns to normal working mode i e normal 8 minutes signal...

Отзывы: