background image

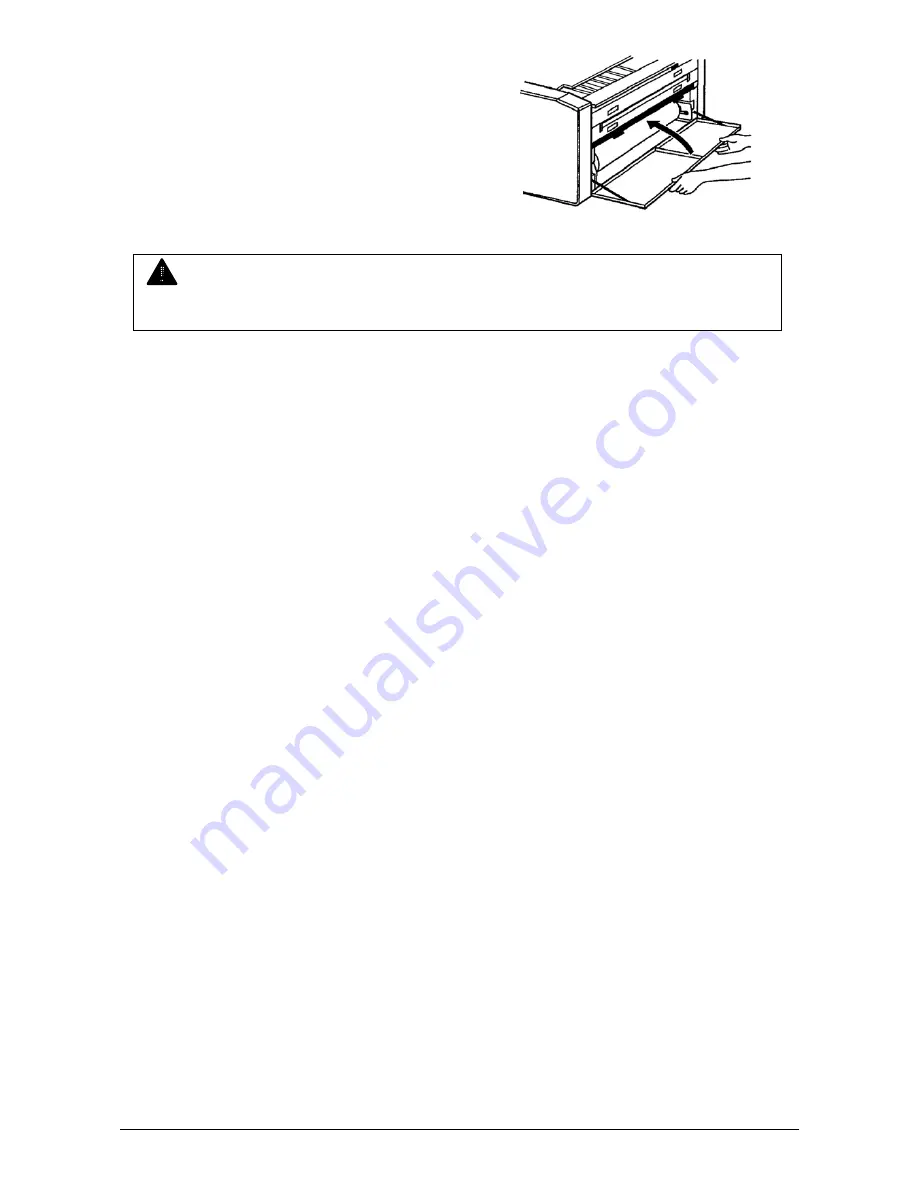
 9.  Close the Front Door. 


NOTE 

 
If the Feeding Roller Cover is not closed properly, the Front Door can not be closed. 


10.  Cut the leading part of roll paper by the Initial Cut.   
       (As for the detail of the Initial Cut, refer to [3.1  Initial Cut] on the page 3-2.) 
 

Chapter 2     Basic Operation 

2-8

Содержание CX 8020

Страница 1: ...Instruction Handbook CX 8020 Large Format System...

Страница 2: ...devices may be effected by electrical noise during operation If the Machine is installed near other electronic equipment such as a TV or a radio interference to said equipment such as noise or flicke...

Страница 3: ...the USER S Manual and have the following meaning WARNING This WARNING mark means that there is a possibility of death or serious injury if you ignore or do not follow the said instruction CAUTION Thi...

Страница 4: ...ck 1 Do not plug in the machine into a multi wire connector in which some other equipment is plugged into It may cause a fire due to outlet overheating 2 Do not damage the Power Cord by stepping on or...

Страница 5: ...ay result in a fire or electric shock 2 If you do not use the machine for a long duration holidays company shutdown turn off and unplug the printer from the outlet for safety Do not pull the cord when...

Страница 6: ...10 1 8 2 Rear View 1 12 1 8 3 Operation Panel 1 13 Chapter 2 Basic Operation Page 2 1 Turning on the CX 8020 2 2 2 2 Turning off the CX 8020 2 4 2 3 Replacing the Roll Media 2 5 2 4 Adding the Toner 2...

Страница 7: ...ed at Paper Turning Area 4 7 4 1 1 4 Code J3 Paper Mis feed at Print Area or Copy Exit Area 4 9 4 1 1 5 Code J4 Incorrect insertion of Cut Sheet Paper 4 13 4 1 1 6 Code J5 Mis feed of cut sheet paper...

Страница 8: ...from Duplication 1 3 1 3 Features 1 4 1 4 Specifications 1 5 1 5 Specifications of Original 1 6 1 6 Specifications of Copying Paper 1 8 1 7 Storage of Copying Media 1 9 1 8 Appearance 1 10 1 8 1 Fron...

Страница 9: ...er sources boilers humidifiers or refrigerators 1 The installation site must not have open flames dust or ammonia gases 2 The equipment must not be exposed to the air vents from air conditioners It ma...

Страница 10: ...pies such originals as many as it requires for its own business 2 We recommend you do not copy freely originals such as government issued passport public or private issued licenses automobile inspecti...

Страница 11: ...5 Sample Copy is available CX 8020 has a Sample Copy function that allows to check the copy image in advance 6 14 kinds of Copy Density Level including SL Mode are available 7 Adjustment of Leading M...

Страница 12: ...cut sheet paper feeding Fusing method Heat Roller Fusing Exposure method Lens array Development method Dry Mono component Copy magnification ratio 1 1 Input power 220 240V plus 6 or minus 10 50 60Hz 6...

Страница 13: ...0 07mm 0 2mm In case of Multiple Copy Width 210mm 841mm Length 297mm 3 000mm Also do not use the following kinds of original because you may damage the original or machine Sticked with paste Torn Fold...

Страница 14: ...Clipped or stapled Rough surface Carbon paper for example 100Punched Clipped Stapled K I P K I P Rough surface Chapter 1 Before Use 1 7...

Страница 15: ...to 80g m2 Vellum 64 to 80g m2 Film 120g m2 A0 A1 A2 A3 and A4 size If the used paper does not satisfy the above specifications it may cause such troubles as paper mis feed defective image etc Do not...

Страница 16: ...bag 40 RH to 70 RH Remove the paper from the machine every day in the evening and keep it in a polyethylene bag Then set it to the machine in the next morning High Humidity Possible trouble Void of im...

Страница 17: ...r when you replace the roll paper 6 Upper Unit Open Lever Press down these levers to unlock and open the Upper Unit 7 Original Feed Unit The Original is transported under the Original Transport Unit 8...

Страница 18: ...urn on off the Dehumidify Heater which dehumidifies the roll paper in the machine 13 Length Counter Total copy length is indicated 1 count 1 meter 14 Upper Unit Open the Upper Unit when you remove a m...

Страница 19: ...Hatch 2 Developer Covers Remove these covers when you set a new Toner Cartridge to supply the toner to the Developer Unit 3 Original Exit Original is ejected from here 4 Original Receiver They receive...

Страница 20: ...SL LIGHTER DARKER FILM VELLUM TRACING PLAIN PAPER MEDIA ROLL CUT SHEET C CLEAR DECREASE INCREASE LEAD EDGE TRAIL EDGE CUT MODE DECREASE INCREASE C CLEAR STOP ALL CLEAR 3 4 5 6 7 8 9 10 11 12 13 14 15...

Страница 21: ...ting the Copy Density on the page 3 3 as for the SL Mode 7 SL Key Press the SL Key to select the SL Mode Refer to 3 2 Adjusting the Copy Density on the page 3 3 as for the SL Mode 8 FILM Indicator The...

Страница 22: ...Key PLAIN PAPER Indicator VELLUM TRACING Indicator and FILM Indicator lights orderly whenever you press this key 26 Copy Number Indicator The setting value of Copy Number is indicated 27 DECREASE Key...

Страница 23: ...the CX 8020 2 2 2 2 Turning off the CX 8020 2 4 2 3 Replacing the Roll Media 2 5 2 4 Adding Toner 2 9 2 5 Copying with Roll Media 2 13 2 6 Copying with Cut Sheet Media 2 16 2 7 Replacing the Waste To...

Страница 24: ...ock 2 Ground the printer for safety 3 Do not plug the printer into a multi wiring connector in which other devices are plugged It may overheat the outlet and may result in a fire 4 outlet must satisfy...

Страница 25: ...IN PAPER MEDIA ROLL CUT SHEET C CLEAR DECREASE INCREASE LEAD EDGE TRAIL EDGE CUT MODE DECREASE INCREASE C CLEAR STOP ALL CLEAR 3 2 4 4 The Ready Indicator 4 lights when the CX 8020 is ready STAND BY S...

Страница 26: ...2 2 Turning off the CX 8020 1 There is a Power Switch 1 on the right front side of CX 8020 Press its O side to turn off the CX 8020 1 Chapter 2 Basic Operation 2 4...

Страница 27: ...d then pull out both the Spool Guides 2 2 1 2 Lift up the core of roll paper with the Spool holding its both sides 3 Press down the Lock Lever 3 to unlock the core of roll paper and then pull out the...

Страница 28: ...e mark 5 printed on the Spool When aligned release your hand from the Lock Lever 3 to lock the roll paper firmly 5 Install the Spool with the new roll paper to the inner groove of the Spool Guides The...

Страница 29: ...the media straight up in between the rollers noted Insert the leading part about 50mm of the roll paper between the Feeding Roller Cover 6 and the Roller 7 And then bring down the Feeding Roller Cover...

Страница 30: ...ding Roller Cover is not closed properly the Front Door can not be closed 10 Cut the leading part of roll paper by the Initial Cut As for the detail of the Initial Cut refer to 3 1 Initial Cut on the...

Страница 31: ...by toner dust the toner If it is unable to dust it wash the clothing with the cold water Do not use the hot water at this time because the toner will soak into fibres 1 Pull both the Toner Hatch Open...

Страница 32: ...ne side of each Toner Cartridge has a tape 6 which fixes the film Insert this side of each Toner Cartridge under the 7 6 holder 7 5 Pulling the green Hook 3 toward the arrow mark press down another si...

Страница 33: ...nt of time because it will be used later 7 Insert the Spool 10 to the holes of Holder 9 while catching the film 8 between its pins Then rotate the Spool 10 clockwise to wind up the film 8 Fix the film...

Страница 34: ...ch green Hook 3 toward the arrow mark and remove each Toner Cartridge 5 Discard the Toner Cartridge in a proper way 4 11 Put back the Developer Covers 4 12 Close the Toner Hatch 2 2 Chapter 2 Basic Op...

Страница 35: ...FILM VELLUM TRACING PLAIN PAPER MEDIA ROLL CUT SHEET C CLEAR DECREASE INCREASE LEAD EDGE TRAIL EDGE CUT MODE DECREASE INCREASE C CLEAR STOP ALL CLEAR 2 If necessary change such settings as Copy Densi...

Страница 36: ...l with face down on the Original Table and then insert it under the Original Feed Unit along the Original Guide 2 until the leading edge touches the feeding roller The Original is accepted a little re...

Страница 37: ...5 The Original is ejected from the Original Exit after the scan 6 Copy is ejected from the Copy Exit Chapter 2 Basic Operation 2 15...

Страница 38: ...efer to Chapter 3 as for the details of each setting 3 Open both the Original Table 1 and the Bypass Feeder Table 2 NOTE It is impossible to make a multiple copy by Cut Sheet Paper Feeding Mode STAND...

Страница 39: ...et the cut sheet paper the Cut Sheet Paper Feeding Mode is automatically selected The CUT SHEET Indicator on the Operation Panel automatically lights instead of ROLL Indicator at this time Roll Paper...

Страница 40: ...ntil the leading edge touches the feeding roller The Original is transported a little remains for a moment and then transported for the scan NOTE Please wait for a moment if the WAIT Indicator is ligh...

Страница 41: ...changes from Cut Sheet Paper Feeding Mode to Roll Paper Feeding Mode after the copy 2 It is impossible to set multiple sheets in to the Bypass Feeder Please set it one at a time When the previous cut...

Страница 42: ...d toner bottle Do not burn up the used wasted toner bottle NOTE Do not reuse the wasted toner 1 Press down the Upper Unit Open Levers 1 at both sides and lift up the Upper Unit 2 2 1 2 Loosen the Scre...

Страница 43: ...f toner spill out from the bottle clean with a wet cloth 2 If your hand or your cloth is soiled with the toner dust the toner If it is unable to dust it wash the clothing with the cold water Do not us...

Страница 44: ...ting the Leading Trailing Margin 3 6 3 5 Multiple Copy 3 7 3 6 Power Saving Mode and Power OFF Mode 3 11 3 6 1 Power Saving Mode 3 11 3 6 1 1 Power Saving Mode Manual 3 11 3 6 1 2 Power Saving Mode Au...

Страница 45: ...s cut off by about 280mm long and it is ejected from the Copy Exit NOTE The leading part of a roll media will be humidified if it is kept in the machine for a long term without printing which results...

Страница 46: ...lect the level on more right side On the contrary it becomes lighter if you select the one on more left side Also if you validate the SL Mode Strong Light Mode which removes background it becomes poss...

Страница 47: ...E TRAIL EDGE CUT MODE DECREASE INCREASE C CLEAR STOP ALL CLEAR 3 2 4 1 density darker On the contrary press the LIGHTER Key 2 if you will make it lighter 2 Press the SL Key 3 if you will validate the...

Страница 48: ...oll paper Please select the Standard Cut if the copy image is standard size Or the printed copy sheet should be standard size even if the copy image is not so Reference 1 Press the Cut Mode Select Key...

Страница 49: ...nge that of Trailing Margin when the TRAIL EDGE Indicator is lighting 2 Change the setting value pressing both the INCREASE Key and DECREASE Key 4 The unit of setting is millimetre Setting ranges are...

Страница 50: ...or longer 1 Confirm that the Ready Indicator on the Operation Panel is lighting Ready Indicator STAND BY SL LIGHTER DARKER FILM VELLUM TRACING PLAIN PAPER MEDIA ROLL CUT SHEET C CLEAR DECREASE INCREA...

Страница 51: ...AND BY SL LIGHTER DARKER FILM VELLUM TRACING PLAIN PAPER MEDIA ROLL CUT SHEET C CLEAR DECREASE INCREASE LEAD EDGE TRAIL EDGE CUT MODE DECREASE INCREASE C CLEAR STOP ALL CLEAR 3 NOTE As the Copy Number...

Страница 52: ...hen slide the Original Guide 5 fully to the right The Original is transported a little remains a moment and then transported for the scan NOTE If the Original Guide 5 is not at the far right position...

Страница 53: ...7 The Original is ejected from the Copy Exit after scanning 8 Copies are ejected from the Copy Exit Chapter 3 Useful Function 3 10...

Страница 54: ...Function 3 11 STAND BY SL LIGHTER DARKER FILM VELLUM TRACING PLAIN PAPER MEDIA ROLL CUT SHEET C CLEAR DECREASE INCREASE LEAD EDGE TRAIL EDGE CUT MODE DECREASE INCREASE C CLEAR STOP ALL CLEAR 1 sh The...

Страница 55: ...g Mode from now indicate LP 3 Press the STAND BY Key 1 The Indication Part 2 indicates the present setting of the timer of the Power Saving Mode 2 3 4 Change the setting of timer pressing DECREASE Key...

Страница 56: ...de works off Power OFF Mode does not work Select on pressing the DECREASE Key or the INCREASE if you will make the Power OFF Mode work 4 Press the STAND BY Key 1 The Indication Part 2 indicates the pr...

Страница 57: ...atically by the Power OFF Mode NOTE If both the Power Saving Mode Automatic and the Power OFF Mode are ON the Power OFF Mode has the priority Example 1 Power Saving Mode Power OFF Mode Timer 30 minute...

Страница 58: ...dia And also void of image double feeding creasing might occur If the room has humidity turn on the Dehumidify Heater to dehumidify the interior of the machine Open the Front Door 1 and the Dehumidify...

Страница 59: ...ber Indicator 2 is indicating 1 The Copy Number Indicator 2 indicates P 2 Set the Original to the CX 8020 The original is transported about 280mm long for the Sample Copy and then it is returned to th...

Страница 60: ...a or Copy Exit Area 4 9 4 1 1 5 Code J4 Incorrect insertion of Cut Sheet Paper 4 13 4 1 1 6 Code J5 Mis feed of cut sheet paper at Paper Turning Area 4 14 4 1 1 7 Code J6 Mis feed of cut sheet paper I...

Страница 61: ...icated on the Indication Part 3 to let you know where the mis feed has occurred The following figure is the section of the CX 8020 which shows the location of each mis feed More detailed explanation f...

Страница 62: ...e heater section Therefore be careful not to soil your cloth with the toner when you remove the mis fed paper Please dust the toner if your cloth is soiled If it is unable to dust it wash the cloth wi...

Страница 63: ...ASE LEAD EDGE TRAIL EDGE CUT MODE DECREASE INCREASE C CLEAR STOP ALL CLEAR Rear Front Remove the mis fed original in the following direction 1 Open the Original Feed Unit 1 and remove the original 2 C...

Страница 64: ...ARKER FILM VELLUM TRACING PLAIN PAPER MEDIA ROLL CUT SHEET C CLEAR DECREASE INCREASE LEAD EDGE TRAIL EDGE CUT MODE DECREASE INCREASE C CLEAR STOP ALL CLEAR Paper Entrance Area Rear Front Remove the mi...

Страница 65: ...ter or scissors 4 Bring down the Feeding Roller Cover 2 and close the Front Door 1 Chapter 4 Error Treatment 4 6 NOTE Confirm that the Mis feed Indicator is put out and the Paper Mis feed Code disappe...

Страница 66: ...ARKER FILM VELLUM TRACING PLAIN PAPER MEDIA ROLL CUT SHEET C CLEAR DECREASE INCREASE LEAD EDGE TRAIL EDGE CUT MODE DECREASE INCREASE C CLEAR STOP ALL CLEAR Paper Turning Area Rear Front Remove the mis...

Страница 67: ...ter or scissors 4 Bring down the Feeding Roller Cover 2 and close the Front Door 1 Chapter 4 Error Treatment 4 8 NOTE Confirm that the Mis feed Indicator is put out and the Paper Mis feed Code disappe...

Страница 68: ...EASE INCREASE C CLEAR STOP ALL CLEAR cases 1 The paper is mis fed at the Print Area Print Area is between Drum and Fuser in the following drawing 2 The paper is mis fed around the Copy Exit Rear Front...

Страница 69: ...touch the Stripper Fingers as they are very sharp Otherwise you may be hurt 3 Close the Exit Cover 4 Open the Upper Unit 2 Chapter 4 Error Treatment 4 10 2 NOTE It is recommended to make Initial Cut...

Страница 70: ...u remove the mis fed paper or when you open close the Corner Transport Unit Do not leave the Upper Unit open for a long period as the Photoconductive Drum is very sensitive to light Direct sunlight is...

Страница 71: ...it finally NOTE Confirm that the Mis feed Indicator is put out and the Paper Mis feed Code disappears after removing the mis fed paper If the Mis feed Indicator lights again some more paper may be mis...

Страница 72: ...REASE C CLEAR STOP ALL CLEAR paper to the Bypass Feeder mistakenly when the CX 8020 is copying with the roll paper Rear Front Pull out the cut sheet paper from the Bypass Feeder NOTE Confirm that the...

Страница 73: ...BY SL LIGHTER DARKER FILM VELLUM TRACING PLAIN PAPER MEDIA ROLL CUT SHEET C CLEAR DECREASE INCREASE LEAD EDGE TRAIL EDGE CUT MODE DECREASE INCREASE C CLEAR STOP ALL CLEAR mis fed at the Paper Turning...

Страница 74: ...u remove the mis fed paper or when you open close the Corner Transport Unit Do not leave the Upper Unit open for a long period as the Photoconductive Drum is very sensitive to light Direct sunlight is...

Страница 75: ...it finally NOTE Confirm that the Mis feed Indicator is put out and the Paper Mis feed Code disappears after removing the mis fed paper If the Mis feed Indicator lights again some more paper may be mis...

Страница 76: ...M TRACING PLAIN PAPER MEDIA ROLL CUT SHEET C CLEAR DECREASE INCREASE LEAD EDGE TRAIL EDGE CUT MODE DECREASE INCREASE C CLEAR STOP ALL CLEAR paper of incorrect size Incorrect size means shorter than 27...

Страница 77: ...u remove the mis fed paper or when you open close the Corner Transport Unit Do not leave the Upper Unit open for a long period as the Photoconductive Drum is very sensitive to light Direct sunlight is...

Страница 78: ...it finally NOTE Confirm that the Mis feed Indicator is put out and the Paper Mis feed Code disappears after removing the mis fed paper If the Mis feed Indicator lights again some more paper may be mis...

Страница 79: ...ng Please replace the roll paper making reference to 2 3 Replacing the Roll Paper on the page 2 5 4 1 2 2 Toner Empty The Toner Empty Indicator 1 lights if the toner is emptied in the middle of copyin...

Страница 80: ...the WAIT Indicator 2 flash simultaneously if either original or cut sheet paper is incorrectly set to the machine Remove the original cut sheet paper and set it again correctly Chapter 4 Error Treatme...

Страница 81: ...Error ED Developer Motor Error EE Main Motor Error EF Fuser Motor Error It is impossible for the user to cure these errors to resolve these issues PLEASE CALL YOUR TRAINED SERVICE PERSONNEL TO RESOLV...

Страница 82: ...Chapter 5 Cleaning and Checking Page 5 1 Cleaning of Each Part 5 2 5 1 1 Original Feeding Part 5 2 5 1 2 Original Guide 5 2 Chapter 5 Cleaning and Checking 5 1...

Страница 83: ...ty will not be good 5 1 1 Original Feeding Part 1 Open the Original Feed Unit 1 2 Clean the Glass 2 and the Roller 3 with a soft cloth like gauze impregnated with a little water or glass cleaner 1 3 2...

Страница 84: ...UTAX GmbH Ohechaussee 235 22848 Norderstedt Germany...

Отзывы: