background image

 TRAXXAS • 31 

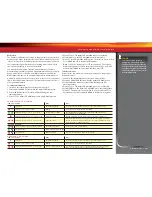
TQ 2.4GHz ADVANCED TUNING GUIDE

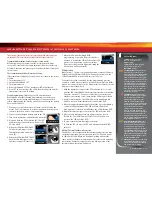
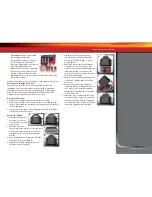
Set Multi-Function 
knob for STEERING 
SENSITIVITY (Expo)


Press/hold MENU 

green LED blinks


Press SET 

red LED blinks


x

8

Press SET to confirm 

green LED blinks (x8)


Press/hold MENU 

returns to driving mode

Set Multi-Function 
knob for THROTTLE 
SENSITIVITY (Expo)


Press/hold MENU 

green LED blinks


Press SET 

red LED blinks


x

2

Press MENU to confirm 

red LED blinks (x2)


x

8

Press SET to select 

green LED blinks (x8)

Press/hold MENU 

returns to driving mode

Set Multi-Function 
knob for STEERING 
DUAL RATE (%)


Press/hold MENU 

green LED blinks


Press SET 

red LED blinks


x

3

Press MENU twice 

red LED blinks (x3)


x

8

Press SET to select 

green LED blinks (x8)

Press/hold MENU 

returns to driving mode

Set Multi-Function 
knob for BRAKING 
PERCENTAGE (%)


Press/hold MENU 

green LED blinks


Press SET 

red LED blinks


x

4

Press MENU 3 times 

red LED blinks (x4)


x

8

Press SET to select 

green LED blinks (x8)

Press/hold MENU 

returns to driving mode

Set Multi-Function  
knob for  
THROTTLE TRIM


Press/hold MENU 

green LED blinks


Press SET 

red LED blinks


x

5

Press MENU 4 times 

red LED blinks (x5)


x

8

Press SET to select 

green LED blinks (x8)

Press/hold MENU 

returns to driving mode

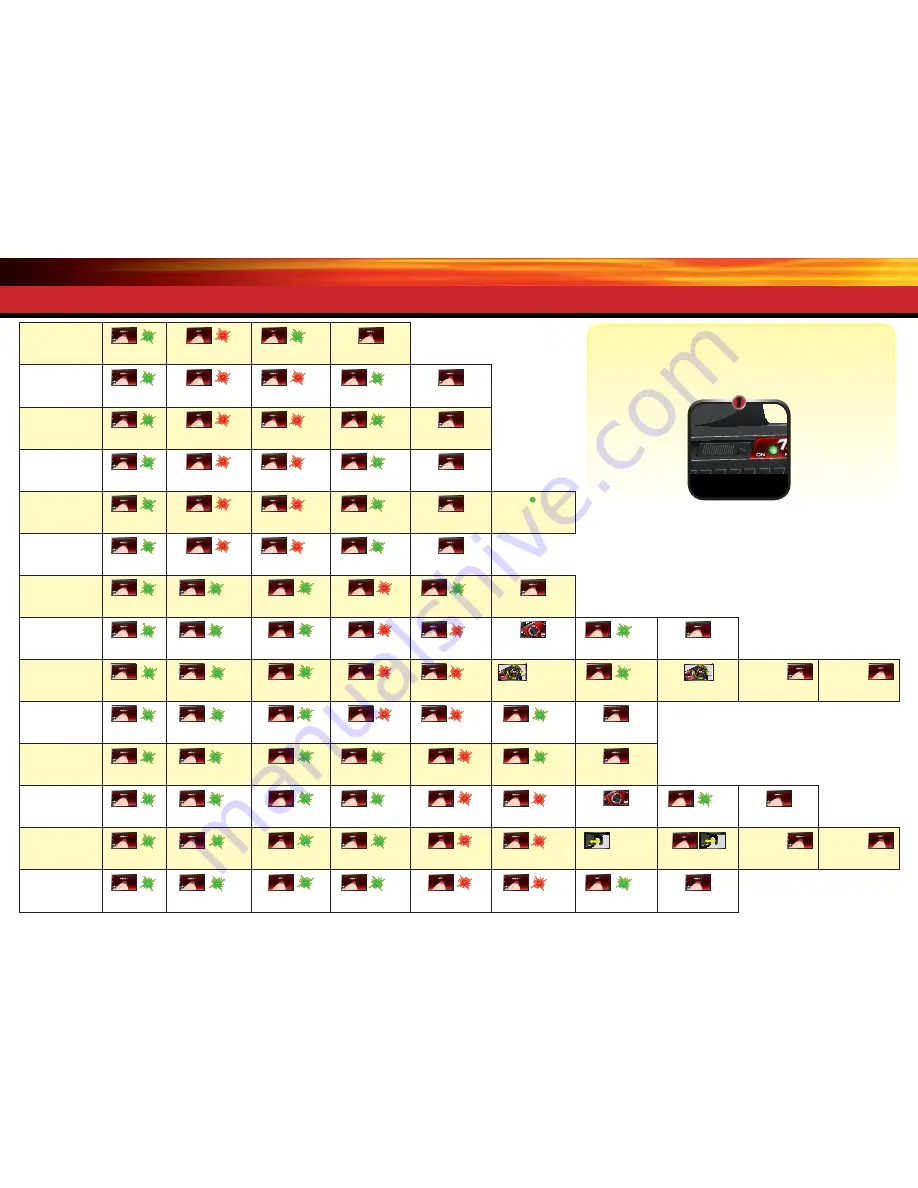
Adjust the Multi-

Function knob until the 

LED turns solid green. 

To LOCK the  
Multi-Function knob


Press/hold MENU 

green LED blinks


Press SET 

red LED blinks


x

6

Press MENU 5 times 

red LED blinks (x6)


x

8

Press SET to lock 

green LED blinks (x8)

Press/hold MENU 

returns to driving mode

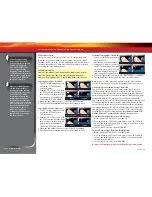
To REVERSE 
the direction of 
STEERING servo


Press/hold MENU 

green LED blinks


x

2

Press MENU

green LED blinks (x2)


Press SET 

green LED blinks


Press SET 

red LED blinks


x

8

Press SET 

to reverse 

servo direction

Press/hold MENU 

returns to driving mode

To set the SUB TRIM 
of the STEERING 
servo


Press/hold MENU 

green LED blinks


x

2

Press MENU

green LED blinks (x2)


Press SET 

green LED blinks


Press SET 

red LED blinks


x

2

Press MENU 

red LED blinks (x2)

Use Multi-Function 

knob 

to set neutral


x

8

Press SET 

to save position

Press/hold MENU 

returns to driving mode

To set the END 
POINTS of the 
STEERING servo


Press/hold MENU 

green LED blinks


x

2

Press MENU  

green LED blinks (x2)


Press SET 

green LED blinks


Press SET 

red LED blinks


x

3

Press MENU  twice

red LED blinks (x3)


Turn steering 

wheel 

to desired max 

left and right travel


x

8

Press SET 

to save each position


Turn steering wheel 

to test settings

IF END POINTS 

ARE OK:


Press/hold MENU 

returns to driving mode

IF END POINTS 

NEED TO BE 

CHANGED:


Press SET 

and repeat steps 6-8

To reset the END 
POINTS of STEERING 
servo to defaults


Press/hold MENU 

green LED blinks


x

2

Press MENU  

green LED blinks (x2)


Press SET 

green LED blinks


Press SET 

red LED blinks


x

4

Press MENU  3 times

red LED blinks (x4)


x

8

Press SET 

to reset end points

Press/hold MENU 

returns to driving mode

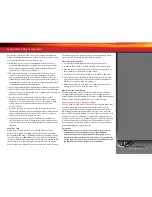
To REVERSE 
the direction of 
THROTTLE servo


Press/hold MENU 

green LED blinks


x

2

Press MENU

green LED blinks (x2)


Press SET 

green LED blinks


x

2

Press MENU

green LED blinks (x2)


Press SET 

red LED blinks


x

8

Press SET 

to reverse 

servo direction

Press/hold MENU 

returns to driving mode

To set the SUB TRIM 
of the THROTTLE 
servo


Press/hold MENU 

green LED blinks


x

2

Press MENU

green LED blinks (x2)


Press SET 

green LED blinks


x

2

Press MENU

green LED blinks (x2)


Press SET 

red LED blinks


x

2

Press MENU 

red LED blinks (x2)

Use Multi-Function 

knob 

to set neutral


x

8

Press SET 

to save position

Press/hold MENU 

returns to driving mode

To set the END 
POINTS of the 
THROTTLE servo


Press/hold MENU 

green LED blinks


x

2

Press MENU  

green LED blinks (x2)


Press SET 

green LED blinks


x

2

Press MENU  

green LED blinks (x2)


Press SET 

red LED blinks


x

3

Press MENU twice 

red LED blinks (x3)


Use throttle 

trigger 

to set desired 

max throttle or brake


Press SET 

to save

Use trigger to test

IF END POINTS 

ARE OK:


Press/hold MENU 

returns to driving mode

IF END POINTS 

NEED TO BE 

CHANGED:


Press SET 

and repeat steps 7-9

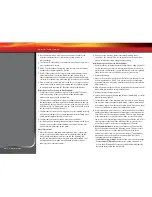
To reset the END 
POINTS of THROTTLE 
servo to defaults


Press/hold MENU 

green LED blinks


x

2

Press MENU  

green LED blinks (x2)


Press SET 

green LED blinks


x

2

Press MENU

green LED blinks (x2)


Press SET 

red LED blinks


x

4

Press MENU 3 times 

red LED blinks (x4)


x

8

Press SET 

green LED blinks (x8)

Press/hold MENU 

returns to driving mode

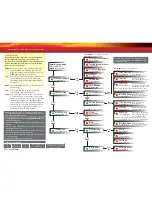
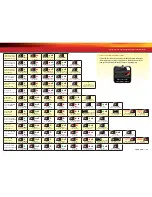
MENU TREE FORMULAS

To select functions and make adjustments to the TQ 2.4GHz transmitter without 
referencing the menu tree, turn your transmitter on, find the function in the left 
column you wish to adjust, and simply follow the corresponding steps. 

Always turn your

transmitter on first.

1

Содержание 1/16 E Revo 7105

Страница 1: ...B R U S H L E S S B R U S H L E S S B R U S H L E S S owner s manual MODEL 7007 MODEL 7107 ...

Страница 2: ... a team of professionals who aim to provide the highest level of factory support possible Traxxas models are about experiencing total performance and satisfaction not just with your model but also with the company that stands behind it We know you re excited about getting your new model on the road but it s very important that you take some time to read through the Owner s Manual This manual conta...

Страница 3: ... may also e mail customer support with your question at support Traxxas com Join thousands of registered members in our online community at Traxxas com Traxxas offers a full service on site repair facility to handle any of your Traxxas service needs Maintenance and replacement parts may be purchased directly from Traxxas by phone or online at BuyTraxxas com You can save time along with shipping an...

Страница 4: ...s around the model in order to prevent collisions The motor batteries and speed control can become hot during use Be careful to avoid getting burned Don t operate your model at night or anytime your line of sight to the model may be obstructed or impaired in any way Most importantly use good common sense at all times BATTERIES AND BATTERY CHARGING Your model uses rechargeable batteries that must b...

Страница 5: ...ally smooth the decal down with your finger as you go This will prevent air bubbles Placing both ends of the decal down and then trying to smooth it out will result in air pockets Look at the photos on the box for typical decal placement TIRE GLUING The factory tires on your model are already glued to the rims The tires must be glued to the rims to prevent the rims from spinning inside the tires T...

Страница 6: ...per Rear Body Mount Hex Hub Rear Suspension Arm Axle Carrier Pivot Ball Turnbuckle Receiver Box Light Pipe Steering Servo Front Body Mount Battery Compartment Door Battery Compartment Vent Electronic Speed Control VXL 3m Motor Velineon 380 Battery Door Release Tab Slipper Clutch Rocker Rocker Push Rod Push Rod Spring Preload Adjuster Traxxas High Current Connector ...

Страница 7: ...ear Body Mount Hex Hub Rear Suspension Arm Axle Carrier Pivot Ball Turnbuckle Light Pipe Receiver Box Steering Servo Front Body Mount Battery Compartment Door Battery Compartment Vent Electronic Speed Control VXL 3m Motor Velineon 380 Battery Door Release Tab Slipper Clutch Rocker Rocker Push Rod Push Rod Spring Preload Adjuster Traxxas High Current Connector ...

Страница 8: ...lly charge the battery pack included with your model Driving tips and adjustments for your model 3 Install the antenna See page 12 11 Maintaining your model See page 27 Install the antenna mast in the model Follow these critical steps to maintain the performance of your model and keep it in excellent running condition 4 Install batteries in the transmitter See page 12 The transmitter requires 4 AA...

Страница 9: ...ou look at wire like a garden hose current is a measure of how much water is flowing through the hose ESC Electronic Speed Control An electronic speed control is the electronic motor control inside the model Electronic speed controls use power more efficiently than mechanical speed controls so that the battery runs longer An electronic speed control also has circuitry that prevents loss of steerin...

Страница 10: ...tion of the servos made by adjusting the throttle and steering trim sliders on the face of the transmitter Thermal Shutdown Protection Temperature sensing electronics used in the electronic speed control detect overloading and overheating of the transistor circuitry If excessive temperature is detected the unit automatically shuts down to prevent damage to the electronics 2 channel radio system Th...

Страница 11: ...sed VXL 3m ELECTRONIC SPEED CONTROL Your model is equipped with the newest Traxxas 2 4 GHz transmitter with Traxxas Link The transmitter has two channels for controlling your throttle and steering The receiver inside the model has 5 output channels Your model is equipped with one servo and an electronic speed control TQ 2 4GHz Transmitter Antenna Steering Trim Multi Function Knob Throttle Trigger ...

Страница 12: ... on page 13 for more information INSTALLING THE BATTERY PACK Your model includes a 7 2 volt battery pack To properly balance the model it should be installed in the battery compartment on the left side of the model Follow these steps to install the battery Battery Installation 1 Open the battery compartment door by pressing on the release tabs 2 Install the battery pack with the battery wires faci...

Страница 13: ...ery For Increased Speed An additional battery may also be used to increase the top speed of your model by connecting the batteries in series using a Traxxas series connector Part 3063 sold separately This also requires a gearing change using the supplied optional pinion gear as described on page 25 Precautions The High Speed dual battery battery and gearing configuration is for high speed running ...

Страница 14: ...tween the receiver and the transmitter Loss of the radio signal can cause you to lose control of your model TQ 2 4GHz Radio System Basic Adjustments Throttle Neutral Adjustment The throttle neutral adjustment is located on the transmitter face and controls the forward reverse travel of the throttle trigger Change the adjustment by pressing the button and sliding it to the desired position There ar...

Страница 15: ...tops when the throttle trigger is at neutral Warning Do not apply full throttle in forward or reverse while the model is elevated 8 Once adjustments are made turn off the receiver on your model followed by the hand held transmitter Range Testing the Radio System Before each running session with your model you should range test your radio system to ensure that it operates properly 1 Turn on the rad...

Страница 16: ...vo less responsive near neutral with increasing sensitivity as the servo nears the limits of its travel range The farther you turn the knob the more pronounced the change in steering servo movement will be The term exponential comes from this effect the servo s travel changes exponentially relative to the input from the steering wheel The exponential effect is indicated as a percentage the greater...

Страница 17: ...ear the steering servos jump but the LED may not stay on 2 Apply forward throttle The LED will turn off until full throttle power is reached At full throttle the led will shine RED 3 Move the trigger forward to apply the brakes Note that braking control is fully proportional The LED will turn off until full braking power is reached At full brakes the LED will shine RED 4 Return the throttle trigge...

Страница 18: ...ection circuitry constantly monitors the battery voltage When the battery voltage begins to reach the minimum recommended discharge voltage threshold for LiPo battery packs the VXL 3m will limit the power output to 50 throttle When the battery voltage attempts to fall below the minimum threshold the VXL 3m will shut down all motor output The LED on the speed control will slowly blink red indicatin...

Страница 19: ...at are available and the methods with which they can be charged it s impossible to give exact run times for the model Another major factor which affects run time is how the model is driven Run times may decrease when the model is driven repetitively from a stop to top speed and with repetitive hard acceleration Tips for Increasing Run Time Use batteries with the highest mAh rating you can purchase...

Страница 20: ...bmerge the motor under water Do not gear the motor by temperature when running in wet conditions The motor will be cooled by water contact and will not give an accurate indication of appropriate gearing After Running Your Vehicle in Wet Conditions 1 Drain the tires by spinning the tires at full throttle to sling the water out An easy way to do this is to remove the body and set the truck upside do...

Страница 21: ...ver and remove the receiver Receiver Installation 1 Route the antenna wire out of the receiver box cover A Place the cover on the chassis 2 Route the servo and speed control leads into the receiver box cover Use the molded in wire guides to align the servo and speed control leads and antenna wire B 3 Apply a small bead of silicone grease Traxxas part 1647 to the wire clamp C 4 Install the wire cla...

Страница 22: ...e suspension damping effect Changing the oil to a higher viscosity oil will increase damping Lowering the viscosity of the oil will cause the suspension damping to be reduced Damping should be increased with higher viscosity oil if the model is bottoming easily over jumps Damping should be decreased with thinner viscosity oil if the model is hopping over small bumps and feels unstable The viscosit...

Страница 23: ...rge spur gear The purpose of the slipper clutch is to prevent over stressing of the drivetrain and transmission gears It may also be used to regulate the amount of power sent to the rear wheels to prevent tire spin When it slips the slipper clutch makes a high pitch whining noise To adjust the slipper clutch remove the receiver box cover The slipper clutch is integrated into the main spur gear on ...

Страница 24: ...o will increase torque but reduce top speed Installing a pinion with more teeth or a spur gear with fewer teeth will decrease the final drive ratio which will generally increase top speed but reduce torque However installing too large a pinion will overgear the car which will reduce performance and may overheat the motor and speed control Use the following formula to calculate the overall ratio fo...

Страница 25: ...r cover by removing the single screw on the top of the gear cover The motor uses an aluminum mount for quick easy motor access and gearing adjustment To remove the motor first open the right battery door and slide out the ESC Next remove the single large hex screw using the supplied 2 5mm wrench Then rotate the motor and mount to the side of the model and slide backward off the post The motor moun...

Страница 26: ...spension geometry of the model The offsets and dimensions designed into the model s wheels are intentional therefore Traxxas cannot recommend the use of other non Traxxas wheels with different specifications Experimentation with different types of tires is recommended to see which ones work the best on the terrain where the model is run Soft compound tires with many short spikes generally work bet...

Страница 27: ...olong the life of the seals If you are experiencing leakage around the top of the shock inspect the bladder in the top cap for signs of damage or distortion from overtightening If the bottom of the shock is leaking then it is time for a rebuild The Traxxas rebuild kit for two shocks is part 5462 Suspension Periodically inspect the model for signs of damage such as bent or dirty suspension pins ben...

Страница 28: ...nd point adjustment settings you select will represent what you wish to be the servo s maximum travel the Steering Percentage or Braking Percentage functions will not override the End Point settings Steering and Throttle Sub Trim The Sub Trim function is used to precisely set the neutral point of the steering or throttle servo in the event that simply setting the trim knob to zero does not complet...

Страница 29: ...mes repeatedly 4 Press SET once The status LED will blink green once repeatedly 5 Press MENU once The status LED will blink green twice repeatedly 6 Press SET The memory is now selected to be deleted Press SET to delete the model Press and hold MENU to return to driving mode Failsafe Your Traxxas radio system is equipped with a built in failsafe function that returns the throttle to its last saved...

Страница 30: ...o save Push forward to desired endpoint and press set to save To reset max throw Let go of controls and press SET The menu tree below shows how to navigate through the TQ 2 4GHz transmitter s various settings and functions Press and hold MENU to enter the menu tree and use the following commands to navigate through the menu and select options MENU When you enter a menu you always start at the top ...

Страница 31: ...ks x2 Press SET green LED blinks Press SET red LED blinks x3 Press MENU twice red LED blinks x3 Turn steering wheel to desired max left and right travel x8 Press SET to save each position Turn steering wheel to test settings IF END POINTS ARE OK Press hold MENU returns to driving mode IF END POINTS NEED TO BE CHANGED Press SET and repeat steps 6 8 To reset the END POINTS of STEERING servo to defau...

Страница 32: ...B R U S H L E S S B R U S H L E S S B R U S H L E S S 1100 Klein Road Plano Texas 75074 1 888 TRAXXAS 100205 KC1256 R01 owner s manual MODEL 7007 MODEL 7107 ...

Отзывы: