Traeger 9352-USB Скачать руководство пользователя страница 1

Söllnerstr. 9 92637 Weiden

[email protected]

+49 (0)961 48 23 0 0
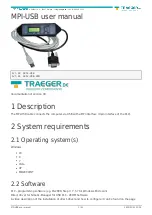
MPI-USB user manual

1 / 93

2022/01/21 01:28

MPI-USB user manual

Art.Nr. 9352-USB
Art.Nr. 9352-USB.05M

documentation of version XX

1 Description

The MPI-USB cable connects the computer via USB with a MPI interface (9 pin interface of the PLC).

2 System requirements

2.1 Operating system(s)

Windows

10
8
7
Vista
XP
ME/2000/NT

2.2 Software

PLC - programming software (eg. PG2000, Step © 7, S7 for Windows, Microwin)
Direct driver for Simatic-Manager for USB PLC - VCOM Software
A video description of the installation of direct-driver and how to configure it can be found on the page

Содержание 9352-USB

Страница 1: ...SB cable connects the computer via USB with a MPI interface 9 pin interface of the PLC 2 System requirements 2 1 Operating system s Windows 10 8 7 Vista XP ME 2000 NT 2 2 Software PLC programming soft...

Страница 2: ...s S7 400 provides baud rates up to 12M FM devices Sinamix Step7 direct driver up V1 20 or PLCVCom up V2 71 MicroMaster and other electrical drives and inverter feds Step7 direct driver up V1 20 or PLC...

Страница 3: ...ning successfully the panel is ready to be connected to the PLC 4 2 Software To communicate with the PLC please install following products for MPI USB S7 USB MPI II only USB MPI LAN and S7 LAN Product...

Страница 4: ...lation for 32 bit systems The S7 Interface S7 USB MPI USB or MPI II Kabel over USB as well as the devices of TeleService familiy will be connected to USB 1 1 compatible port of the PC This opens the H...

Страница 5: ...en info traeger de 49 0 961 48 23 0 0 MPI USB user manual 5 93 2022 01 21 01 28 Enter as source the folder USB Treiber x86 Either in the folder where the downloaded drivers were extracted or the direc...

Страница 6: ...7 Weiden info traeger de 49 0 961 48 23 0 0 MPI USB user manual 6 93 2022 01 21 01 28 The message of windows logo test skip with Continue Anyway After copying the data appears a little moment later th...

Страница 7: ...tr 9 92637 Weiden info traeger de 49 0 961 48 23 0 0 MPI USB user manual 7 93 2022 01 21 01 28 Upon a successful installation the PI_Usb Sys driver will be displayed without any warnings in the device...

Страница 8: ...nual 8 93 2022 01 21 01 28 Will this entry in the device manager shown with a yellow exclamation mark then please install the driver again or look in the driver properties about the reason If the driv...

Страница 9: ...r install shields 4 4 USB driver installation for Win7 64 bit The S7 Interface S7 USB MPI USB or MPI II Kabel over USB as well as the devices of TeleService familiy will be connected to USB 1 1 compat...

Страница 10: ...S llnerstr 9 92637 Weiden info traeger de 49 0 961 48 23 0 0 MPI USB user manual 10 93 2022 01 21 01 28 With a right mouse button click you will open the properties of the new device...

Страница 11: ...S llnerstr 9 92637 Weiden info traeger de 49 0 961 48 23 0 0 MPI USB user manual 11 93 2022 01 21 01 28 Now select Update Driver...

Страница 12: ...l 12 93 2022 01 21 01 28 Please select Browse my computer for driver software and de ne as source the folder USB Treiber x64 Either in the folder where the downloaded drivers were extracted or the dir...

Страница 13: ...o traeger de 49 0 961 48 23 0 0 MPI USB user manual 13 93 2022 01 21 01 28 Please press install and a little moment later appears the success message To verify the successful installation you can look...

Страница 14: ...7 Weiden info traeger de 49 0 961 48 23 0 0 MPI USB user manual 14 93 2022 01 21 01 28 Here may appear no exclamation mark If the driver has to be updated please use the function Update driver in the...

Страница 15: ...o be deleted please use the function Uninstall and set the check box in Delete the driver software for this device If you install older versions of PLCVCom Step7 direct driver or S7IFC the actual usb...

Страница 16: ...First line 02PD00 Second line 02AG04 Display description from left to right First line 02 In this example there are two active stations on the MPI BUS PD letter de nition of the PC baud rate Display D...

Страница 17: ...AG The type of the protocol which is used for the cable to run up to the computer Display Description AG Unknown because there is no connection or an older protocol version before 5 0 is used Ag v5 1...

Страница 18: ...te down to the PG PC menu Press enter PG PC Baudrate Press Enter to con gure the Baudrate PG Baud from PC Search for the entry from PC and con rm with enter The cable is now ready to work Go back to t...

Страница 19: ...lems with the use of PLC VCOM software go to the chapter PLC VCOM and look there for operating instructions 6 3 Programming software to use with direct access After you have adjusted and connected the...

Страница 20: ...the AG Interface COM port in the section Interfaces 4 Con gure the baud rate in the section Bus access to 19 2k Below change the value for PC MPI to 187 5kBaud 5 Save your con guration by pressing OK...

Страница 21: ...window appears Now you can edit the blocks in the PLC 6 3 2 Set PG PC interface This step is required for the following software SIMATIC Step 7 Manager v5 2 SP1 Windows Control Center WinCC v6 0 Windo...

Страница 22: ...ttings If you can t nd these entries go ahead with step PC Adapter orTCP IP installation 6 3 2 1 PC Adapter Auto MPI PROFIBUS 4 Click on Choose to add these entries to the PG PC interface con guration...

Страница 23: ...d the RFC1006 required elements to the PG PC interface con guration 8 In the dialog Select choose TCP IP and click on Install 9 After successful installation click Close 10 Back to the Set PG PC inter...

Страница 24: ...0 961 48 23 0 0 MPI USB user manual 24 93 2022 01 21 01 28 11 Select PC Adapter MPI and click Properties 12 Open the properties dialog Choose the register Local Connection 13 Set here the COM port 14...

Страница 25: ...1 01 28 15 In the register card MPI choose the Transmission Rate to 187 5 kbit s Change the Highest Station Address HSA to 126 16 Acept your settings with OK and exit the PG PC interface setting dialo...

Страница 26: ...rstr 9 92637 Weiden info traeger de 49 0 961 48 23 0 0 MPI USB user manual 26 93 2022 01 21 01 28 18 In the registry card Locale connection you have to set the COM Port 19 Set the Transmission Rate to...

Страница 27: ...me RT Con guration 24 If you want to use ProTool Pro RunTime you can set the PG PC Interface by selecting the entry DPSONLINE Therefore you have to select Access Point of Application and con gure it a...

Страница 28: ...rmed with Create To use one of the other options please go ahead and read in the manual of WinCC software 5 Please wait until the project is created The project content will be shown in the left part...

Страница 29: ...ation 9 Now you are able to type in the name of the connection With a click on Con guration a new dialog will appear Now you are able to set the properties of the connection Set up the station address...

Страница 30: ...on and click again on Properties Now you can see all the variables which has been created for this connection In fact this connection is a new connection so there should not be any variable in the lis...

Страница 31: ...d fault diagnosis To clean up errors faster the WinCC Software o ers a tool named Channel Diagnosis This tool analyses all connections from your WinCC software For demonstration purposes please stop t...

Страница 32: ...the connection runs properly Start the connection from your WinCC Explorer The Channel Diagnosis dialog marks the connection with a green hook if everything worked out 6 3 5 Windows Control Center exi...

Страница 33: ...ub menu Communication In the context menu click on Add Connection 5 A new con guration window Connections opens in the right part of the main window This o ers you di erent setting options Important f...

Страница 34: ...h the Delta transfer to On in this example we set it O 9 Press the button Transfer to start communication with the terminal Your project is about to be transferred The WinCC exible software is now abl...

Страница 35: ...con guration In the sector Net parameter choose the interface which uses your module on the PLC e g MPI Con gure the baud rate to 187 5 6 The button More leads you to a small dialog where the Highest...

Страница 36: ...ransfer the project just click on File Download Start Project Download or click on the right symbol Please wait while the project is transferred The communication between the operator panel is now est...

Страница 37: ...o the dialog 3 Click on Communications to start the next dialog In the sector Address set up the Remote listbox with the station address of the PLC e g 2 If you skipped the point b PD PC set interface...

Страница 38: ...icate parallel with one PLC The following steps describe how to con gure this mode in hardware and software 2 The module or cable has to switched in the PPIMulti Mode This mode can be switched in the...

Страница 39: ...S llnerstr 9 92637 Weiden info traeger de 49 0 961 48 23 0 0 MPI USB user manual 39 93 2022 01 21 01 28 8 In the menu PPI you are able to con gure diverse settings like for e g HSA...

Страница 40: ...01 21 01 28 9 In the menu Local Connection you select the com port Interface to to the port which is served from the tool PLCVCom 10 Click on the button OK and click in the left down area in your wind...

Страница 41: ...nd the picture changes it like this 13 Prove the dialog with OK until you would be in the main window The communication to the PLC is now ready 6 3 9 S7 for Windows v5 02 1 Start the S7 for Windows so...

Страница 42: ...rface standard and set up the con guration data as descriped below Area Preferences from PC Area PLC Type S7 Area Protocol MPI Converter Area Serial Port Choose the virtual COM port which has been cre...

Страница 43: ...area MPI Converter A new dialog appears where you can select the desired PLC 5 The dialog displays all the PLCs that can be found in your MPI bus Select the desired one and con rm with OK 6 Close the...

Страница 44: ...erminal via MPI II MPI USB Note The TP070 and OP73 can be con gured via the RS485 with the MPI II MPI USB Key Display Name 01P 02AG Take the cable and press the Enter Key Control elements see chapter...

Страница 45: ...l please refer to the manufacturer s instructions 6 4 1 Direct setting of a slave address to a passive Pro bus Slave With the S7 LAN module or MPI LAN cable and Step7 direct driver V1 21 or later and...

Страница 46: ...nformation Mode Cabel mode Addresses Version Password Con guration password Restart Restart the cable WerksEin Set the con guration to manufacture settings Language Select the language Protocol Protoc...

Страница 47: ...set The cable reset Default settings Press the enter key to change the cable con guration to default Language In this menu you can choose the language of your choice Choose between German and English...

Страница 48: ...y for MPI II Because this cable take its power out of the PLC 360mA Default value The cable takes power out of the USB interface Some computers are blocking the drivers for the communication if the US...

Страница 49: ...t Mail Tuning Factory defaults PPI Boot o Emergency Loader 8 1 Language selection Select the menu Con guration to change the language permanently 8 2 User interface Select near Search which interfaces...

Страница 50: ...d On the rightmost position the actual OS version on the harddisk is displayed The background of the lines could use the following colours White The OS of the device is up to date Light blue The OS of...

Страница 51: ...EService MPI PPI Parameterize TELEService MPI II MPI USB Choices Bus con guration Parameterize TELEService S7 USB Bus con guration S7 LAN MPI LAN Choices Bus con guration Network settings The button P...

Страница 52: ...ration in the CPU s PD PC is the only master on the bus The TS Adapter is the one and only master in the MPI bus adapter hast to speak to all passive clients Pro le Bustype of the connection Local cli...

Страница 53: ...Here you could enter the Subnetmask of your network Gateway address Here you could enter the IP address of your Gateway Usual a router address Device name Here you could change the device name Factory...

Страница 54: ...all passive clients Address Which local station address is used for the TS Adapter Please consider that a programming device has normally the number 0 operator panel have 1 CPU s use 2 FM CP s 3 etc...

Страница 55: ...rier sound S0 1 automatic connection after 1 ring Hang up The deselection text consists of 2 parts Switch to command mode AT start command H Hang up connection Location Dialing The phone system uses T...

Страница 56: ...2k 38 4k 57 6k and 115 2kBaud Parity The parity could be choosen but this is modem dependend because some modems could not handle the parity bit None There is no parity testing Odd The amount of bits...

Страница 57: ...he username and password is valid the connection is hang up and the TS adapter calls back the con gured callback number 8 5 5 Index GSM ISDN SMS Information about the three di erent devices Analog Mod...

Страница 58: ...at of the provider is set Manual automatic The modem tries to select manually the provider if this fails an automatic search is done Unknown Unknown response from GSM Modem Refresh The button Refresh...

Страница 59: ...ECEIVE SMS DTMF QUITTUNG SEND MAIL SEND RECEIVE DTMF CONFIRMATION Attention before setting ON check con guration after activating the device will go on the MPI bus and tries to connect to the de ned P...

Страница 60: ...con gured PIN Number is wrong for the inserted SIM Card The SIM Card is not or wrong inserted or the SIM Card is a 5V Type Possible MPI Bus error messages MPI Pro bus Con guration erroneous Timeout a...

Страница 61: ...are wrong unknown CPU XXX SSAP YYh FC ZZh length UUU ErrCode 16 Unknown function code has been transmitted to the cable CPU XXX SSAP YYh FC ZZh length UUU ErrCode 17 Destination SAP are de ned till 3F...

Страница 62: ...access over PPP Username Username for the Internet access Password Userpassword for the Internet access Mail Server Name of the SMTP Email Servers which is used to send the E Mail Mail from Source E...

Страница 63: ...r M20 Terminal the control lines on the serial port are not used In that case the TELEService function is not working With this property the control lines are no longer used and therefore the A20 M20...

Страница 64: ...y defaults This button sets the con guration of the selected device to factory defaults 8 8 PPI Boot o In PPI boot mode S7IFC cannot communicate with the cable To disable the PPI boot mode click on th...

Страница 65: ...n The MPI cable manager allows you to install an update in your cables and modules and con gure them The MPI cable manager can be used for the following products MPI LAN cable Art ID 9352 LAN S7 LAN m...

Страница 66: ...28 2 Following the Language selection the installation starts and a welcome screen is displayed Next click onto the button Next To change the installation path click on Browse Then click Continue 3 S...

Страница 67: ...23 0 0 MPI USB user manual 67 93 2022 01 21 01 28 4 Wait for the installation of the les 5 End the installation after a successful copy of data with Finish 9 3 Overview 9 3 1 Language After starting...

Страница 68: ...port you device is connected at Only the COM port which was aktive at starting the MPI Kabel Manager are shown Search update the COM port listed in set interface and put the Kabelmanager to the respe...

Страница 69: ...em This button also is selectable after version check With version check your cable which is connected to the COM Port reviewed The symbol next to version check shows the running update While update d...

Страница 70: ...r the connection these are displayed at connection street ZIP code and country Telephone number you can reach the TS adapter 9 3 4 2 Connect At the moment not implemented In this dialog the connection...

Страница 71: ...tically TS Adapterfunktion is ACTIVE To disable press TS function The MPI cable acts like an TS Adapter There will an answer to TS spezi c protocols the adapter could now con gured An attached Modem w...

Страница 72: ...4 3 2 TS function With this button you select the function of the MPI cable as TS or PC adapter Right of this button the actual state of the MPI cable is displayed 9 3 4 3 3 con gure adapter In the fo...

Страница 73: ...S Adapter Please consider that a programming device has normally the number 0 operator panel have 1 PLC s use 2 FM CP s 3 etc Please Never use the same station number for 2 di erent stations network r...

Страница 74: ...ing is composed of 2 elements Change to command mode AT start command H Hand Up connection There are 2 possible calling technics MFV tone the telphone number is transfer by several frequencies IWV pul...

Страница 75: ...TS Adapter is selected The transfer rate could choosen between the follwing values 2400 4800 9600 19 2k 38 4k 57 6k and 115 2kBaud The Parity could be choosen but this is modem dependant because some...

Страница 76: ...a telephone line These have to enter for each new call After 3 wrong retries the connection is hanged up so you must call again Not so with an original TS adapter After changing the password for one u...

Страница 77: ...e 49 0 961 48 23 0 0 MPI USB user manual 77 93 2022 01 21 01 28 You could choose the Location of the Modem ISDN modem Type Choose the type of the ISDN network switch AT T 5ESS Nothern Telecom DMS 100...

Страница 78: ...than a minute At end the possible provider are listed for selection With Automatic the GSM Modem tries to connect automatically to a provider On the right side of the button the actual used selection...

Страница 79: ...y 31 Best receive quality Messages The possible error conditions for the modem mpi bus problems or other problems are displayed in this text eld Firstly the modem related information is shown Message...

Страница 80: ...oken SSAP YYh FC ZZh length UUU ErrCode 12 Data protocol with Source address 255 Broadcast is useless CPU XXX SSAP YYh FC ZZh length UUU ErrCode 13 The sender XXX of the received data protocol is unkn...

Страница 81: ...y with TELESERVICE GSM Receive of DTMF only with with TELESERVICE GSM TS local station address should not be used twice in the MPI Pro bus PLC from this station address the Flagword and Data block is...

Страница 82: ...2022 01 21 01 28 9 3 5 Tuning This tab is only used in some special cases If you press the button Check Adapter the cable is connected und after that the following dialog is displayed There are the fo...

Страница 83: ...rrect bus type no changes are needed In special cases the MPI Bus could be selected as PPI For example This application and the PLC are powered on at the same time The application is communicating imm...

Страница 84: ...dy press Next to go on 3 In the next dialog you can choose the program folder for your start menu Go on with Next 10 2 1 USB driver installation using Windows NT 2000 XP This part of the description i...

Страница 85: ...ort Already occupied COM port can be viewed in Windows Device Manager if you are not sure which COM ports are still available If you are not sure which port is unused press OK Later you can start this...

Страница 86: ...rol panel Hardware 11 The hardware assistent wants you to install the USB Serial driver Click on Next to con gure the driver search 12 Choose in the next dialog Search for the best device driver recom...

Страница 87: ...PLCVCOM is in the connected state that means a cable is present and usable 10 3 Overview Beside your watch in your Windows Taskbar appears a new Symbol This one is for the PLC VCom software It shows t...

Страница 88: ...tatus half right shows the IP address of the connecting cable Top right Click here to search or select a device right middle name of the connected cable bottom right displays information about current...

Страница 89: ...ger Installs the PLC VCOM COM port in Device Manager required only for S7 for Windows and S7 Doctor software RFC1006 activation of RFC1006 communication method no network card selection Passes the rou...

Страница 90: ...other networks because the router does not transmit the broadcast for the automatic recognition so that these users are not recognized This point is not noted for USB devices because these are all dir...

Страница 91: ...to Send from the PLC In 5 M5V Ground of the 5V IN 6 P5V 5V output Out 7 P24V 24V Supply input IN 8 Ltg_A Data line A BiDi 9 RTS PG Request to Send to the PLC Out Note The shield is attached with the...

Страница 92: ...S llnerstr 9 92637 Weiden info traeger de 49 0 961 48 23 0 0 MPI USB user manual 92 93 2022 01 21 01 28...

Страница 93: ...Step 7 Manager v5 2 SP1 27 6 3 4 Windows Control Center WinCC v6 0 28 6 3 4 1 MPI Con guration 29 6 3 4 2 TCP IP Con guration 30 6 3 4 3 Communication and fault diagnosis 31 6 3 5 Windows Control Cent...

Отзывы: