background image

106

Chapter 16


Manage the Router 

16  1   Update the Firmware

TP-Link aims at providing better network experience for users. 
We will inform you through the web management page if there’s any new firmware 
available for your router. Also, the latest firmware will be released at the TP-Link official 
website 

www.tp-link.com

, and you can download it from the 

Support

 page for free.

Note: 

•  Back up your router’s configurations before firmware update.
•  Do NOT turn off the router during the firmware update. 

16  1  1   Auto Update

1. Visit 

http://tplinkwifi.net

, and log in with your TP-Link ID or the password you set for 

the router.

2. Go to 

Advanced

 > 

System 

>

 Firmware Update

.

3. Enable 

Auto Update

.

4. Specify the 

Update Time

 and save the settings.

The router will update firmware automatically at the specified time when new version is 
available.

16  1  2   Online Update

1. Visit 

http://tplinkwifi.net

, and log in with your TP-Link ID or the password you set for 

the router.

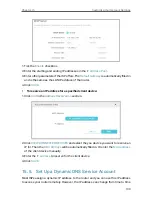
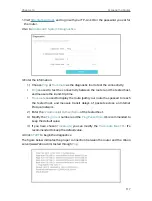
2. When the latest firmware is available for your router, the update icon   will display in 

the top-right corner of the page. Click the icon to go to the 

Firmware Update

 page.

Alternatively, you can go to 

Advanced

 > 

System 

>

 Firmware Update

, and click 

CHECK 

FOR UPDATES

 to see whether the latest firmware is released.

Содержание Archer AX73

Страница 1: ...2022 TP Link 1910013167 REV1 2 0 User Guide AX5400 Wi Fi 6 Router Archer AX73...

Страница 2: ...TP Link Tether App 14 4 3 Manually Set Up Your Internet Connection 15 4 4 Set Up the Router as an Access Point 18 4 5 Set Up an IPv6 Internet Connection 18 Chapter 5 TP Link Cloud Service 22 5 1 Regi...

Страница 3: ...age Device 47 9 1 1 Access the USB Device Locally 47 9 1 2 Access the USB Device Remotely 48 9 1 3 Customize the Access Settings 50 9 2 Media Sharing 52 9 3 Time Machine 53 Chapter 10 HomeShield 55 10...

Страница 4: ...ggregation 97 15 3 Configure to Support IPTV Service 98 15 4 Specify DHCP Server Settings 99 15 5 Set Up a Dynamic DNS Service Account 100 15 6 Create Static Routes 102 Chapter 16 Manage the Router 10...

Страница 5: ...orresponding page For example Advanced Wireless WDS means the WDS function page is under the Wireless menu that is located in the Advanced tab Note Ignoring this type of note might result in a malfunc...

Страница 6: ...ng rated performance location connection quality and client condition Use of Wi Fi 6 802 11ax and features including OFDMA MU MIMO 1024 QAM and HT160 require clients to also support the corresponding...

Страница 7: ...Chapter 1 Get to Know About Your Router This chapter introduces what the router can do and shows its appearance It chapter contains the following sections Product Overview Appearance...

Страница 8: ...convenient to set up and use the TP Link router due to its intuitive web interface and the powerful Tether app 1 2 Appearance 1 2 1 Top Panel The router s LEDs view from left to right are located on t...

Страница 9: ...er s Ethernet port Off No powered on device is connected to the router s Ethernet port USB On The inserted USB device is ready to use Blinking A USB device is being identified Off No device is plugged...

Страница 10: ...your router Reset Button Press and hold the button until the Power LED blinks to reset the router to its factory default settings LAN Port 1 4 For connecting your PC or other wired devices to the rout...

Страница 11: ...Chapter 2 Connect the Hardware This chapter contains the following sections Position Your Router Connect Your Router...

Страница 12: ...a horizontal surface such as on a shelf or desktop The device also can be mounted on the wall as shown in the following figure 143 9 14 10 3 2 D H NOTE 5 207 D 8 179mm H 3mm Note The diameter of the s...

Страница 13: ...ur computer to the router Method 1 Wired Turn off the Wi Fi on your computer and connect the devices as shown below Ethernet cable Method 2 Wirelessly 1 Find the SSID Network Name and Wireless Passwor...

Страница 14: ...onfigured if the wireless function of the router is disabled Also the WPS function will be disabled if your wireless encryption is WEP Please make sure the wireless function is enabled and is configur...

Страница 15: ...Chapter 3 Log In to Your Router...

Страница 16: ...s Microsoft Internet Explorer Mozilla Firefox or Apple Safari Follow the steps below to log in to your router 1 Set up the TCP IP Protocol in Obtain an IP address automatically mode on your computer 2...

Страница 17: ...on built in automates many of the steps and verifies that those steps have been successfully completed Furthermore you can also set up an IPv6 connection if your ISP provides IPv6 service It contains...

Страница 18: ...mplete service from TP Link remote management TP Link DDNS and more log in with your TP Link ID or click Sign Up Now to get one Then follow the instructions to bind the cloud router to your TP Link ID...

Страница 19: ...ent internet connection settings You can also modify the settings according to the service information provided by your ISP Follow the steps below to check or modify your internet connection settings...

Страница 20: ...t Connection 2 If you choose Static IP enter the information provided by your ISP in the corresponding fields 3 If you choose PPPoE enter the username and password provided by your ISP PPPoE users usu...

Страница 21: ...r the username and password and choose the Secondary Connection provided by your ISP Different parameters are needed according to the Secondary Connection you have chosen 5 Click SAVE Tips If you use...

Страница 22: ...able 4 Log in again to the web management page http tplinkwifi net and go to Advanced Quick Setup 5 Configure your wireless settings and click Next 6 Confirm the information and click SAVE Now you can...

Страница 23: ...known information provided by your ISP 4 Fill in information as required by different connection types 1 Static IP Fill in blanks and click SAVE 2 Dynamic IP SLAAC DHCPv6 Click Advanced to input furt...

Страница 24: ...er the username and password for the IPv6 connection 4 6to4 Tunnel An IPv4 internet connection type is a prerequisite for this connection type Manually Set Up Your Internet Connection Click Advanced t...

Страница 25: ...ndows users are recommended to choose from the first two types Fill in Address Prefix provided by your ISP and click SAVE 6 Click Status to check whether you have successfully set up an IPv6 connectio...

Страница 26: ...ll notify you when an important firmware upgrade is available Surely you can also manage multiple TP Link Cloud devices with a single TP Link ID This chapter introduces how to register a new TP Link I...

Страница 27: ...ink ID refer to Manage the User TP Link IDs Once you have registered a TP Link ID on the web management page you can only register another TP Link ID via the Tether APP Please refer to Manage the Rout...

Страница 28: ...ssword 2 Enter the current password then a new password twice And click SAVE 5 3 Manage the User TP Link IDs The TP Link ID used to log in to the router for the first time will be automatically bound...

Страница 29: ...TP Link ID and focus on the Bound Accounts section 3 Click enter another TP Link ID as needed and click SAVE Note If you need another TP Link ID please register a new one via the Tether app Refer to M...

Страница 30: ...d log in with your TP Link ID Note If you don t have a TP Link ID create one first 3 Connect your device to the router s wireless network 4 GobacktotheTetherapp selectthemodelofyourrouterandloginwitht...

Страница 31: ...Chapter 6 Network Map...

Страница 32: ...kwifi net and log in with the password you set for the router 2 Go to Network Map 3 Click each network device icon to check and manage general network settings Click Internet to check internet status...

Страница 33: ...29 Chapter 6 Network Map Click Mesh Devices to view the devices that form a mesh network with the router...

Страница 34: ...so they cannot access your network or set Speed Limit to limit their upload and download speeds To limit the speeds of a device 1 Click in the Speed Limit column 2 Enable Speed Limit 3 Set the downlo...

Страница 35: ...ings This chapter guides you on how to configure the wireless settings It contains the following sections Specify Wireless Settings Schedule Your Wireless Function Use WPS for Wireless Connection Adva...

Страница 36: ...s speed and efficiency Noted that only when your clients also support OFDMA can you fully enjoy the benefits It is disabled by default 1 Go to Advanced Wireless Wireless Settings 2 Enable OFDMA To ena...

Страница 37: ...the network in Password The value is case sensitive Note If you change the wireless settings with a wireless device you will be disconnected when the settings are effective Please write down the new...

Страница 38: ...ntly enhancing the network efficiency 1 Go to Advanced Wireless Wireless Settings 2 Make sure Smart Connect is disabled and enable MU MIMO for the 5 GHz band Note MU MIMO works only on the 5 GHz band...

Страница 39: ...7 3 Use WPS for Wireless Connection Wi Fi Protected Setup WPS provides an easier approach to set up a security protected Wi Fi connection 1 Visit http tplinkwifi net and log in with your TP Link ID o...

Страница 40: ...supported devices can connect to your router with the PIN The default PIN is printed on the label of the router 7 3 3 Push the WPS Button Click Start on the screen or directly press the router s WPS b...

Страница 41: ...nel once the radar signal is detected on a channel allocated to radar devices to ensure lag free network experience Beacon Interval Enter a value between 40 and 1000 in milliseconds to determine the d...

Страница 42: ...hapter 7 Wireless Settings Group Key Update Period Enter a number of seconds minimum 30 to control the time interval for the encryption key automatic renewal The default value is 0 meaning no key rene...

Страница 43: ...nt or workplace you can create a guest network for them In addition you can customize the guest network according to your needs It contains the following sections Create a Network for Guests Set Up Po...

Страница 44: ...your guests to manually input the SSID for guest network access 3 Select the Security type and customize your own password If No security is selected no password is needed to access your guest networ...

Страница 45: ...ly connected guests will be redirected to for example the official website of your shop 1 Visit http tplinkwifi net and log in with your TP Link ID or the password you set for the router 2 Go to Wirel...

Страница 46: ...tional Click to edit the Login Page You can customize the appearance and content of the login page 8 Click SAVE 8 3 Limit the Bandwidth of the Guest Network 1 Visit http tplinkwifi net and log in with...

Страница 47: ...r the network 5 Click SAVE Now you can limit the bandwidth of the guest network 8 4 Specify the Effective Time of the Guest Network 1 Visit http tplinkwifi net and log in with your TP Link ID or the p...

Страница 48: ...set for the router 2 Go to Advanced Wireless Guest Network Locate the Guest Permissions section 3 Customize guest network options according to your needs Allow guests to see each other Tick this check...

Страница 49: ...45 Chapter 8 Guest Network 4 Click SAVE Now you can ensure network security and privacy...

Страница 50: ...to share files and media from the USB storage devices over your home network locally or remotely through the internet The router supports USB external flash drives and hard drives It contains the foll...

Страница 51: ...ke sure its file system is FAT32 exFat NTFS or HFS Before you physically disconnect a USB device from the router safely remove it to avoid data damage Go to Advanced USB USB Storage Device and click R...

Страница 52: ...and a password to deny anonymous access to the USB disks you should select the Registered User radio box To learn how to set up an account for the access refer to To Set Up Authentication for Data Sec...

Страница 53: ...rney Note If your ISP assigns a private WAN IP address such as 192 168 x x or 10 x x x you cannot use this feature because private addresses are not routed on the internet Follow the steps below to co...

Страница 54: ...hird party app for network files management Tips Click Set Up a Dynamic DNS Service Account to learn how to set up a domain name for you router 9 1 3 Customize the Access Settings By default all the n...

Страница 55: ...ocus on the File Sharing section Specify sharing folders that you want to share and click SAVE To Set Up Authentication for Data Security You can set up authentication for your USB storage device so t...

Страница 56: ...equired to enter the sharing password for USB access 2 Due to Windows credential mechanism you might be unable to access the USB disk after changing Authentication settings Please log out from the Win...

Страница 57: ...section Note Here we take Windows 7 as an example Tablet Use a third party DLNA supported player 9 3 Time Machine Time Machine backs up all files on your Mac computer to a USB storage device connecte...

Страница 58: ...pter 9 USB Settings 3 Tick the checkbox to enable Time Machine 4 Click Select to select a location for Time Machine backups 5 Set the Size Limit for Backups Note 0 means no limit for the space 6 Click...

Страница 59: ...res built in TP Link HomeShield Whether protecting your sensitive data or limiting the access of kids and guests TP Link HomeShield provides you the tools you need to fully manage your network It cont...

Страница 60: ...DDoS attacks To use this feature download Tether to enjoy the HomeShield service 1 Scan the QR code or get the Tether app from the Apple App Store or Google Play OR 2 Launch the Tether app and log in...

Страница 61: ...ID If you don t have an account create one first 3 Log in to your router and tap the HomeShield tab to use this feature 10 3 Network Analysis Optimization TP Link HomeShield provides many tools for yo...

Страница 62: ...58 Chapter 10 HomeShield 2 Launch the Tether app and log in with your TP Link ID If you don t have an account create one first 3 Log in to your router and tap the HomeShield tab to use this feature...

Страница 63: ...Chapter 11 OneMesh with Seamless Roaming This chapter introduces the TP Link OneMeshTM feature It contains the following sections Set Up a OneMesh Network Manage Devices in the OneMesh Network...

Страница 64: ...e same wireless settings including network name password access control settings and more Seamless Roaming Devices automatically switch between your router and extenders as you move through your home...

Страница 65: ...page Note To check full list of TP Link OneMesh devices visit https www tp link com onemesh compatibility 5 If you have set up the extender to join the OneMesh network it will be listed on the router...

Страница 66: ...in the network 1 Visit http tplinkwifi net and log in with your TP Link ID or the password you set for the router 2 Go to Network Map 3 Click to view all mesh devices and click to view all connected...

Страница 67: ...eamless Roaming 4 Manage the OneMesh device as needed You can Change device information Click Manage Device to redirect to the web management page of this device Click Leave OneMesh to delete this dev...

Страница 68: ...n protect your home network from cyber attacks block or allow specific client devices to access your network using Access Control or you can prevent ARP spoofing and ARP attacks using IP MAC Binding I...

Страница 69: ...ttings 12 2 Access Control Access Control is used to block or allow specific client devices to access your network via wired or wireless based on a list of blocked devices Blacklist or a list of allow...

Страница 70: ...means the selected devices have been successfully added to the blacklist To allow specific device s 1 Select Whitelist and click SAVE 2 Your own device is in the whitelist by default and cannot be del...

Страница 71: ...will appear on the screen which means the device has been successfully added to the whitelist Done Now you can block or allow specific client devices to access your network via wired or wireless usin...

Страница 72: ...password you set for the router 2 Go to Advanced Security IP MAC Binding 3 Enable IP MAC Binding 4 Bind your device s according to your need To bind the connected device s 1 Click in the Binding List...

Страница 73: ...gateway to support address and port translation for certain application layer control data protocols such as FTP TFTP H323 etc It is recommended to keep the default settings You may need to disable S...

Страница 74: ...warding feature the router can penetrate the isolation of NAT and allows devices on the internet to initiatively communicate with devices on the local network thus realizing some special functions The...

Страница 75: ...d in HTTP service port 21 in FTP service port 25 in SMTP service and port 110 in POP3 service Please verify the service port number before the configuration I want to SharemypersonalwebsiteI vebuiltin...

Страница 76: ...mmended to keep the default settings of Internal Port and Protocol if you are not clear about which port and protocol to use If the service you want to use is not in the common services list you can e...

Страница 77: ...e triggering port all the external ports will be opened for subsequent connections The router can record the IP address of the host When the data from the internet return to the external ports the rou...

Страница 78: ...he internet which can realize the unlimited bidirectional communication between internal hosts and external hosts The DMZ host becomes a virtual server with all ports opened When you are not clear abo...

Страница 79: ...devices to automatically find the front end NAT device and send request to it to open the corresponding ports With UPnP enabled the applications or host devices on the local network and the internet c...

Страница 80: ...erefore you can play Xbox online games without a hitch INTERNET If necessary you can follow the steps to change the status of UPnP 1 Visit http tplinkwifi net and log in with your TP Link ID or the pa...

Страница 81: ...P VPN is easy to use with the built in VPN software of computers and mobile devices but it is vulnerable and may be blocked by some ISPs L2TP IPSec VPN is more secure but slower than PPTP VPN and may...

Страница 82: ...r the password you set for the router 2 Go to Advanced VPN Server OpenVPN and tick the Enable box of OpenVPN Note Before you enable VPN Server we recommend you configure Dynamic DNS Service recommende...

Страница 83: ...you want to run the OpenVPN client utility Note You need to install the OpenVPN client utility on each device that you plan to apply the VPN function to access your router Mobile devices should downlo...

Страница 84: ...IP addresses up to 10 that can be leased to the devices by the PPTP VPN server 4 Set the PPTP connection permission according to your needs Select Allow Samba Network Place access to allow your VPN d...

Страница 85: ...use the Windows built in PPTP software or a third party PPTP software to connect to PPTP Server Here we use the Windows built in PPTP software as an example 1 Go to Start Control Panel Network and In...

Страница 86: ...82 Chapter 14 VPN Server Client 4 Select Use my Internet connection VPN 5 Enter the internet IP address of the router for example 218 18 1 73 in the Internet address field Click Next...

Страница 87: ...83 Chapter 14 VPN Server Client 6 Enter the User name and Password you have set for the PPTP VPN server on your router and click Connect 7 Click Connect Now when the VPN connection is ready to use...

Страница 88: ...w to set up the L2TP IPSec VPN connection INTERNET Home Network Router VPN Server Remote Devices Step 1 Set up L2TP IPSec VPN Server on Your Router 1 Visit http tplinkwifi net and log in with your TP...

Страница 89: ...r 4 Keep IPSec Encryption as Encrypted and create an IPSec Pre Shared Key 5 Click SAVE 6 Configure the L2TP IPSec VPN connection account for the remote device You can create up to 16 accounts 4 Click...

Страница 90: ...re or a third party L2TP IPSec software to connect to L2TP IPSec Server Here we use the Windows built in L2TP IPSec software as an example 1 Go to Start Control Panel Network and Internet Network and...

Страница 91: ...ernet IP address of the router for example 218 18 1 73 in the Internet address field and select the checkbox Don t connect now just set it up so I can connect later Click Next 6 Enter the User name an...

Страница 92: ...88 Chapter 14 VPN Server Client 7 Click Close when the VPN connection is ready to use 8 Go to Network and Sharing Center and click Change adapter settings...

Страница 93: ...Chapter 14 VPN Server Client 9 Find the VPN connection you created then double click it 10 Enter the User name and Password you have set for the L2TP IPSec VPN server on your router and click Properti...

Страница 94: ...yer 2 Tunneling Protocol with IPsec L2TP IPSec and click Advanced settings 12 Select Use preshared key for authentication and enter the IPSec Pre Shared Key you have set for the L2TP IPSec VPN server...

Страница 95: ...ese devices can access the remote VPN server Please follow the steps below INTERNET Home Devices Router VPN Client VPN Servers 1 Visit http tplinkwifi net and log in with your TP Link ID or the passwo...

Страница 96: ...VPN Enter the VPN username and password if required by your VPN provider otherwise simply leave them empty Then import the configuration file provided by your VPN provider PPTP Enter the VPN server ad...

Страница 97: ...r Client L2TP IPSec VPN Enter the VPN server address for example 218 18 1 73 VPN username and password and IPSec pre shared key provided by your VPN provider 4 Save the settings 5 In the server list e...

Страница 98: ...N Server Client 5 Add and manage the devices that will use the VPN function 1 In the Device List section click Add 2 Choose and add the devices that will access the VPN server you have configured 6 Sa...

Страница 99: ...95 Chapter 14 VPN Server Client Done Now the devices you specified can access the VPN server you enabled...

Страница 100: ...ides you on how to configure advanced network features It contains the following sections Change the LAN Settings Set Up Link Aggregation Configure to Support IPTV Service Specify DHCP Server Settings...

Страница 101: ...AN 3 Type in a new IP Address appropriate to your needs And leave the Subnet Mask as the default settings 4 Click SAVE Note If you have set the Port Forwarding DMZ or DHCP address reservation and the...

Страница 102: ...by my internet service provider ISP How can I do that 1 Visit http tplinkwifi net and log in with your TP Link ID or the password you set for the router 2 Go to Advanced Network IPTV VLAN 3 If your IS...

Страница 103: ...ch port is used to support IPTV service 4 Click SAVE 5 Connect the set top box to the corresponding LAN port which is predetermined or you have specified in Step 3 Done Your IPTV setup is done now You...

Страница 104: ...d client device 1 Click Add in the Address Reservation section 2 Click VIEW CONNECTED DEVICES and select the you device you want to reserve an IP for Then the MAC Address will be automatically filled...

Страница 105: ...ID or the password you set for the router 2 Go to Advanced Network Dynamic DNS 3 Select the DDNS Service Provider TP Link NO IP or DynDNS It is recommended to select TP Link so that you can enjoy TP...

Страница 106: ...ed routing information guides the router in forwarding data packets to the specific destination I want to Visit multiple networks and servers at the same time For example in a small office my PC can s...

Страница 107: ...to the following explanations Network Destination The destination IP address that you want to assign to a static route This IP address cannot be on the same subnet with the WAN IP or LAN IP of Router...

Страница 108: ...2 168 0 2 Interface Determined by the port WAN LAN that sends out data packets In the example the data are sent to the gateway through the LAN port of Router A so LAN WLAN should be selected Descripti...

Страница 109: ...r router It contains the following sections Update the Firmware Backup and Restore Configuration Settings Change the Login Password Password Recovery Local Management Remote Management System Log Test...

Страница 110: ...p tplinkwifi net and log in with your TP Link ID or the password you set for the router 2 Go to Advanced System Firmware Update 3 Enable Auto Update 4 Specify the Update Time and save the settings The...

Страница 111: ...eb browser is opened Click to update and log in to the web management page with the username and password you set for the router You will see the Firmware Update page 16 1 3 Local Update 1 Download th...

Страница 112: ...outer to the default factory settings 1 Visit http tplinkwifi net and log in with your TP Link ID or the password you set for the router 2 Go to Advanced System Tools Backup Restore To backup configur...

Страница 113: ...reset the router We strongly recommend you backup the current configuration settings before resetting the router 16 3 Change the Login Password The account management feature allows you to change you...

Страница 114: ...3 Tick the Enable box of Password Recovery 4 Specify a mailbox From for sending the recovery letter and enter its SMTP Server address Specify a mailbox To for receiving the recovery letter If the mai...

Страница 115: ...r the router 2 Go to Advanced System Administration and complete the settings In Local Management section as needed Access the router via HTTPS and HTTP Tick the Enable box of Local Management via HTT...

Страница 116: ...this entry 5 Click SAVE 16 6 Remote Management This feature allows you to control remote devices authority to manage the router 1 Visit http tplinkwifi net and log in with your TP Link ID or the pass...

Страница 117: ...s for Remote Managers 4 Click SAVE Devices on the internet can log in to http Router s WAN IP address port number such as http 113 116 60 229 1024 to manage the router Tips You can find the WAN IP add...

Страница 118: ...gging in to http Router s WAN IP port number such as http 113 116 60 229 1024 Tips The router s WAN IP is usually a dynamic IP Please refer to Set Up a Dynamic DNS Service Account if you want to log i...

Страница 119: ...s at a fixed time every day however it s too troublesome to log in to the web management page every time I want to go checking It would be great if the system logs could be sent to my mailbox at 8 a m...

Страница 120: ...ess Tips SMTP server is available for users in most webmail systems For example the SMTP server address of Hotmail is smtp mail outlook com 6 Email To Enter the recipient s email address which can be...

Страница 121: ...is used to display the route path your router has passed to reach the tested host and measure transit delays of packets across an Internet Protocol network 2 Enter the IP Address or Domain Name of th...

Страница 122: ...ike Parental Controls You can choose the way to obtain the system time as needed System language is the language displayed when you log into the router You can change the system language as needed 1 V...

Страница 123: ...rver 6 Click SAVE To get time from your computer 1 In the Set Time field select Get from Managing Device 2 The time of your computer will then be displayed and click SAVE To manually set the date and...

Страница 124: ...l time zone 4 Click SAVE To set system language Select the language from the dropdown list then click SAVE 16 10 Set the Router to Reboot Regularly The Scheduled Reboot feature cleans the cache to enh...

Страница 125: ...ter indicates its activities and status You can enable the Night Mode feature to specify a time period during which the LED is off 1 Visit http tplinkwifi net and log in with your TP Link ID or the pa...

Страница 126: ...http tplinkwifi net to create a new login password Note Please refer to Password Recovery to learn how to configure Password Recovery You ll need to reconfigure the router to surf the internet once t...

Страница 127: ...123 4 Click LAN settings and deselect the following three options and click OK 5 Go to Advanced Restore advanced settings click OK to save the settings...

Страница 128: ...even though the configuration is finished 1 Visit http tplinkwifi net and log in with your TP Link ID or the password you set for the router 2 Go to Advanced Network Status to check internet status If...

Страница 129: ...nd check the internet access Reset the router to factory default settings and reconfigure the router Upgrade the firmware of the router Check the TCP IP settings on the particular device if all other...

Страница 130: ...MAC address to the router The MAC addresses of a computer in wired connection and wireless connection are different Modify the LAN IP address of the router Note Most TP Link routers use 192 168 0 1 1...

Страница 131: ...3 Go to Advanced Network Internet 4 Select your Internet Connection Type and fill in other parameters 5 Click SAVE 6 Restart the modem and the router again Please upgrade the firmware of the router I...

Страница 132: ...n the Services list on the right side 5 Right click Wireless Zero Configuration and then select Properties 6 Change Startup type to Automatic click on Start button and make sure the Service status is...

Страница 133: ...r wireless router Note Wireless Password Network Security Key is case sensitive Windows unable to connect to XXXX Can not join this network Taking longer than usual to connect to this network Check th...

Страница 134: ...rantee that interference will not occur in a particular installation If this equipment does cause harmful interference to radio or television reception which can be determined by turning the equipment...

Страница 135: ...poration Address 10 Mauchly Irvine CA 92618 Website http www tp link com us Tel 1 626 333 0234 Fax 1 909 527 6804 E mail sales usa tp link com This equipment has been tested and found to comply with t...

Страница 136: ...interference that may cause undesired operation Any changes or modifications not expressly approved by the party responsible for compliance could void the user s authority to operate the equipment We...

Страница 137: ...ons of directives 2014 53 EU 2009 125 EC 2011 65 EU and EU 2015 863 TheoriginalEUDeclarationofConformitymaybefoundat https www tp link com en support ce RF Exposure Information This device meets the E...

Страница 138: ...cause undesired operation of the device L metteur r cepteur exempt de licence contenu dans le pr sent appareil est conforme aux CNR d Innovation Sciences et D veloppement conomique Canada applicables...

Страница 139: ...orth for an uncontrolled environment This equipment should be installed and operated with minimum distance 20cm between the radiator your body D claration d exposition aux radiations Cet quipement est...

Страница 140: ...of the restricted substance exceeds the reference percentage value of presence condition 2 Note 2 indicates that the percentage content of the restricted substance does not exceed the percentage of re...

Страница 141: ...anted medical device turn off your product and consult your physician for information specific to your medical device Please read and follow the above safety information when operating the device We c...

Отзывы: