36
Chapter 8
Guest Network
8 1 Create a Network for Guests
1. Visit
http://tplinkwifi.net
, and log in with your TP-Link ID or the password you set for
the router.
2. Go to
Advanced
>
Guest Network
. Locate the
Wireless
section.
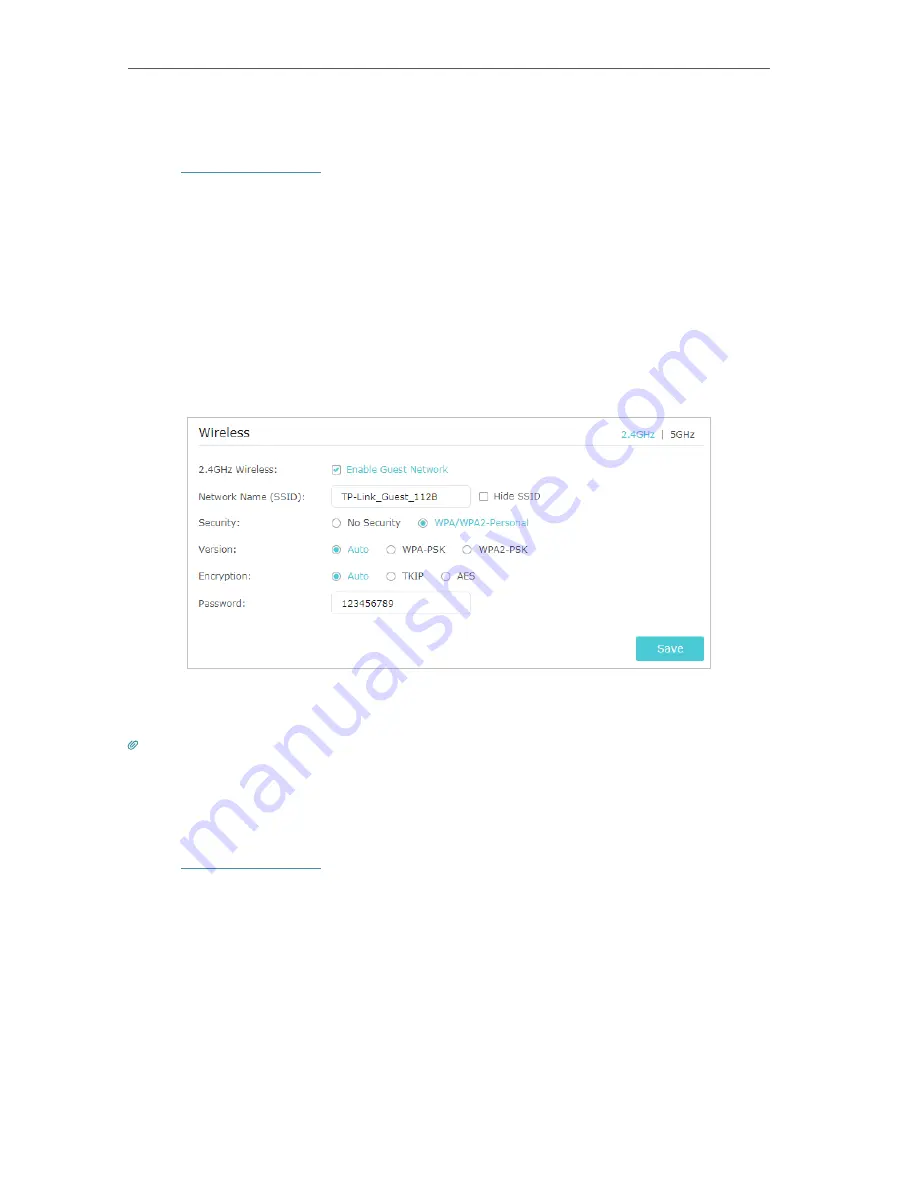
3. Create a guest network as needed.
1 ) Select
2.4GHz
or
5GHz
network and tick the
Enable Guest Network
checkbox.
2 ) Customize the SSID. Don‘t select
Hide SSID
unless you want your guests to
manually input the SSID for guest network access.
3 ) Set
Security
to
WPA/WPA2 Personal
, keep the default
Version
and
Encryption
values, and customize your own password.
4. Click
Save
. Now your guests can access your guest network using the SSID and
password you set!
Tips:
To view guest network information, go to
Advanced
>
Status
and locate the
Guest Network
section.
8 2 Customize Guest Network Options
1. Visit
http://tplinkwifi.net
, and log in with your TP-Link ID or the password you set for
the router.
2. Go to
Advanced
>
Guest Network
. Locate the
Settings
section.
3. Customize guest network options according to your needs.
Содержание Archer A7
Страница 1: ...REV5 1 1 1910012752 User Guide AC1750 Wireless Dual Band Gigabit Router Archer C7 Archer A7...
Страница 15: ...Chapter 3 Log In to Your Router...
Страница 32: ...Chapter 6 Work with Alexa This chapter will show you how to configure your router to work with Alexa...
Страница 76: ...72 Chapter 14 VPN Server 3 Select Connect to a workplace and click Next 4 Select Use my Internet connection VPN...
Страница 78: ...74 Chapter 14 VPN Server 7 The PPTP VPN connection is created and ready to use...


