
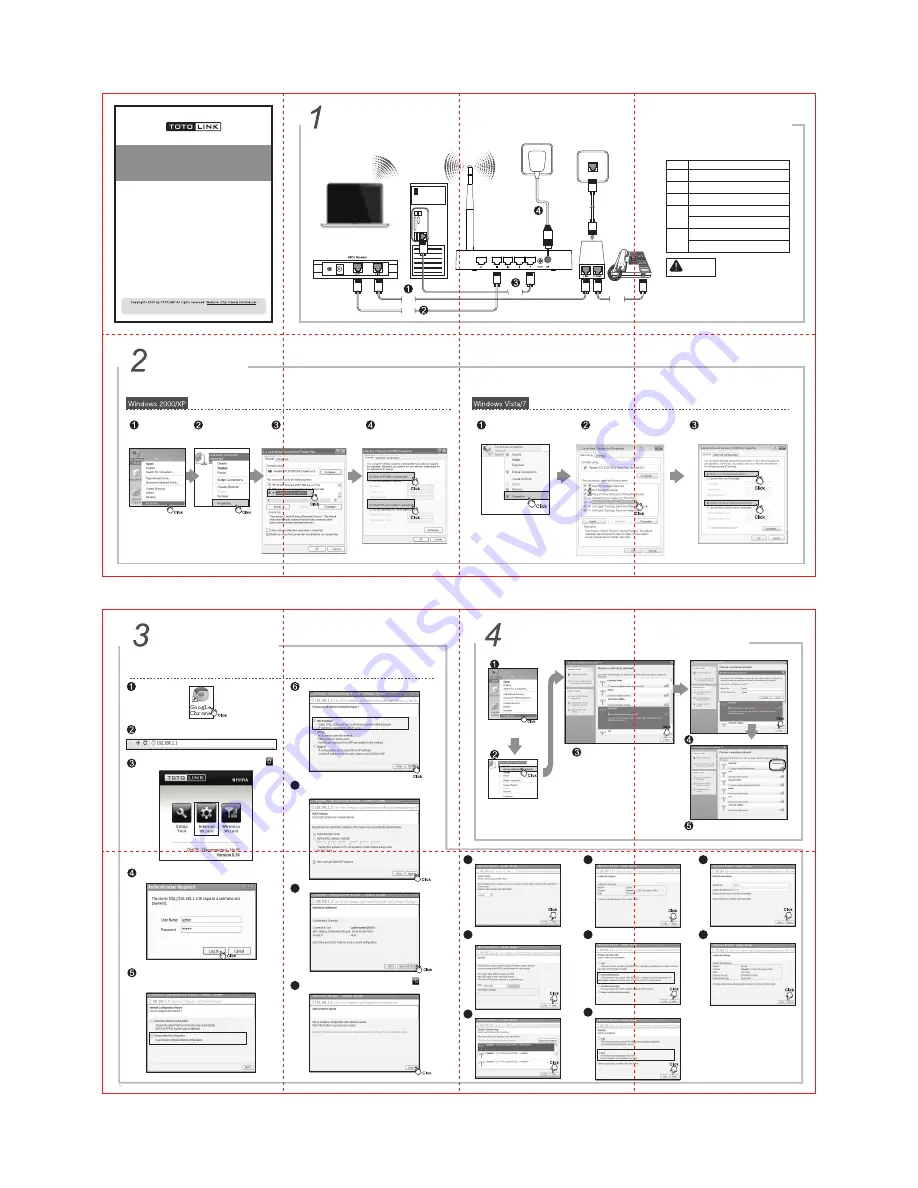
Hardware Installation
If you access Internet by ADSL, please comply with step 1, 2, 3 and 4 in below diagram in correct order; if you access Internet by
residential broadband, please comply with step 2, 3 and 4 to connect the WAN port of your router with the residential broadband directly.
Name
Power
CPU
WLAN
1/2/3/4
LAN
Normal Status
This indicator lights when the router is powered on,
otherwise it is off.
This indicator keeps lighting when Router powered
on.
This indicator lights when there are wireless devices
connected and transmitting data to WLAN Router.
During transmitting or receiving data through the
WAN port the indicator blinks.
When one of the LAN ports has a successful
connection, the corresponding indicator lights.
During transmitting or receiving data through the
LAN port the indicator blinks.
WAN
When the WAN port is connected successfully the
indicator lights.
1. Please disconnect the power adapter and all cables during
thunderstorm weather;
2. Keep away from heat source and keep well ventilated;
3. Please pay attention to the waterproofing and moisture-proof
when storing, transporting and running;
4. The power supply must reach the rated current and power;
5. Put the router in flat places.
Set Up PC
For Windows 2000 or Windows XP Operating System, please comply with following steps to set up.
Right-click “My Network
Places”, click “Properties”
Right-click “Local Area
Connection”, click “Properties”
Double-click “Internet Protocol
(TCP/IP)”
Choose “Obtain an IP address
automatically” and “Obtain DNS
server address automatically”,
click “OK”; go back to previous
interface and click “OK”
For Windows Vista or Windows 7 Operating System, please comply with following steps to set up.
Click “Start— Control Panel— Network
and Internet— Network Connection”,
right-click “Local Area Connection”,
and choose “Properties”.
Double-click “Internet Protocol
Version 4 (TCP/IPv4)”
Choose “Obtain an IP address automatically”
and “Obtain DNS server address automatically”,
click “OK”; go back to previous interface and
click “OK”
Quick Installation Guide
Wireless-N Broadband Router
After connected, please check whether the indicator lights
are normal.
NOTE:
Set Up Router
Please set up the router following below steps.
It will show up the following page, please click Internet Wizard icon
Enter valid User Name and Password (The default user name and
password are “admin”). Then click “Log In” button or press Enter.
Wireless Network Connection
Right-click “My Network
Places”, click “Properties”
Right-click “Wireless Network
Connection”, and click “View
Available Wireless Networks”
Confirm the wireless network SSID name,
choose one that you would like to connect,
then click “Connect”
Input the encrytion key and click “Connect”
Have connected wireless network, you can access
Internet through wireless mode.
For more information, please go to www.totolink.net
You can choose “Automatic Internet Configuration” or “Manual Internet
Configuration” in this page. Suggests to choose “Manual Internet
Configuration” if you know the connection type provided by your ISP.
Here we take it for example.
Choose Internet connection types provided by your ISP.
Run the Web browser.
Type 192.168.1.1 in the Web browser address bar, and then press Enter.
The DHCP method is selected by default. Here we take it as an example.
You can choose one method to set MAC address according to need.
Then click “Next”.
Click Save and Close button to reply configuration.
7
8
After Internet wizard, please click the wireless wizard icon to start
wireless settings. Click “Next” to process this wizard.
9
Choose your country region and click “Next”.
10
You can setup the wireless network name and then
click “Check SSID” button to make sure your SSID
is available. After SSID check is done, click “Next”.
11
Choose the best channel, and click “Next”.
12
Click “Next” if the setting is no problem.
13
Setup the encryption for the security of your
network.
14
Select TKIP or AES cryptography, and then
click “Next”.
15
Input the password (more than 8 characters).
16
After confirming the settings, click “Finish”
button to apply all configuration values.
17
Information in this docutment is subject to change without prior notice.
Router
Telephone
Wire
Telephone Wire
Telephone
Wire
Network
Cable
Network
Cable


