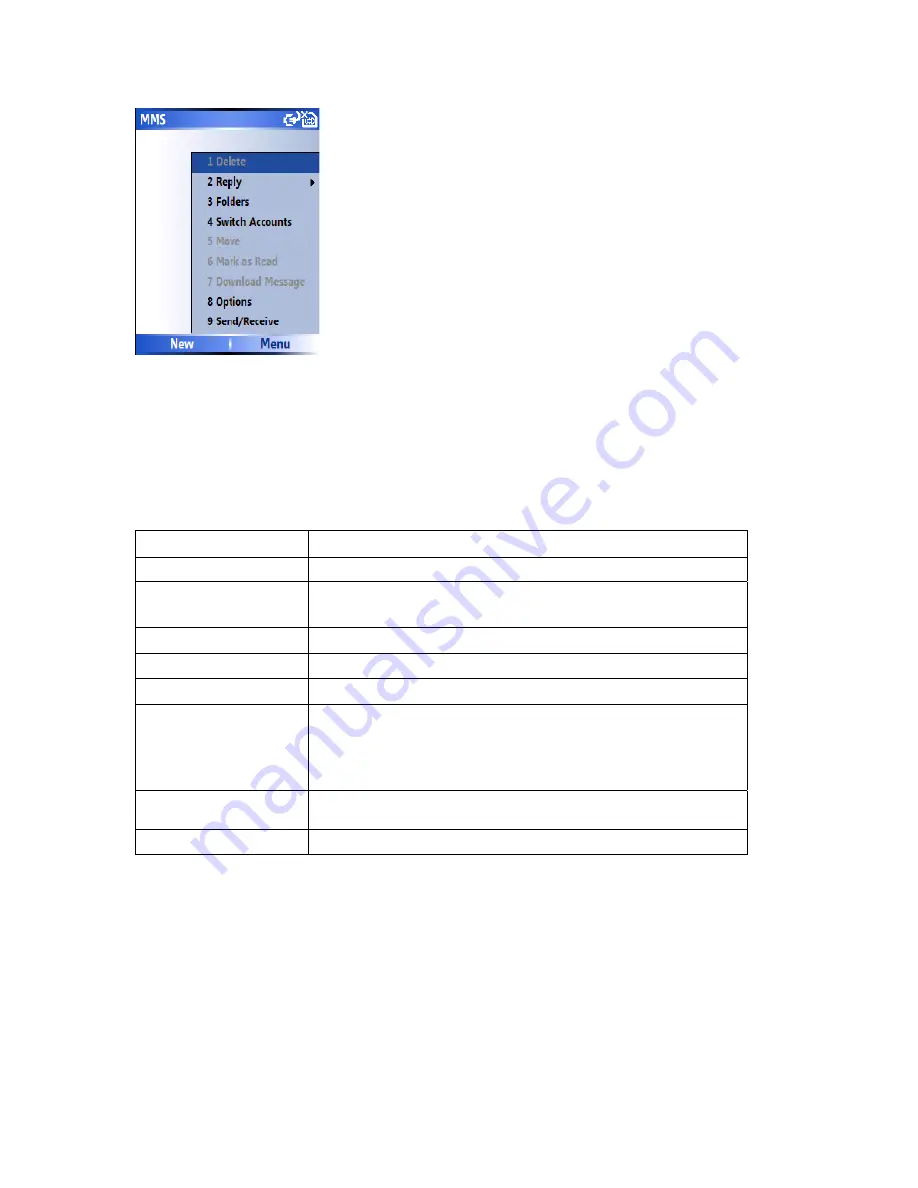
Setting up the MMS account
If your device has not been preconfigured, then you will need to manually enter the
details of the MMS. This is a two-stage process : In stage one you will set up the data
connection, and in the second stage you will define the address of the MMS server on the
internet.
Delete Delete
current
message
Reply
Reply to all and Forward current message
Folders
Switch to other folders (including Drafts, Outbox, Inbox, Sent
Items and
deleted items
)
Switch accounts
Switch between Text message, Outlook
and MMS
Move
Move current message into other folders
Mark as
read/unread
Mark current item as an
unread/read
one
Download Messages
If you have chosen only to take notification of MMS messages
(and not to download the whole message), you can mark a
message for download. At the next Send / Receive the mes-
sage will be downloaded
Options
Change the account options for the MMS account
Send/Receive
Force a Send or Receive of MMS messages that are pending
Setting up a data connection
First you will need to set up a data connection. You should refer to the ‘Getting
Connected’ section of this manual for more information on setting this up. You will need
the name of the MMS APN and any associated username or password. When you set up
the ‘Connects to’ description , we suggest you set this to ‘Secure WAP Network’ so as to
avoid conflicts with other applications.
Содержание RG4-E01
Страница 1: ...TOSHIBA RG4 E01 User Manual Version 1 0 Copyright 2006 TOSHIBA CORPORATION All rights reserved ...
Страница 69: ...For example you may choose to synchronize details of your Calendar for the past two weeks only ...
Страница 92: ...Click this now and follow thru the steps in screenshots ...
Страница 93: ......


