


3-EN
- 3 -
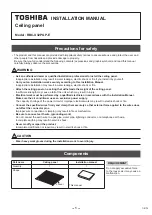
Attaching ceiling panel
(Fig. 1)
(Fig. 2)
Drain pipe
Rectangular holes of
indoor unit
Electrical control box
Refrigerant pipe
Panel
fi
xing screw
Ceiling panel
Marking: Drain pipe side
louver motor wire
Marking: Refrigerant pipe side
Movable hook
Rectangular hole of
indoor unit
Push when releasing
Movable hook
(Fig. 3)
(Fig. 5)
(Fig. 4)
(Fig. 6)
Panel inner frame
Panel
fi
xing bracket
Hole
Panel
fi
xing screw
Lift the panel inner frame to make
the screw head visible.
Push the panel
fi
xing bracket
securely.
Indoor unit
No gap
Ceiling panel
Bottom of ceiling
Tighten the panel
fi
xing screw.
RE
MOT
E CO
N
T
ROL
LE
R
B
A
Pass the wire through the clamper
as illustrated.
louver motor wire
Wire Connection (For illustrative purpose, the
orientation of the indoor unit is not the actual
orientation.)
Electrical control
box cover
Two screws
Clamper
CN510
Do not apply excessive force to the louver when attaching
the ceiling panel, as it may cause malfunction of the louver.
1. Insert the two movable hooks at the inside of the ceiling
panel into the rectangular holes of the indoor unit, and hook
them tentatively onto the indoor unit. (Fig. 1 and Fig. 2)
• The ceiling panel has an orientation to the indoor unit
for installation. Attach the ceiling panel so that the louver
motor wire comes to the electrical control box side.
• To detach the ceiling panel, push the movable hooks
outward while holding the ceiling panel.
2. Lift the corner of the panel inner frame and insert the panel
fixing screw of the indoor unit into the panel fixing bracket
hole (Fig. 3). Then slide the panel fixing bracket in the
direction of arrow and push it to the specified position
(Fig. 4). Repeat this procedure for the four panel fixing
brackets.
• Slide the panel fixing bracket while keeping the screw
head lower than the bracket.
• The panel fixing screws have been attached to the indoor
unit since its shipping.
3. Tighten the four panel fixing screws to secure the ceiling
panel until it comes into close contact with the indoor unit.
(Fig. 5)
4. Check that the ceiling panel is in close contact with the
ceiling.
• Make sure that there is no gap between indoor unit and
ceiling panel and between ceiling panel and bottom of the
ceiling. (Fig. 6)
CAUTION
Air leakage
Air leakage
from bottom
of the ceiling
Contamination
Dew drop/water leakage
• If a gap between ceiling panel and
bottom of the ceiling still remains
after the screws are tightened,
readjust the height of the indoor unit.
No gap
After the adjustment of height, tighten
the nuts of the indoor unit securely.
The height of the indoor unit can be
adjusted from the corner holes of the
ceiling panel without detaching the
panel, provided that the levelness of
the indoor unit and the drain pipe are
not affected.
• Insufficient tightening of the screws may result in the
following problems. Tighten the screws securely.
Connecting wires of ceiling panel
1. Remove the two screws of the electrical control box cover,
and detach the electrical control box cover by pressing the
hook. (The electrical control box cover is clamped onto the
hinge.)
2. Pass the louver motor wire from the ceiling panel through
the clamper as shown, and connect the wire to the white
20P connector CN510 on the P.C. board of the indoor unit.
•
Connect the wire firmly to the connector to ensure
operation of the louver.
3. Attach the electrical control box cover by reversing the
procedure of detaching.
• Make sure that no wire is caught between the
electrical control box and the cover.
• Make sure that no wire is caught between the indoor
unit and the ceiling panel.