


Appendix-3
Remove each cabinet, inverter assembly, motor base assembly, and partition board assembly.
* Do not damage the electric parts such as cables, connectors, etc. while this work.
4. Cord heater installation work procedure
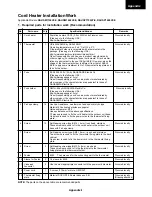
No.
1
1-2
Photo / Explanatory diagram
Procedure
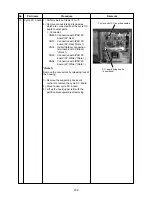
<Example for RAS-13JAVP-E>
As shown in the left figure, remove the set of refrigeration
cycle assembly from the outdoor unit base.
* In this time, work attentively so that the cycle pipes are
not damaged by dent or deformation. Apply protective
measures to pipes if necessary.
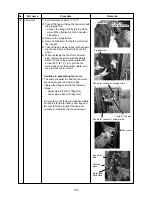
Cord heater installation work
Drill a hole on the outdoor unit base, and fix the cord heater to the outdoor unit base using P-shape clamp.
Connect the cord heater cables.
Using a motor drill, etc., drill Ø3.2 holes to the existing emboss on the outdoor unit base. (12 positions)
As shown in the left figure, install the cord heater to the
outdoor unit base by using P-shape clamp and screws
(Self-tapping screw type-B Ø4 × 6mm, stainless).
Pay attention to the direction of P-shape clamp so that it
is set to the same direction in the left figure.
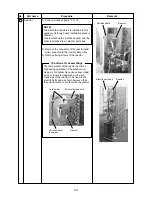
* If the drain port is frozen due to installation status, etc.,
draw around the cord heater so that the end part of the
heater is inserted into the drain port. In this case, add
some fixing positions to fix the cord heater surely.
* The end part from the marked part of the cord heater
heats up. When there is the heating part near the
electric parts box, a fire may generate. Be sure to set
the heating part on the outdoor unit base at the fan
room side or near it. (within 20cm from the outdoor unit
base)
* Be careful that the cord heater does not hit the fan.
Fix the cord heater without any loosening or sag
Enlarged
marked part
Heating part
As shown in the left figure, drill a hole on the back
cabinet for fixing the thermostat fixing plate.
Ø5 hole at two positions
When drilling a hole on the back cabinet, be sure not to
damage the cabinet.
2
2-1
2-2
2-3
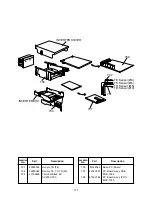
Appendix
Back cabinet
Содержание RAV-SP1100AT-E
Страница 118: ......