background image

– 19 –

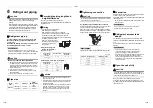
8

Applicable controls

REQUIREMENT

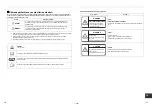
• When you use this air conditioner for the first time, it 

takes approx. 5 minutes until the remote controller 
becomes available after power-on. This is normal.

<When power is turned on for the first time after 
installation> 

It takes 

approx. 5 minutes

 until the remote controller 

becomes available.

<When power is turned on for the second (or later) 
time> 

It takes 

approx. 1 minute

 until the remote controller 

becomes available.

• Normal settings were made when the indoor unit was 

shipped from factory. 
Change the indoor unit settings as required.

• Use the wired remote controller to change the 

settings.

* The settings cannot be changed using the 

wireless remote controller, simplified wired 

remote controller, or remote-controller-less 

system (for central remote controller only). 

Applicable controls setup
(settings at the site)

Remote controller model name:
RBC-AMSU5

Basic procedure

Change the settings while the air conditioner is not 
working. 

(Stop the air conditioner before making 

settings.)

CAUTION

Set only the “Code (DN)

ˮ

 shown in the following table: 

Do not set any other “Code (DN)

ˮ

.

If a “Code (DN)

ˮ

 not listed is set, it may not be possible 

to operate the air conditioner or other trouble with the 
product may result.

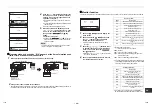
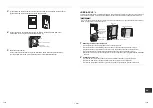
1

Push the [


MENU] button to display the 

menu screen.

2

Push and hold the [


MENU] button and 

the [


] button at the same time to 

display the “Field setting menu”.

Push and hold the buttons for more than 4 
seconds.

Power on

“   Setting” 

flashes

“   Setting” 

goes out

Remote 

controller is 

available

Approx. 5 minutes

Power on

“   Setting” 

flashes

“  Setting” 

goes out

Remote 

controller is 

available

Approx. 1 minutes

6. Setting timer operation mode

7. DN setting

8. Reset power consumption data
9. Notice history

Field setting menu(2/2)

Return

Set

3

Push the [


 ] / [


 ] button to select 

“7. DN setting” on the “Field setting menu” 
screen, then push the “

 Set” [


F2] button.

Push the [


 ] / [


 ] button to select 

the “Indoor unit” and push the “


Set” [

 F2] button.

The fan and louver of the indoor unit operate. 
When the group control is used, the fan and 
louver of the selected indoor unit operate.

Move the cursor to select “Code (DN)” with the 


<

” [ 

 F1] button, then set “Code 

(DN)” with the [ 


] / [ 


 ] button.

Move the cursor to select “Data” with the 


>

” [ 

 F2] button, then set “Data” 

with the [ 


] / [ 


 ] button.

4

Push the [


 MENU] button to set the other 

Code(DN) and Data. After “Continue?” is 
displayed on the screen, push the 

 Yes” [


F1] button.

5

Push the “


No” [


 F2]  button to 

finish the setting operation. “


Setting” 

appears on the screen for a while, then the 
screen returns to the “Field setting menu” 
screen.

Pushing the “


No” [ 

 F2] button 

displays the unit selection screen when the 
group control is used. Push the [ 

 CANCEL] 

button on the unit selection screen to finish the 
setting operation. “  Setting” appears on the 
screen for a while, then the screen returns to the 
“Field setting menu” screen.

DN setting

Set

Return

Indoor unit
 Code (DN) I.DN

Outdoor unit
 Code (DN) O.DN

Set

Set

<

>

Yes

No

No

DN setting

Code

(DN) I.DN

Data

Return

0010

0000

Fix

<

>

DN setting

Code

Data

Return

0010

0001

Fix

<

>

(DN) I.DN

Return

Continue?

No

Yes

DN setting

37-EN

38-EN

Содержание RAV-HM1101FT-TR

Страница 1: ...lation Manual Indoor Unit Floor Standing type RAV HM561FT TR RAV HM801FT TR RAV HM1101FT TR RAV HM1401FT TR RAV HM1601FT TR Model name R32 For commercial use Ticari kullanım için Kurulum kılavuzu 30 Türkçe Installation Manual 1 English ...

Страница 2: ...rant HFC R32 which does not destroy the ozone layer This indoor unit is for the R32 refrigerant Be sure to combine with an outdoor unit for the R32 refrigerant Product information of ecodesign requirements Regulation EU 2016 2281 http ecodesign toshiba airconditioning eu en Contents 1 Precautions for safety 4 2 Accessory parts 8 3 Selection of installation place 8 4 Installation 10 5 Drain piping ...

Страница 3: ...s work Qualified service person 1 The qualified service person is a person who installs repairs maintains relocates and removes the air conditioners made by Toshiba Carrier Corporation He or she has been trained to install repair maintain relocate and remove the air conditioners made by Toshiba Carrier Corporation or alternatively he or she has been instructed in such operations by an individual o...

Страница 4: ... or loss of life if the product is handled improperly Text set off in this manner indicates that failure to adhere to the directions in the caution could result in slight injury 2 or damage 3 to property if the product is handled improperly WARNING Risk of fire Read the OWNER S MANUAL carefully before operation Service personnel are required to carefully read the OWNER S MANUAL and INSTALLATION MA...

Страница 5: ...t be touched for some reason first put on protective gloves and safety work clothing and then proceed WARNING When work is performed at heights use a ladder which complies with the ISO 14122 standard and follow the procedure in the ladder s instructions Also wear a helmet for use in industry as protective gear to undertake the work This unit is equipped with a refrigerant leak detection sensor for...

Страница 6: ... and the refrigeration cycles is over pressurized which may cause an injury Tighten the flare nut with a torque wrench in the specified manner Excessive tighten of the flare nut may cause a crack in the flare nut after a long period which may result in refrigerant leakage After the installation work confirm that refrigerant gas does not leak If refrigerant gas leaks into the room and flows near a ...

Страница 7: ...se the air conditioner in the trouble status may cause mechanical problems to escalate or result in electric shocks or other trouble After the work has finished use an insulation tester set 500 V Megger to check the resistance is 1 MΩ or more between the charge section and the non charge metal section Earth section If the resistance value is low a disaster such as a leak or electric shock is cause...

Страница 8: ...tallation work A special tool for the R32 refrigerant is required for installation Use a new and clean piping materials for the connecting pipe so that moisture and dirt are not mixed together during the installation work When using existing pipes follow the Installation Manual enclosed with the outdoor unit Be careful of fan operation when the circuit breaker is turned on If the refrigerant leak ...

Страница 9: ...e sucked into the unit Doing so may cause the heat exchanger its aluminum fins and copper pipes and other parts to become corroded Locations with atmospheres with mist of cutting oil or other types of machine oil Doing so may cause the heat exchanger to become corroded mists caused by the blockage of the heat exchanger to be generated the plastic parts to be damaged the heat insulators to peel off...

Страница 10: ...sulator to the side face and the rear side of the indoor unit 200 or more 500 or more 1000 or more Front side In case of right direction piping Front side To open the intake grille Direction of vertical louver The intake grille is fixed by the screws for safety reasons Use a screwdriver to unfasten the screws of the intake grille two places to open the intake grille The screws are designed to stay...

Страница 11: ...ther material not to damage the unit Carry the package by four or more persons and do not bundle it with plastic band at positions other than specified Be sure to take measures to prevent falling at the wall surface and the floor and fix it surely considering prevention of accident of falling because this unit is formed into a thin type If it is not fixed a falling accident may occur After carryin...

Страница 12: ... Height of head of fixing bolt Model A B HM56 to HM80 type 88 30 to 80 HM110 to HM160 type 258 40 to 90 A B Wooden wall Screws for side plate Concrete wall Screws bolts Total 4 at right and left Screws for side plate Anchor bolts Total 4 at right and left 634 mm Air intake grille Bracket for fixing to floor Bracket for fixing to wall Electrical control box cover Installation of wired remote contro...

Страница 13: ...l the Cover kit TCB CKC1F E sold separately Follow the steps below to install the Cover kit 1 Removing the remote controller panel 1 Untie the cords of the air inlet grille and remove the air inlet grille 2 Unfasten the two screws fastening the upper cabinet Lift up the upper cabinet and remove it 3 Unfasten the two screws fastened on the back of the upper cabinet and remove the foam cover 4 Push ...

Страница 14: ...e in the drain hose and water leakage in the room NOTE The drain pipe and drain hose must be sloping downward at an angle of 1 100 or more and do not run the pipe up and down arched shape or allow it to form traps Be sure to connect the drain hose and drain pipe at the outside of unit and fix them If clearance occurs between piping wiring and drain hose in opening the knockout hole apply putty to ...

Страница 15: ...ll be hard to remove the drip proof cover and the electrical control box cannot be taken out Drain hose Drain pan Heat insulator Hard polyvinyl chloride pipe Adhesion for hard polyvinyl chloride pipe used To connect drain hose on right or left route it through the knock out for refrigerant piping on HM56 to HM80 model Wiring port both sides Refrigerant pipe connecting port both sides Piping port a...

Страница 16: ...hat there are no chips adhered or other problems after flare processing Do not apply refrigerating machine oil to the flare surface Model name RAV HM56 type HM80 HM110 to HM160 type Pipe size Gas side 12 7 mm 15 9 mm Liquid side 6 4 mm 9 5 mm Outer dia of copper pipe R32 tool used Conventional tool used 6 4 9 5 0 0 5 1 0 1 5 12 7 15 9 Outer dia of copper pipe A 0 0 4 6 4 9 1 9 5 13 2 12 7 16 6 15 ...

Страница 17: ...le may give rise to smoking and or a fire CAUTION For power supply specifications follow the Installation Manual of outdoor unit Do not connect 220 240 V power to the terminal blocks for control wiring Otherwise the system will fail Do not damage or scratch the conductive core and inner insulator of power and system interconnection wires during peeling them Perform the electric wiring so that it d...

Страница 18: ...iring connections between the indoor and outdoor units and between the indoor units and remote controller The wires indicated by the broken lines are provided at the locally 2 Refer to the both indoor and outdoor unit wiring diagrams 3 For details refer to the Installation Manual for outdoor unit to be connected Wiring diagram Example Use 2 core shield wire MVVS 0 5 to 2 0 mm or more for the remot...

Страница 19: ...e figure Do not apply tension on the connecting part of the terminal block Be sure to mount cover of the electrical control box and the drip proof cover 1 3 4 2 Drip proof cover HM56 to HM80 only Electrical control box cover Electrical control box A B Positioning of hole for wiring Knock out hole HM56 HM80 HM110 to HM160 Wiring hole Knock out hole Wiring hole Knock out hole Earth screw Indoor and ...

Страница 20: ...buttons for more than 4 seconds Power on Setting flashes Setting goes out Remote controller is available Approx 5 minutes Power on Setting flashes Setting goes out Remote controller is available Approx 1 minutes 6 Setting timer operation mode 7 DN setting 8 Reset power consumption data 9 Notice history Field setting menu 2 2 Return Set 3 Push the button to select 7 DN setting on the Field setting ...

Страница 21: ...the basic operation procedure 1 2 3 4 5 For the Code DN in Procedure 3 specify 00FC For the Data in Procedure 3 select the Data 0000 TCC Link Data Filter sign term 0000 None 0001 150 H Factory default 0002 2500 H 0003 5000 H 0004 10000 H Data Detection temperature shift value 0000 No shift Factory default 0001 1 C 0002 2 C 0003 3 C 0004 4 C 0005 5 C 0006 6 C Data 8 C Operation setting 0000 None Fa...

Страница 22: ...n system Triple system Outdoor unit Finish of address setup by power ON Remote controller Indoor unit Indoor unit Outdoor unit Finish of address setup by power ON Remote controller Indoor unit Indoor unit Indoor unit Outdoor unit Finish of address setup by power ON Remote controller Indoor unit Indoor unit Indoor unit Indoor unit Group control for system of multiple units One group can control up ...

Страница 23: ...dress 3 2 2 Address 3 3 2 Address 3 1 2 Address 2 2 2 Address 1 2 2 Procedure example Manual address setup procedure While the operation stops change the setup Stop the operation of the unit Address is displayed here 1 Push the MENU button to display the menu screen 2 Push and hold the MENU button and the button at the same time to display the Field setting menu Push and hold the buttons for more ...

Страница 24: ...stance of less than 1 MΩ is detected do not run the unit 2 Check the valve of the outdoor unit being opened fully To protect the compressor at activation time leave power ON for 12 hours or more before operating Execute a test run Operate the unit with the remote controller as usual For the procedure of the operation refer to the attached Owner s Manual A forced test run can be executed in the fol...

Страница 25: ...on to display the menu screen 2 Push and hold the MENU button and the button at the same time to display the Field setting menu Push and hold the buttons for more than 4 seconds 3 Push the button to select 4 Monitor function on the Field setting menu screen then push the Set F2 button Push the button to select the code to check data 4 Push the CANCEL button to return to the Field setting menu scre...

Страница 26: ...itioner when filter sign appears on the detailed display Push one of the operation buttons to erase the message or wait for more than 5 seconds until the message disappears Cool 24 Room A 12 00 Mode Fan Speed Filter sign Filter check Room A 12 00 Mode Fan Speed 1 Push the ON OFF button to stop the operation then turn off the circuit breaker 2 Use a screwdriver to unfasten the screws of the intake ...

Страница 27: ... if there are any waggles damages or adhesive dust Filter Go to installed location and check if there are any stains or breaks on the filter Drain pan Access from inspection opening and remove the access panel Check if there is any clogging or drain water is polluted Refrigerant leak detection sensor Open the intake grille and E BOX and check if there are any troubles on sensor s appearance or its...

Страница 28: ...was detected Auto reset E09 Duplicated header remote controllers Remote controller Remote controller address setting trouble Two remote controllers are set as header in the double remote controller control The header indoor unit stops raising alarm and follower indoor units continue to operate E10 CPU CPU communication trouble Indoor Indoor P C board Communication trouble between main MCU and moto...

Страница 29: ...ue to incorrect external input into CN80 Entire stop L31 SIM Phase sequence trouble etc Outdoor Power supply phase sequence outdoor unit P C board Abnormal phase sequence of the 3 phase power supply Operation continued thermos tat OFF Remote controller display Wireless remote controller Sensor block display of receiving unit Main defective parts Judging device Parts to be checked trouble descripti...

Страница 30: ...90 14 86 1 80 6 00 15 11 1 84 4 64 6 10 15 36 1 90 4 79 6 20 15 62 2 00 5 04 6 30 15 87 2 10 5 29 6 40 16 12 2 20 5 54 6 50 16 37 2 30 5 80 6 60 16 62 2 40 6 05 6 70 16 87 2 50 6 30 6 80 17 13 2 60 6 55 6 90 17 38 2 70 6 80 7 00 17 63 2 80 7 05 7 10 17 88 2 90 7 31 7 20 18 13 3 00 7 56 7 30 18 38 3 10 7 81 7 40 18 64 3 20 8 06 7 50 18 89 3 30 8 31 7 60 19 14 3 40 8 57 7 70 19 39 3 50 8 82 7 80 19 ...

Страница 31: ...u kullanılmıştır Bu iç ünite R32 soğutucu içindir R32 soğutucuya yönelik bir dış ünite ile birlikte kullandığınızdan emin olun Ecodesign gereklilikleri ürün bilgileri Yönetmelik AB 2016 2281 http ecodesign toshiba airconditioning eu en AEEE Yönetmeliğine Uygundur İçindekiler 1 Güvenlik önlemleri 33 2 Aksesuar Parçaları 37 3 Kurulum yerinin seçimi 37 4 Kurulum 39 5 Drenaj Borusu 42 6 Soğutucu borus...

Страница 32: ... işlemleri gerçekleştirmektedir Kalifiye servis elemanı 1 Yetkili servis personeli Toshiba Carrier Corporation tarafından üretilen klimaların montaj onarım bakım yer değiştirme ve söküm işlemlerini gerçekleştiren şahıstır Bu şahıs Toshiba Carrier Corporation tarafından üretilen klimaların montaj onarım bakım yer değiştirme ve söküm işlemlerini gerçekleştirecek şekilde eğitim almıştır ya da eğitim ...

Страница 33: ...leceğini göstermektedir Bu şekilde öne çıkartılan metin ürün yanlış kullanılırsa uyarıdaki talimatlara bağlı kalınmaması durumunda hafif yaralanmaya 2 ya da mal hasarına 3 neden olabileceğini göstermektedir UYARI Yangın riski Çalışmadan önce KULLANICI KILAVUZU dikkatlice okuyun Çalışmadan önce servis personelinin KULLANICI KILAVUZU ve MONTAJ KILAVUZUNU dikkatlice okuması gerekir Daha fazla bilgiye...

Страница 34: ...işe daha sonra devam edin Yüksek yerlerde çalışırken ISO 14122 standardına uygun bir merdiven kullanın ve merdiven kullanma kılavuzundaki prosedürü takip edin Ayrıca işi gerçekleştirmek için koruyucu donanım olarak baret kullanın UYARI Bu ünitede güvenlik için bir soğutucu sızıntısı algılama sensörü bulunmaktadır sensörün etkili olması için ünite kurulumdan sonra servis işlemleri hariç her zaman e...

Страница 35: ...madde kaçağına neden olabilir Kurulum çalışmasından sonra soğutucu gazın sızıntı yapmadığını onaylayın Odaya soğutucu gaz sızar ve fırın gibi ısı kaynaklarının yakınına akarsa tutuşabilecek zehirli gaz oluşabilir Klima monte edilirken veya yeri değiştirilirken soğutucu devresine soğutucu madde haricinde başka gazların karışmasını engellemek için Kurulum Kılavuzundaki talimatları takip ederek havay...

Страница 36: ...ısmı ile şarj olmayan metal kısım toprak kısmı arasındaki direncin 1 MΩ veya üstü olduğunu yalıtım test seti 500 V Megger kullanarak mutlaka kontrol edin Direnç değeri düşükse kullanıcı tarafında elektrik kaçağı veya elektrik çarpması meydana gelebilir Montaj işi tamamlandıktan sonra soğutucu kaçaklarını yalıtım direncini ve su tahliyesini kontrol edin Daha sonra klimanın düzgün çalıştığını kontro...

Страница 37: ...zin vermemeye dikkat edin Kurulumda R32 soğutucu için özel bir alet gerekir Bağlantı borusu için yeni ve temiz boru malzemeleri kullanın böylece kurulum çalışması sırasında nem ve kir karışmaz Mevcut boruları kullanırken dış ünite ile birlikte verilen kurulum kılavuzunu uygulayın Devre kesici açıldığında fan çalışmasına dikkat edin Soğutucu sızıntısı algılama sensörü soğutucu sızıntısını algılarsa...

Страница 38: ...ği yerler Klimanın bu tür yerlere monte edilmesi ısı eşanjörünün alüminyum kanatçıkların ve bakır boruların ve diğer parçaların aşınmasına neden olabilir Atmosferinde kesme yağı veya diğer tür makine yağlarının buğusu bulunan yerler Klimanın bu tür yerlere monte edilmesi ısı eşanjörünün aşınmasına ısı eşanjörünün tıkanması sonucunda buğu üretilmesine plastik parçaların hasar görmesine ısı izolatör...

Страница 39: ...nü iç ünitenin yan tarafına ve arka tarafına takın En az 200 En az 500 En az 1000 Ön yüz Sağa doğru boru bağlantıları durumunda Ön yüz Emiş ızgarasını açmak için Dikey panjurun yönü Emniyet sebeplerinden dolayı emiş ızgarası vidalarla sabitlenir Emiş ızgarasını açmak üzere iki yerde bulunan emiş ızgarasının vidalarını sökmek için tornavida kullanın Vidalar emiş ızgarasının üzerinde kalacak şekilde...

Страница 40: ... taşıyın ve belirtilen konumlar dışında plastik bantlarla sarmayın Ünitenin duvar yüzeyinden ve yerden düşmesini engellemek için önlemler aldığınızdan emin olun ve bu ünite ince tipte olduğu için üniteyi düşme kazalarını önleyecek şekilde sabitleyin Sabitlenmezse düşme kazası meydana gelebilir İç üniteyi belirtilen yere taşıdıktan sonra güvenlik için üniteyi hemen duvara veya zemine sabitleyin Mod...

Страница 41: ...eya ankraj cıvatasının sabitleme yüksekliği Boşluk Sabitleme cıvatası başlığının yüksekliği Model A B HM56 ila HM80 tipi 88 30 to 80 HM110 ila HM160 tipi 258 40 to 90 A B Ahşap duvar Yan plaka vidaları Beton duvar Vidalı cıvatalar Sağda ve solda toplam 4 Yan plaka vidaları Bağlantı cıvataları Sağda ve solda toplam 4 634 mm Hava alışı ızgarası Yere sabitleme için dirsek Duvara sabitleme için dirsek...

Страница 42: ...Kapak kitini ayrıca satılır takın Kapak kitini takmak için aşağıdaki adımları izleyin 1 Uzaktan kumanda panelini çıkarma 1 Hava giriş ızgarasının kordonlarını açın ve hava giriş ızgarasını sökün 2 Üst kasayı sabitleyen iki vidayı sökün Üst kasayı yukarı kaldırıp çıkarın 3 Üst kasanın arkasında bulunan iki vidayı sökün ve köpük örtüyü çıkarın 4 Uzaktan kumanda panelini üst kasanın arkasından dışarı...

Страница 43: ...da su sızıntısına neden olabilir NOT Tahliye borusu ve tahliye hortumu aşağıya doğru eğimli 1 100 veya daha fazla bir açıda olmalıdır ve borunun yukarı ve aşağı yay şeklinde ilerlemesine veya bükülmesine izin vermeyin Tahliye hortumunu ve tahliye borusunu ünitenin dışına bağladığınızdan ve sabitlediğinizden emin olun Vurma deliğini açarken boru tesisatı kablo tesisatı ile tahliye hortumu arasında ...

Страница 44: ...tavası Isı izolatörü Sert polivinil klorür boru Sert polivinil klorür boru için yapıştırıcı kullanılır Tahliye hortumunu sağa veya sola bağlamak için hortumu HM56 ila HM80 modelinde soğutucu boru tesisatı için açılan delikten yönlendirin Kablo tesisatı bağlantısı her iki tarafta da mevcuttur Soğutucu borusu bağlantı yuvası her iki tarafta da mevcuttur Arkadaki boru yuvası Alttaki boru yuvası Tahli...

Страница 45: ...nik parçanın çizilmediğini deforme olmadığını atlanmadığını veya düzleşmediğini ve yapışmış herhangi bir parçanın olmadığını veya herhangi bir diğer sorunun olmadığını kontrol edin Konik yüzeye soğutucu makine yağı uygulamayın Model adı RAV HM56 tipi HM80 HM110 ila HM160 tipi Boru ölçüsü Gaz tarafı 12 7 mm 15 9 mm Sıvı tarafı 6 4 mm 9 5 mm Bakır borunun dış çapı R32 aleti kullanıldığında Konvansiy...

Страница 46: ...ıkmasına ve veya yangına neden olabilir CAUTION DİKKAT Güç kaynağı belirtimleri için dış ünitenin Kurulum Kılavuzu nu izleyin Kontrol kabloları için terminal bloklarına 220 240 V güç bağlamayın Aksi takdirde sistem arızalanacaktır İletken çekirdeği ile güç ve ara bağlantı kablolarının iç izolatörünü çıkarırken çizilmediklerinden veya hasar görmediklerinden emin olun Elektrik kablolarını borunun yü...

Страница 47: ...lantıları gösterilmiştir Kesik çizgilerle belirtilen kablolar yerel olarak sağlanır 2 Hem iç hem de dış ünite kablo şemalarına bakın 3 Ayrıntılar için bağlanacak dış ünitenin Kurulum Kılavuzu na başvurun Kablo şeması Örnek Gürültü sorunlarını önlemek için eş zamanlı üçüz ve eş zamanlı ikili ikiz sistemlerde uzaktan kumanda kablo bağlantısı için 2 damarlı blendajlı kablo MVVS 0 5 2 0 mm2 veya daha ...

Страница 48: ...rine gerilim uygulamayın Elektrik kontrol kutusu kapağını ve damla geçirmez kapağı monte ettiğinizden emin olun 1 3 4 2 Damlamaya dayanıklı kapak yalnızca HM56 ila HM80 Elektrikli kontrol kutusu kapağı Elektrik kumanda kutusu A B Kablo tesisatı için deliğin konumlandırılması Vurma deliği HM56 HM80 HM110 ila HM160 Kablo tesisatı deliği Vurma deliği Kablo tesisatı deliği Vurma deliği Toprak vidası İ...

Страница 49: ...nda basılı tutun Düğmeleri 4 saniyeden daha uzun süre basılı tutun Güç açık Ayar yanıp söner Ayar söner Uzaktan kumanda kullanıma hazırdır Yaklaşık 5 dakika Güç açık Ayar yanıp söner Ayar söner Uzaktan kumanda kullanıma hazırdır Yaklaşık 1 dakika Dön Ayarla 9 Uyarı geçmişi Alan ayar menüsü 2 2 3 düğmelerine basarak Alan ayar menüsü ekranında 7 DN ayarı öğesini seçin ve ardından Ayarla F2 düğmesine...

Страница 50: ...edür 3 teki Veri için Veri 0000 TCC Link seçin Veri Filtre işareti süresi 0000 Hiçbiri 0001 150 H Fabrika varsayılan değeri 0002 2500 H 0003 5000 H 0004 10000 H Veri Algılama sıcaklığı değişme değeri 0000 Değişme yok Fabrika varsayılan değeri 0001 1 C 0002 2 C 0003 3 C 0004 4 C 0005 5 C 0006 6 C Veri 8 C Çalıştırma ayarı 0000 Hiçbiri Fabrika varsayılan değeri 0001 8 C Çalıştırma ayarı Veri İletişi...

Страница 51: ... sistem Dış ünite Power ON Güç Açık la adres ayar işlemini bitirin Uzaktan kumanda İç ünite İç ünite Dış ünite Power ON Güç Açık la adres ayar işlemini bitirin Uzaktan kumanda İç ünite İç ünite İç ünite Dış ünite Power ON Güç Açık la adres ayar işlemini bitirin Uzaktan kumanda İç ünite İç ünite İç ünite İç ünite Çoklu ünite sistemleri için grup kontrolü Bir adet grup bir adet uzaktan kumandayla 16...

Страница 52: ... 2 2 Adres 3 3 2 Adres 3 1 2 Adres 2 2 2 Adres 1 2 2 Prosedür örneği Manuel adres ayarı prosedürü Ünite çalışmıyorken ayarı değiştirin Ünitenin çalışmasını durdurun Adres burada görüntülenir 1 Menü ekranını görüntülemek için MENÜ düğmesine basın 2 Alan ayar menüsü nü görüntülemek için MENÜ düğmesini ve düğmesini aynı anda basılı tutun Düğmeleri 4 saniyeden daha uzun süre basılı tutun 3 düğmelerine...

Страница 53: ...p olmadığını kontrol edin 1 MΩ dan daha az direnç saptanırsa üniteyi çalıştırmayın 2 Dış ünite valfinin tamamen açılıp açılmadığını kontrol edin Çalıştırma sırasında kompresörü korumak için çalıştırmadan önce gücü 12 saat veya daha fazla açık bırakın Bir test çalıştırması gerçekleştirin Üniteyi her zamanki gibi uzaktan kumanda ile çalıştırın Çalıştırma talimatı için birlikte verilen Kullanıcı Kıla...

Страница 54: ...kranını görüntülemek için MENÜ düğmesine basın 2 Alan ayar menüsü nü görüntülemek için MENÜ düğmesini ve düğmesini aynı anda basılı tutun Düğmeleri 4 saniyeden daha uzun süre basılı tutun 3 düğmelerine basarak Alan ayar menüsü ekranında 4 Monitör fonksiyonu öğesini seçin ve ardından Ayarla F2 düğmesine basın Veri kontrolü için kod seçmek üzere düğmesine basın 4 Alan ayar menüsü ekranına geri dönme...

Страница 55: ...kranda Filtre kontrol görünür İşlem düğmelerinden birine basarak mesajı silin veya mesajın kaybolması için 5 saniyeden daha uzun süre bekleyin Mod 24 Room A 12 00 Filtre işareti Filtre kontrol Room A 12 00 Mod Fan Hızı 1 Çalışmayı durdurmak için AÇIK KAPALI düğmesine basın ve sonra devre kesiciyi kapatın 2 Emiş ızgarasını açmak üzere iki yerde bulunan emiş ızgarasının vidalarını sökmek için tornav...

Страница 56: ...uma gidin ve filtrede herhangi bir leke veya bozukluk olup olmadığını kontrol edin Boşaltma tavası Denetim açıklığından erişin ve erişim panelini çıkarın Tıkanma olup olmadığını veya drenaj suyunun kirlenmiş olup olmadığını kontrol edin Soğutucu sızıntısı algılama sensörü Emiş ızgarasını ve E BOX ı açın ve sensörün görünümünde bir sorun olup olmadığını veya konektörünün sağlam bir şekilde bağlı ol...

Страница 57: ...başlatmayı durdurur ve takip eden iç üniteler çalışmaya devam eder E10 CPU CPU iletişim sorunu İç İç P C kartı Ana MCU ile motor mikrobilgisayar MCU su arasında iletişim sorunu Otomatik sıfırlama E11 Uygulama kontrol seti ve İç ünite arasındaki iletişim sorunu İç Uygulama kontrol seti ve İç ünite arasındaki iletişim sorunu Genel durma E18 Başlangıç ünitesini takip eden ünite sürekli iletişim sorun...

Страница 58: ...Çalışma sürdürülür termostat KAPALI P01 SIRAYLA İç ünite fan sorunu İç İç ünite fan motoru iç ünite P C kartı İç ünite AC fan sorunu devreye sokulmuş fan motoru ısıl rölesi tespit edilmiştir Genel durma P03 SIRAYLA Dış ünite hava çıkış sıcaklık sorunu Dış Hava çıkış sıcaklığı bırakma kontrolünde bir sorun tespit edilmiştir Genel durma Uzaktan kumanda ekranı Kablosuz uzaktan kumanda Alıcı ünitenin ...

Страница 59: ... 1 80 6 00 15 11 1 84 4 64 6 10 15 36 1 90 4 79 6 20 15 62 2 00 5 04 6 30 15 87 2 10 5 29 6 40 16 12 2 20 5 54 6 50 16 37 2 30 5 80 6 60 16 62 2 40 6 05 6 70 16 87 2 50 6 30 6 80 17 13 2 60 6 55 6 90 17 38 2 70 6 80 7 00 17 63 2 80 7 05 7 10 17 88 2 90 7 31 7 20 18 13 3 00 7 56 7 30 18 38 3 10 7 81 7 40 18 64 3 20 8 06 7 50 18 89 3 30 8 31 7 60 19 14 3 40 8 57 7 70 19 39 3 50 8 82 7 80 19 64 3 60 ...

Страница 60: ...EB99848001 ...
Отзывы: