


– 37 –
FILE NO. SVM-02009
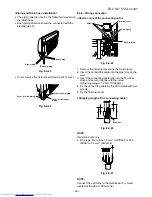
•
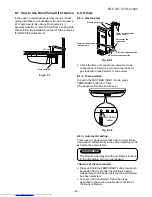
Rear side piping with Drain hose. (Recommended
direction)
Fig. 8-4-14
1. Cut or remove the determined direction slit or cover.
2. Pipes and the Drain hose should be fixed together
by the Drain band with two screws.
Fig. 8-4-15
•
Other direction piping.
1. Cut the slit of connecting only upper direction.
Fig. 8-4-16
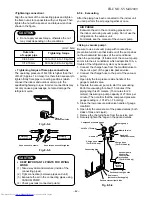
2. Connect the Flexible pipe
"
to the large pipe (Gas
side).
Fig. 8-4-17
Cut
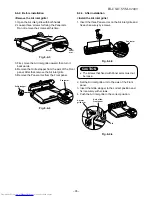
<Piping and Drain hose installation>
•
The piping direction can be 4 ways as illustrated.
•
The Drain hose is only one way.
Fig. 8-4-11
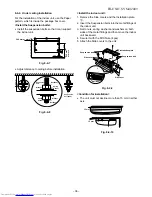
•
How to install the Drain hose.
1. Remove the two screws and the Drain band.
2. Cut a slit for the drain hose hole.
Fig. 8-4-12
3. Place the Drain hose on the U- shape space and
secure it with the Drain band and two screws.
Fig. 8-4-13
Rear piping hole
∅
80
Ceiling
Wall
Ceiling
175 mm
or more
140 mm
Slit for upper piping
Cover for rear
upper piping
Drain hose
Cover for side piping
Big pipe
"
"
"
"
"
Flexible pipe
Screws
Drain band
Slit for drain hose hole
Side piping
Upper piping
Rear upper piping
Rear piping Drain hose