


– 77 –
No.
Spare parts
Work procedure
Remarks
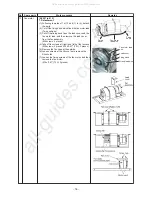
Fan motor
(Continued)
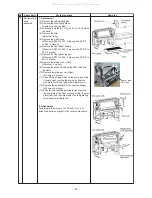
2. Attachment
Following to works of 1 of
and (1) to (5), attach the
parts as original in the reverse procedure.
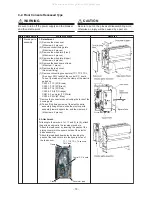
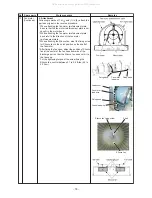
* When attaching the fan motor, be sure that the fan
motor does not hit the motor base reinforcement plate.
* When attaching the fan motor reinforcement plate,
be sure that the fan motor reinforcement plate is not
caught in the motor band.
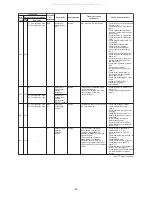
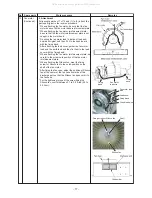
* Do wiring the fan motor lead to inside of the dash-
board as original, and then fix it to the dash-board
with the fixing band.
* After attaching the lead cover, gather the fan motor
lead and the earth lead and then fix them to the lead
cover with the fixing band.
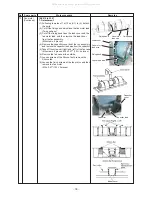
* When attaching the fan motor reinforcement plate, be
careful to the screw hole position of the fan motor
reinforcement plate.
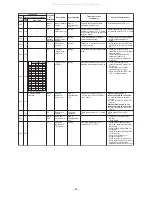
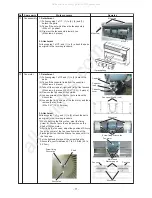
* When attaching the Silocco fan, meet the fixing
screw for Silocco fan to the notch position on the
shaft of the fan motor.
* After fixing the fan case, adjust the position of Silocco
fan at the center of the fan case from side of the
discharge port so that the Silocco fan does not hit to
the fan case.
* For the tightening torque of the screw fixing the
Silocco fan, control between 3.7 to 3.8 ft•lbs (5.0 to
5.2 N•m).
Fixing screw for Silocco fan
Shaft
Silocco fan
Fan motor lead
wire
Lead cover
Fixing band
Grand lead wire
Fixing
band
Fan motor
lead wire
Fixing
band
All manuals and user guides at all-guides.com