DVD-ROM DRIVE INSTALLATION
Remove Server Power
15-14
Installation Manual June, 2011
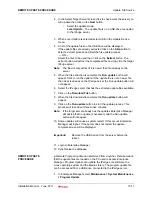
6. To remove the indicated HDD press on the red latch then carefully
swing the arm open, as indicated below.
7. Pull the HDD straight out of the carrier.
8. Insert the new HDD then, swing the arm closed. Ensure that the arm
is latched under the release button.
9. When the drive is locked into the chassis the drive should start
rebuilding. Observe the two LEDs on the front of the HDD carrier.
The green LED on the front of the drive carrier indicates drive activity.
A connection to the drive backplane enables this LED to blink on and
off when that particular drive is being accessed.
The red LED indicates two states. When blinking, it indicates the drive
is rebuilding. When solid, it indicates a drive failure.
Note:
The HDD rebuild can take several hours. The IP
edge
system will
continue to operate normally during the rebuild.
Important!
All HDD carries must be installed for proper cooling air
flow.
DVD-ROM DRIVE
INSTALLATION
The top cover of the chassis must be opened to gain full access to the
DVD-ROM drive bay. The IP
edge
server accommodates only slim-line
DVD-ROM drives. Side mounting brackets are needed to mount a slim-
line DVD-ROM drive in the server chassis.
Important!
You must power down the system before installing or
removing a DVD-ROM drive. Refer to
Remove Server Power
After the IP
edge
server has shutdown set the power switch to OFF. On
the EM server set both rear panel power switches to OFF. Then unplug
the power cord(s).
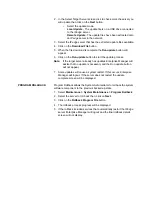
Push the red button then,
swing the arm open.
Содержание IPedge
Страница 1: ...TOSHIBA Telecommunication Systems Division Installation Manual Title Page June 2011 ...
Страница 18: ...This page is intentionally left blank ...
Страница 32: ...This page is intentionally left blank ...
Страница 46: ...This page is intentionally left blank ...
Страница 74: ...This page is intentionally left blank ...
Страница 78: ...This page is intentionally left blank ...
Страница 88: ...This page is intentionally left blank ...
Страница 92: ...This page is intentionally left blank ...
Страница 96: ...This page is intentionally left blank ...
Страница 140: ...MEDIANT 1000 CONFIGURATION IPedge Configuration 12 20 Installation Manual June 2011 ...
Страница 165: ...Server Based Call Manager Configuration Assign Users to User Groups Installation Manual June 2011 13 25 ...
Страница 187: ...EM SERVER FAN REPLACEMENT Power UP Server Installation Manual June 2011 15 11 Figure 15 2 EM Server Fan Location ...
Страница 196: ...THIS IS THE END OF THE DOCUMENT ...


