Diagnostic aids
3-13
INPUT TRAY TESTS
Feed Tests (input tray)
This test lets the servicer observe the paper path as media is feeding through the printer. A blank sheet of paper
feeds through the printer as the laser turns off during this test. The only way to observe the paper path is to open
the lower front door that is used to access the envelope or multipurpose feeder. The paper is placed in the output
bin.
To run the Input Tray Feed Tests:
1.
Select
Feed Tests
from INPUT TRAY TESTS.
2.
Select the input source from the sources displayed on the Feed Tests menu. All installed sources are listed.
3.
Select either
Single
or
Continuous
.
•
Single
—feeds one sheet of media from the selected source.
•
Continuous—
media continues feeding from the selected source until
Stop
(
)
is pressed.
Sensor Test (input tray)
This test is used to determine if the input tray sensors are working correctly. To run the Input Tray Sensor Test:
1.
Select the
Sensor Test
from INPUT TRAY TESTS.
2.
Select the input source from the sources displayed on the Sensor Test menu. All installed sources are
listed.
3.
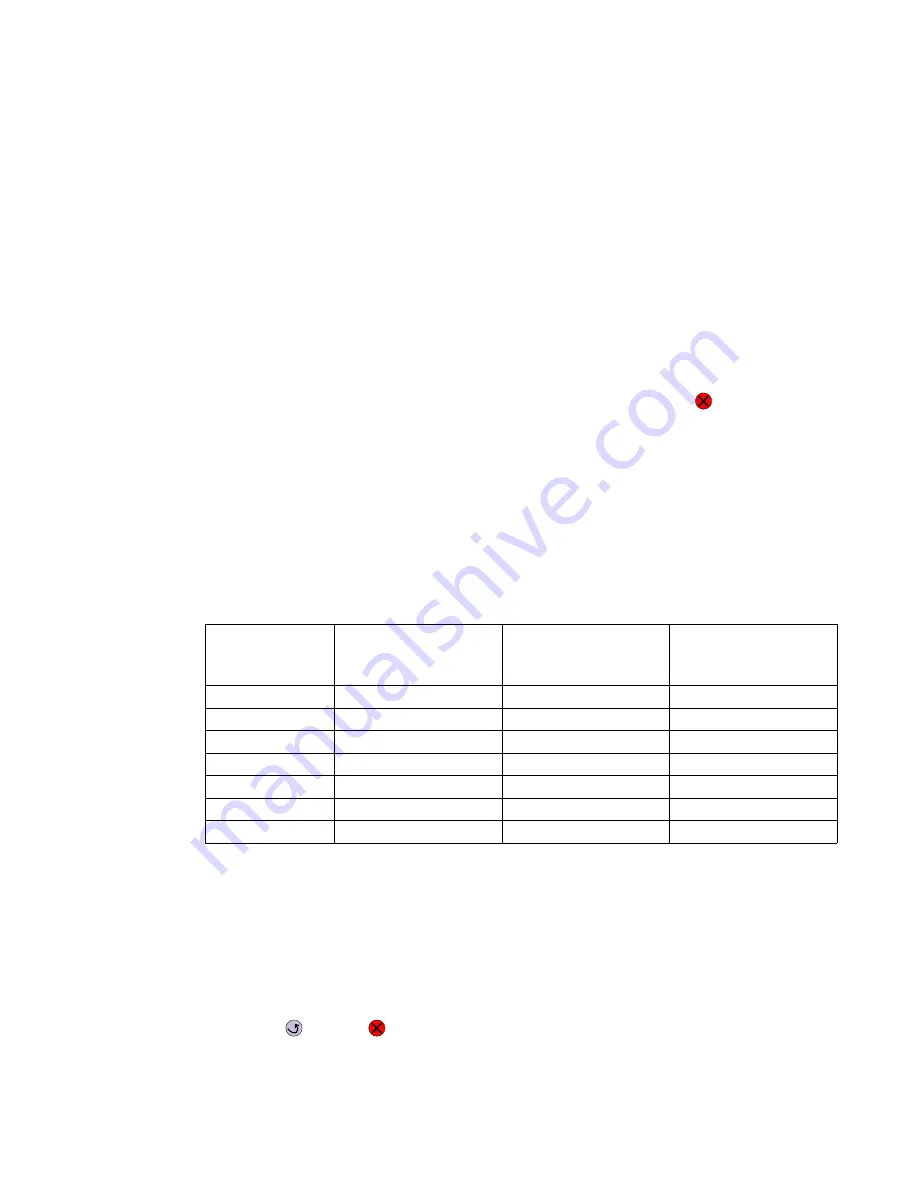
Select the sensor to test. Various sources have different combinations of sensors. See the table below:
[
sensor selected
]
=OP
displays.
•
Empty—Input tray empty sensor
•
Low—Input tray paper low sensor
•
passThru—Input tray pass thru sensor
4.
Once this message displays, the servicer can manually actuate each sensor. The tray empty sensor can be
actuated by hand, however a sheet of paper can be used to cover the pass thru sensor. When the sensor is
closed,
Closed
displays; when the sensor is open,
Open
displays.
5.
Press
Back
(
) or
Stop
(
) to exit the test.
Tray sensor support by source
Source
Empty
(Input tray empty
sensor)
Low
(Input tray paper low
sensor)
passThru
(Input tray pass thru
sensor)
Tray 1
✓
✓
Tray 2
✓
✓
✓
Tray 3
✓
✓
✓
Tray 4
✓
✓
✓
Tray 5
✓
✓
✓
Multipurpose tray
✓
Envelope feeder
✓
✓
Содержание e-STUDIO500P
Страница 1: ...PRINTER P N 12G9609 e STUDIO500P ...
Страница 10: ...x Service Manual ...
Страница 15: ...Laser notices xv Japanese Laser Notice ...
Страница 16: ...xvi Service Manual Korean Laser Notice ...
Страница 22: ...1 2 S ervice Manual Configured model The following illustration shows a standard network printer ...
Страница 43: ...Diagnostic information 2 7 ...
Страница 159: ...Diagnostic information 2 123 ...
Страница 160: ...2 124 Service Manual ...
Страница 161: ...Diagnostic information 2 125 ...
Страница 181: ...Diagnostic aids 3 17 ...
Страница 205: ...Pages 3 42 through 3 44 have been removed from this document intentionally Diagnostic aids 3 41 ...
Страница 286: ...Connector locations and connections 5 1 5 Connector locations and connections Connections System board ...
Страница 297: ...5 12 Service Manual ...
Страница 298: ...Connector locations and connections 5 13 ...
Страница 299: ...5 14 Service Manual ...
Страница 301: ...6 2 Service Manual ...
Страница 303: ...7 2 Service Manual Assembly 1 Covers ...
Страница 305: ...7 4 Service Manual Assembly 2 Frame 1 ...
Страница 307: ...7 6 Service Manual Assembly 3 Frame 2 ...
Страница 309: ...7 8 Service Manual Assembly 4 Frame 3 ...
Страница 311: ...7 10 Service Manual Assembly 5 Printhead ...
Страница 313: ...7 12 Service Manual Assembly 6 Paper feed autocompensator ...
Страница 315: ...7 14 Service Manual 4061 xx0 Assembly 7 Paper feed multipurpose feeder ...
Страница 317: ...7 16 Service Manual Assembly 8 Paper feed alignment ...
Страница 319: ...Page 7 19 has been removed from this document intentionally 7 18 Service Manual ...
Страница 320: ...7 20 Service Manual Assembly 10 Integrated 500 sheet paper tray ...
Страница 322: ...7 22 Service Manual Assembly 11 Drives Main drive and developer drive ...
Страница 324: ...7 24 Service Manual Assembly 12 Hot roll fuser ...
Страница 326: ...7 26 Service Manual Assembly 13 Transfer charging ...
Страница 328: ...7 28 Service Manual Assembly 14 Electronics power supplies ...
Страница 330: ...7 30 Service Manual Note ...
Страница 332: ...7 32 Service Manual Assembly 16 Electronics shields ...
Страница 336: ...7 36 Service Manual Assembly 19 Cabling diagrams 3 ...
Страница 338: ...7 38 Service Manual Assembly 20 Cabling diagrams 4 ...
Страница 340: ...7 40 Service Manual Assembly 21 Cabling diagrams 5 ...
Страница 342: ...7 42 S ervice Manual THE FOLLOWING PAGE 7 43 HAS BEEN OMITTED FROM THIS MANUAL INTENTIONALLY ...
Страница 347: ...7 48 S ervice Manual Pages 7 49 through 7 57 of this manual have been omitted intentionally ...
Страница 348: ...7 58 Service Manual Assembly 35 High capacity feeder 1 ...
Страница 350: ...7 60 Service Manual Assembly 36 High capacity feeder 2 ...
Страница 354: ...7 64 S ervice Manual Pages 7 65 thru 7 70 ofthis manual were omitted intentionally ...
Страница 362: ...I 8 Service Manual ...
Страница 370: ...I 16 Service Manual ...


