Diagnostic information
2-81
3
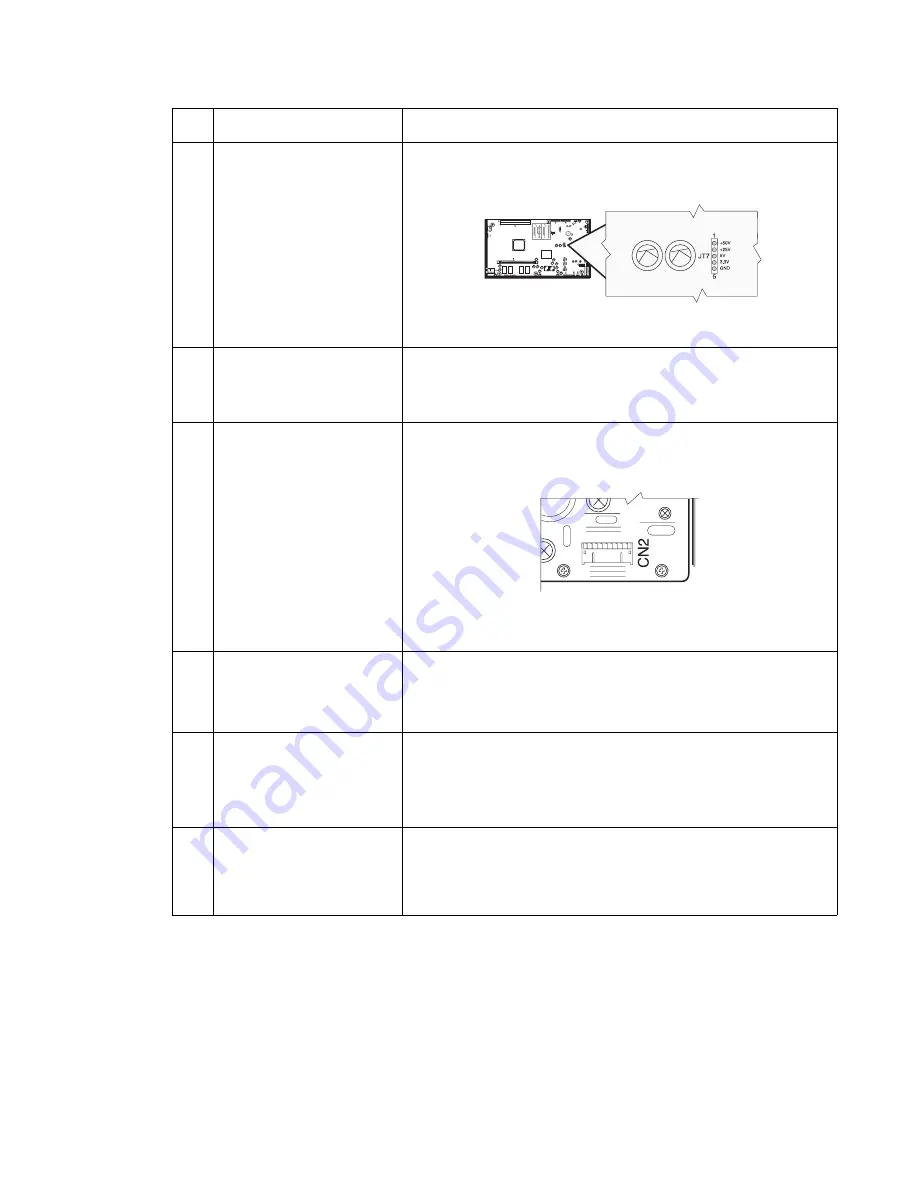
+5 V dc test point on the
system board
Check for approxi5 V dc at the +5 V test point on the system
board.
Note:
Use care not to short adjacent voltage test points.
If the voltage is correct, replace the system board assembly. If the
voltage is incorrect, go to step 4.
4
System board
Check to make sure the LVPS cable is correctly installed at J27 on
the system board. If not, reseat and recheck the voltage at the
+5 V dc test point on the system board.
If test point does not m5 V dc, go to step 5.
5
LVPS
Unplug the AC line cord from the LVPS and disconnect the LVPS
cable to the system board. Reconnect the AC line cord and measure
the voltage on CN2-1 on the LVPS. The voltage should measure
approxi5 V dc.
If the voltage is correct, go to step 6. If the voltage is incorrect,
replace the LVPS assembly. See
“Low voltage power supply
removal” on page 4-54
6
Features or option installed
on the interconnect card
assembly
Warning:
Observe all the ESD precautions and turn the printer off
before any feature or option cards are removed or replaced.
Remove one option/feature at a time to help isolate the failing part.
Replace the faulty part.
7
LVPS fuse F1 (primary
power)
Unplug the AC line cord, remove the LVPS from the printer, and
check the continuity of fuse F1. See
“Low voltage power supply
removal” on page 4-54
.
If continuity is correct, replace the LVPS assembly.
If the voltage is incorrect, replace the LVPS assembly.
8
Loads connected to the
system board
Turn the printer off and disconnect each cable connected to the
system board and each option installed on the system board until the
problem is located.
Warning
: When removing any card installed on the system board
observe all ESD precautions when handling these options.
FRU
Action
Содержание e-STUDIO500P
Страница 1: ...PRINTER P N 12G9609 e STUDIO500P ...
Страница 10: ...x Service Manual ...
Страница 15: ...Laser notices xv Japanese Laser Notice ...
Страница 16: ...xvi Service Manual Korean Laser Notice ...
Страница 22: ...1 2 S ervice Manual Configured model The following illustration shows a standard network printer ...
Страница 43: ...Diagnostic information 2 7 ...
Страница 159: ...Diagnostic information 2 123 ...
Страница 160: ...2 124 Service Manual ...
Страница 161: ...Diagnostic information 2 125 ...
Страница 181: ...Diagnostic aids 3 17 ...
Страница 205: ...Pages 3 42 through 3 44 have been removed from this document intentionally Diagnostic aids 3 41 ...
Страница 286: ...Connector locations and connections 5 1 5 Connector locations and connections Connections System board ...
Страница 297: ...5 12 Service Manual ...
Страница 298: ...Connector locations and connections 5 13 ...
Страница 299: ...5 14 Service Manual ...
Страница 301: ...6 2 Service Manual ...
Страница 303: ...7 2 Service Manual Assembly 1 Covers ...
Страница 305: ...7 4 Service Manual Assembly 2 Frame 1 ...
Страница 307: ...7 6 Service Manual Assembly 3 Frame 2 ...
Страница 309: ...7 8 Service Manual Assembly 4 Frame 3 ...
Страница 311: ...7 10 Service Manual Assembly 5 Printhead ...
Страница 313: ...7 12 Service Manual Assembly 6 Paper feed autocompensator ...
Страница 315: ...7 14 Service Manual 4061 xx0 Assembly 7 Paper feed multipurpose feeder ...
Страница 317: ...7 16 Service Manual Assembly 8 Paper feed alignment ...
Страница 319: ...Page 7 19 has been removed from this document intentionally 7 18 Service Manual ...
Страница 320: ...7 20 Service Manual Assembly 10 Integrated 500 sheet paper tray ...
Страница 322: ...7 22 Service Manual Assembly 11 Drives Main drive and developer drive ...
Страница 324: ...7 24 Service Manual Assembly 12 Hot roll fuser ...
Страница 326: ...7 26 Service Manual Assembly 13 Transfer charging ...
Страница 328: ...7 28 Service Manual Assembly 14 Electronics power supplies ...
Страница 330: ...7 30 Service Manual Note ...
Страница 332: ...7 32 Service Manual Assembly 16 Electronics shields ...
Страница 336: ...7 36 Service Manual Assembly 19 Cabling diagrams 3 ...
Страница 338: ...7 38 Service Manual Assembly 20 Cabling diagrams 4 ...
Страница 340: ...7 40 Service Manual Assembly 21 Cabling diagrams 5 ...
Страница 342: ...7 42 S ervice Manual THE FOLLOWING PAGE 7 43 HAS BEEN OMITTED FROM THIS MANUAL INTENTIONALLY ...
Страница 347: ...7 48 S ervice Manual Pages 7 49 through 7 57 of this manual have been omitted intentionally ...
Страница 348: ...7 58 Service Manual Assembly 35 High capacity feeder 1 ...
Страница 350: ...7 60 Service Manual Assembly 36 High capacity feeder 2 ...
Страница 354: ...7 64 S ervice Manual Pages 7 65 thru 7 70 ofthis manual were omitted intentionally ...
Страница 362: ...I 8 Service Manual ...
Страница 370: ...I 16 Service Manual ...


