Rev091916
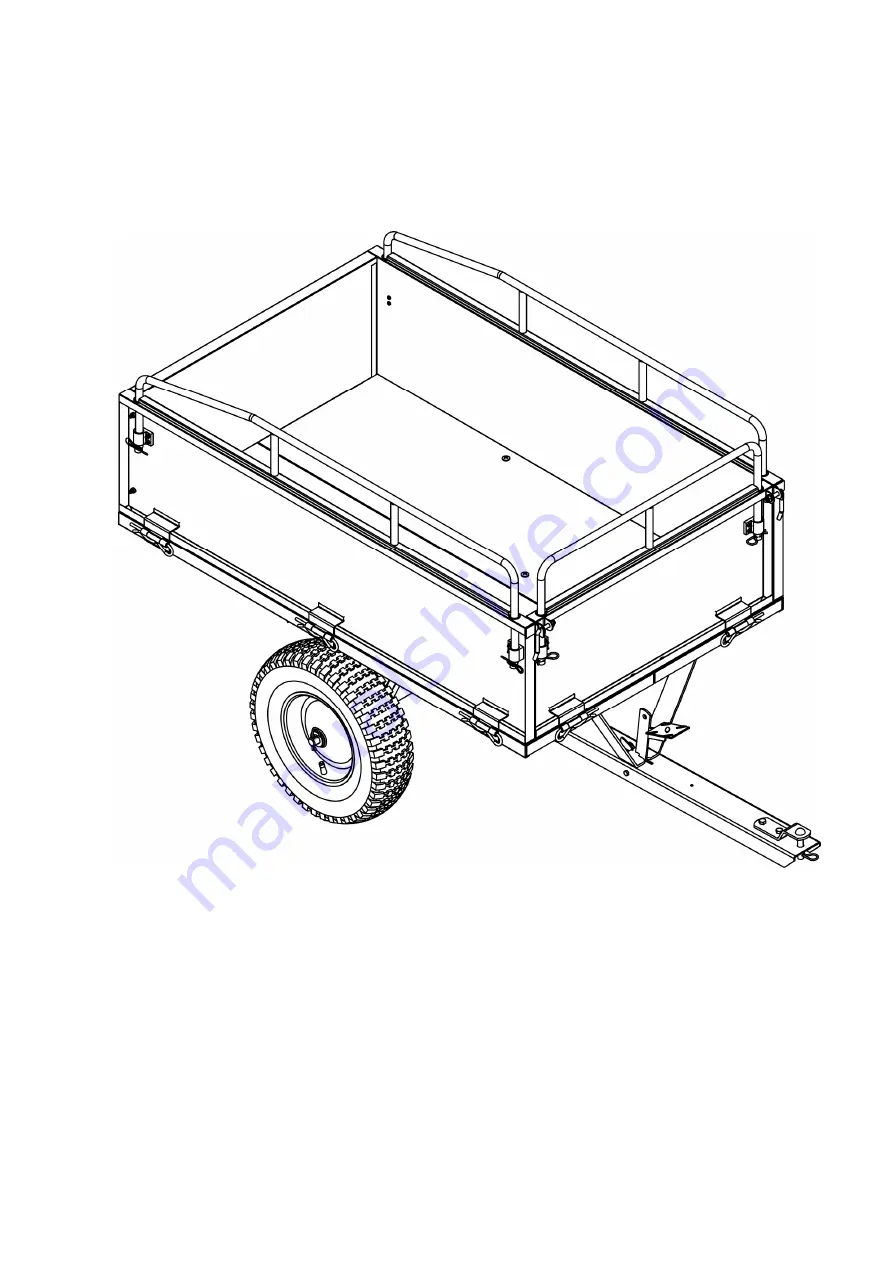
14CU.FT. DUMP CART
Instruction & Assembly
SAVE THESE INSTRUCTIONS FOR FUTURE REFERENCE
Страница 1: ...Rev091916 14CU FT DUMP CART Instruction Assembly SAVE THESE INSTRUCTIONS FOR FUTURE REFERENCE...
Страница 2: ...d Rules 3 Hazard Signal Word Definition 4 Controls and Features Identification 5 Component Hardware 6 7 Assembly Instructions 8 9 10 11 12 Operation Instructions 13 Maintenance and Storage 14 Specific...
Страница 3: ...d personal injury and or equipment damage DO NOT EXCEED 10 MPH l Always use caution when loading and unloading the cart l Only tow with recommended vehicles Lawn Garden Tractors and ATVs l Always secu...
Страница 4: ...rovided in the Specifications section of this manual This is the safety alert symbol It is used to alert you to potential personal injury hazards Obey all safety messages that follow this symbol to av...
Страница 5: ...nual for future reference 1 Removable Tailgate Push up to remove for loading and unloading 2 Tires Wheel Do not exceed the recommended rate 25 PSI 3 Hitch Pin type design use only with approve vehicle...
Страница 6: ...to the user or bystanders or cause equipment damage UTILITY DUMP CART COMPONENT PARTS AND ASSEMBLY Take all parts out of the shipping crate and inspect components to ensure there are no missing piece...
Страница 7: ...7 Note you may have extra nuts bolts when finished Component Parts...
Страница 8: ...ether 2 Attach the support tubes to the panels using four sets of M8x40 screws and M8 nylon lock nuts Loosely tighten the nuts STEP 2 Attach Tongue Support 1 Attach the tongue support to the bottom pa...
Страница 9: ...e M8x16 Screws and M8 nylon lock nuts Loosely tighten the nuts STEP 4 Attach Release Pedal 1 Insert the release pedal into the hitch tongue and secure using M6x90 hex bolt and M6 nylon lock nut Put th...
Страница 10: ...gh the hole and slide it through both the axle support and the hitch tongue assembly 3 Tighten all hardware STEP 6 Attach the Wheels 1 Put an 20 flat washer on the axle slide the wheel over the end fo...
Страница 11: ...panel assemblies to the bottom panels using the four hinge pins STEP 8 Attach the Front Panel 1 Attach the front panel to the bottom panels and secure using the using the two hinge pins 2 Lock the le...
Страница 12: ...ear panel pins must go through the holes on the side panels to lock the panel in place STEP 10 Attach Side Rails and Front Rail 1 Remove the four 3 R pins in the side rails insert the side rails into...
Страница 13: ...cart and towing vehicle to lose traction and skid out of control 6 ONLY fill the dump cart to a comfortable dumping load Extremely heavy loads will be difficult to operate and dump 7 ALWAYS use the du...
Страница 14: ...surfaces Never exceed load capacity rating of 700lbs it will damage the utility dump cart IMPORTANT If a part needs replacement only use parts that meet the manufacturer s specifications Replacement...
Страница 15: ...Inside Box Dimensions 45 5 x 28 x 17 116x71 5x43 7cm Overall Dimensions 66 13 x 33 x 36 25 168x83x92cm Axle Dimensions 0 78 x 32 25 20x82cm Wheel Size 16 Wheel Type Pneumatic Hitch Type Pin Style Tir...
Страница 16: ...16 Parts Drawing Parts List...
Страница 17: ...9 Release Pedal 1 31 Screw M6x16 4 10 Rear Panel 1 32 Screw M8x20 2 11 Wheel 2 33 Screw M4x16 12 12 Left Card Slot of Rear Panel 1 34 Screw M8x16 8 13 Right Card Slot of Rear Panel 1 35 Hex Bolt M8x2...