background image

5.5 Using time shift

33

If a multifeed programme is provided on the current service,
the multifeed symbol (

) will be marked on the information

box. Press the

button, then available video tracks will be

listed. Once you select one, it will be presented. At this time,
you have to press the

button once more to select audio

tracks.

5.5

Using time shift

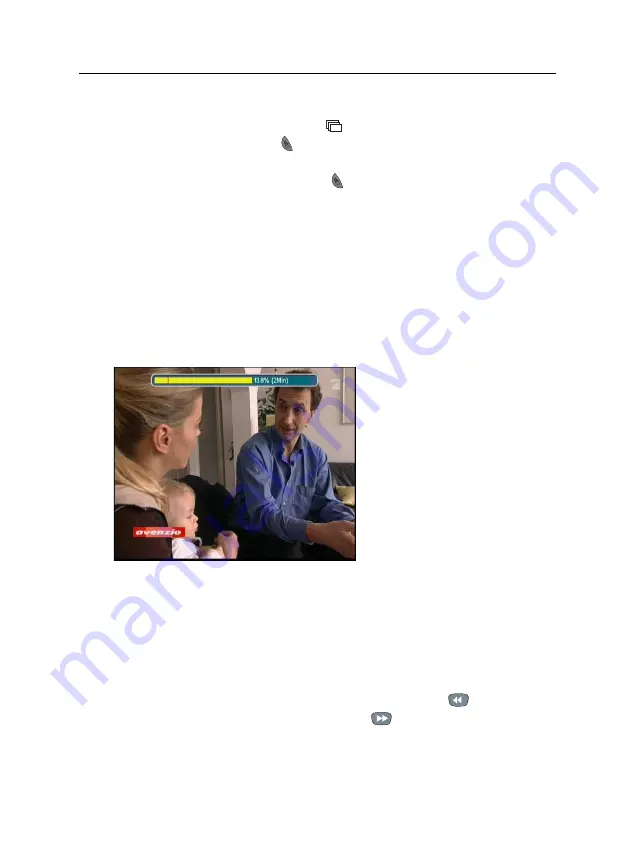
You can pause and resume a live television programme, and

even rewind and replay it. When you are watching a pro-
gramme and you miss something, you can rewind and replay
it. Or when your attention is needed elsewhere, you can pause
it and resume it a short time later without losing any of it.

When you do this, you are no

longer watching the live pro-
gramme, instead you are watch-
ing a delayed presentation of it.

This is called time shifted tele-
vision. Then, you can skip com-

mercials until you catch up to the
live broadcast.

In order to use the time shift
feature, the

Time Shifting

option

must be set to

Enable

. See §

3.6

.

When enabled, the digital receiver will keep as much as one

hour recording buffer of current service by utilizing the hard
disk drive storage. The buffer will reset each time you change
to another service.

With time shift enabled, the following operations are possible:

• To go back in time, hold down the

button; to go

forward, hold down the

button. The progress bar is

displayed momentarily with a preview window.

• You can navigate using the progress bar, refer to §

7.3.1

.

Содержание CONAX TF 4100 PVRt

Страница 1: ...TOPFIELD TF 4100 PVRt User Guide Digital Terrestrial Receiver Personal Video Recorder CONAX...

Страница 2: ......

Страница 3: ...Setup 8 2 1 Unpacking 8 2 2 Safety precautions 8 2 3 Rear panel connections 10 2 4 Connecting up your digital receiver 11 2 4 1 Connecting the antenna 12 2 4 2 Connecting to your television 12 2 4 3 C...

Страница 4: ...turn on the time shift feature 24 4 Service Search 25 4 1 Searching broadcasting services 25 4 2 Resetting to factory settings 26 5 Daily Usage 27 5 1 Volume control 27 5 2 Watching television 27 5 2...

Страница 5: ...rogramme 48 7 2 File archive 49 7 2 1 To delete a recording 49 7 2 2 To sort recordings 49 7 2 3 To lock a recording 50 7 2 4 To rename a recording 50 7 2 5 To make a new folder 50 7 2 6 To move a rec...

Страница 6: ...vi Contents 8 Firmware Update 57 8 1 Checking the firmware information 57 8 2 From your computer via RS 232 port 59 8 3 From another digital receiver via RS 232 port 60 8 4 Over the air 61 Index 62...

Страница 7: ...digital broadcasts are not all as signed to their own frequencies instead multiple television broadcasts are transmitted through a single frequency The fre quency in digital broadcasting is usually c...

Страница 8: ...sound quality Time shift is a special technical feature available on the TF 4100 PVRt You can pause the programme you are watch ing and resume it again at a later time Then you can quickly go to what...

Страница 9: ...eractive screens VOL c a buttons decrease or increase the volume They are also used to change values for menu options TV STB lamp lights up while your video recorder operates instead of the digital re...

Страница 10: ...imer 6 Numeric buttons are used to enter a service number for service change or to specify values for menu options 7 switches between the current service and the previously viewed one 8 displays the s...

Страница 11: ...verse playback Subsequent presses increase the rewind speed 21 resumes normal playback speed or displayes the progress bar for navigation on playback or time shift To play a recorded programme see but...

Страница 12: ...e list of recorded programmes that are stored on the internal hard disk drive See 7 2 for more details 35 displays the services list for sub screen It is also used to specify a block for editing or fo...

Страница 13: ...vice you want to watch 2 Insert the subscription card into the conditional access module 3 Insert the conditional access module into a common in terface on the front of the digital receiver To view th...

Страница 14: ...al receiver Remote control unit Two batteries for the remote control AAA 1 5 V One loop cable to link the first tuner with the second tuner One SCART to component cable A copy of this user guide NOTE...

Страница 15: ...to heat emitting units or in direct sunlight as this will impair cooling Do not lay any objects such as magazines on the digi tal receiver When placed in a cabinet make sure there is a minimum space o...

Страница 16: ...DIO R L 3 1 2 4 6 5 7 8 9 10 Check what connections your television set has in comparison with the digital receiver 1 ANT 1 Terrestrial broadcasting signal input socket for the first tuner 2 RF LOOP 1...

Страница 17: ...fer Table 2 3 Connectors specifications VIDEO Composite video CVBS output AUDIO Left right audio output TV CVBS S Video RGB YUV video output Left right audio output VCR CVBS video output Left right au...

Страница 18: ...T connector to the ANT 2 connector NOTE However if you are in a weak signal area or are using a signal amplifier with more than one output you may achieve better results by connecting a cable from the...

Страница 19: ...ector rather than SCART If you have such a television use an appropriate conversion ca ble to link the TV socket on the digital receiver to the matching socket on your television If you connect with a...

Страница 20: ...ther end into the matching socket on your audio system 2 4 3 Connecting to your video cassette recorder The digital receiver can also output video to another appliance such as a video cassette recorde...

Страница 21: ...e resulting from leaking batteries NOTE Batteries including those which contain no heavy metals may not be disposed of with household waste Please dispose of used batteries in an environmentally sound...

Страница 22: ...and of subtitle track should be output Select the System Setting Lan guage Setting menu You should see a screen like the left figure Menu language The digital receiver supports many menu languages Dut...

Страница 23: ...any available language no subtitle will be displayed Apart from this setting you can select a subtitle track with the button See 5 2 5 for detailed description Audio language Set the 1st Audio Languag...

Страница 24: ...ption to PAL In that case if you switch to a service of the NTSC standard the digital receiver will presents the pictures converting into the PAL standard However it is inevitable to lose a little pic...

Страница 25: ...iver linked to your video cassette recorder or such an appliance via the VCR SCART connector In that case the digital receiver will operate differently depending on the setting of the VCR Scart Type o...

Страница 26: ...t to Center extract Wide screen pictures then will be cut out on the left and right sides equally to fit to the width of the normal screen NOTE When watching television press the 0 button to alternate...

Страница 27: ...r local time is correctly displayed on the Local Time option To set the local time yourself set the Mode option to Manual and enter your local time to the Local Time option with the numeric buttons Th...

Страница 28: ...Kaliningrad GMT 3 00 Baghdad Riyadh Moscow St Petersburg GMT 3 30 Tehran GMT 4 00 Abu Dhabi Muscat Baku Tbilisi GMT 4 30 Kabul GMT 5 00 Ekaterinburg Islamabad Karachi Tashkent GMT 5 30 Bombay Calcutt...

Страница 29: ...on your censorship setting will not take effect If anyone is trying to watch a programme that is of or above the censorship setting the person has to enter the personal identification number to overri...

Страница 30: ...will display the information box If you set this option to Never Hide the information box will always be displayed In addition you can raise or lower the position of the informa tion box Select the S...

Страница 31: ...ee a screen like the left figure If you have an antenna booster you should set the Antenna Sup ply 5V option to On to supply power to it You should set the Search Mode option to Auto for the first tim...

Страница 32: ...press the OK button to save found services To stop at any time or to exit without saving press the EXIT button 4 2 Resetting to factory settings The digital receiver maintains the following data Servi...

Страница 33: ...on Press it again to restore the sound to previous level 5 2 Watching television To change services press the P or P button Pressing the button switches to the previously viewed service In ad dition y...

Страница 34: ...umber with the numeric buttons puts the highlight bar on its entry You can switch between the television services list and the radio services list by pressing the button Pressing the button displays t...

Страница 35: ...ces belong ing to the highlighted group are listed on the right box For how to edit the favourite lists refer to 6 1 To select a favourite service put the hightlight bar on a desired group and press t...

Страница 36: ...elect Yes it will be deleted 5 2 3 Viewing programme information Pressing the button displays the information box on which you can see all of the following Service number and name Signal level and qua...

Страница 37: ...Selecting subtitle tracks Some programmes are provided with subtitle tracks in one or more languages If the current programme provides subtitle tracks the subtitle symbol will be marked on the infor...

Страница 38: ...s the button To switch to another service press the V or V button You can travel over previous days with the button and can travel over next days with the button To see the programme guide for radio b...

Страница 39: ...hout losing any of it When you do this you are no longer watching the live pro gramme instead you are watch ing a delayed presentation of it This is called time shifted tele vision Then you can skip c...

Страница 40: ...o minutes behind live programme To make a recording of what is in time shift see 7 1 5 To end time shift press the button The live pro gramme will be presented When time shift option is disabled and p...

Страница 41: ...ton NOTE When a recording is in progress the available services in the services list may be limited 4 Pressing the button moves the sub screen counter clockwise and pressing the button moves it clock...

Страница 42: ...Favorites menu You should see a screen like the left figure There are three columns Group list left Favourite list centre Services list right The services list contains all available services whereas...

Страница 43: ...button to select it The high light bar then moves to the services list 2 To add a service to the selected group put the highlight bar on a desired service entry and press the OK button The selected se...

Страница 44: ...lect the Space key To type lower case letters or numerals select the Other key To delete a letter put the cursor to the right of the desired letter on the input line and then select the Del key You mu...

Страница 45: ...digital receiver 2 Turn on the source digital receiver 3 Select the Installation Transfer Firmware Transfer Data to Other IRD menu then you get asked for confirmation select Yes 4 To start the data t...

Страница 46: ...ure You can record two different services while playing back a previously recorded programme You can record two different services while watching one of them using the time shift feature See 5 5 for t...

Страница 47: ...erefore you can only change to a limited number of services while the two programs are being recorded CAUTION Do not move the digital receiver nor pull out the plug while it is running It may cause da...

Страница 48: ...nd press the OK button the recording will end at the specified time If the information about the next programme is provided by the electronic programme guide the After this program and After next prog...

Страница 49: ...ugh it is not finished yet The recording file is named after its service name with a suffix of a number To view the recorded programme list press the button See 7 2 for detailed description about the...

Страница 50: ...u do not specify anything it will be named after the service name See 6 2 for how to use the on screen keyboard Once the Record Start option is selected the recording is started and the Stop option be...

Страница 51: ...in this case 2 If you want a radio programme set the Type option to Radio otherwise set it to TV 3 Set the Service option to the service which provides the programme you want Pressing the OK button on...

Страница 52: ...for the timer recording If you do not specify anything it will be named after the service name See 6 2 for how to use the on screen keyboard 8 To set a timer recording with the above settings select...

Страница 53: ...the P and P buttons 4 To make a timer event without recording press the OK button the letter P is displayed To make a timer event with recording press it once more or alternatively press the button t...

Страница 54: ...record pay service programmes with the subscrip tion card so that they can be recorded in descrambled form In that case you can enjoy them without the subscription card like free service ones To reco...

Страница 55: ...You can play move delete rename and lock a recording file You can also sort the recording files by file name playing dura tion or file size In addition you can make a new folder 7 2 1 To delete a rec...

Страница 56: ...recording perform the following steps 1 Put the highlight bar on a desired recording 2 Press the button to display the additional options 3 Select the Rename option and the on screen keyboard appears...

Страница 57: ...ing a playback you can enjoy the following tricks To see the detailed information about the currently played recording press the button then the information box appears and shows its file name playing...

Страница 58: ...3 2 To play in slow motion To watch in slow motion during a playback press the button If you press it repeatedly the playback speed changes in 3 steps 1 2 1 4 and 1 8 times To resume normal speed pre...

Страница 59: ...n you will see a small dot appear above the progress bar like in the picture above 3 To jump forward to next bookmark press the button 4 To jump to first bookmark press the button then the button 5 To...

Страница 60: ...1 Press the button to display the list of recorded pro grammes 2 Select each desired recording with the button once a recording is selected it gets numbered 3 Press the OK button to start playback 4 T...

Страница 61: ...o the beginning scene of the part you want to edit by holding down the or button 3 Press the button then the pointer starts to blink 4 Move to the end scene the part is marked in purple 5 Press the bu...

Страница 62: ...py will be done at six times normal speed 7 6 Formatting the hard disk You can delete all contents stored in the hard disk drive by formatting it If you wish to do that select the Installation Format...

Страница 63: ...te utility which runs on most versions of Windows from the Topfield website http www i topfield com 8 1 Checking the firmware information You have to check the firmware information of your digital re...

Страница 64: ...58 Firmware Update NOTE You can only update with firmwares of which system identifi cation is identical to that of yours Otherwise you will fail in firmware update...

Страница 65: ...oad a new firmware applicable to your digital receiver from the Topfield website 2 Turn off the digital receiver 3 Plug one end of a RS 232 cable 9 pin D sub cable into the RS 232 port on the dig ital...

Страница 66: ...cable 9 pin D sub cable into the RS 232 port on the dig ital receiver and the other end into the matching port on the other digital receiver 3 Turn on the source digital receiver if not already on 4 S...

Страница 67: ...le firmware select the Installation menu If there is a new one the System Software Upgrade menu will become enabled If you select the System Software Up grade menu the digital receiver will ask you wh...

Страница 68: ...DIO L 14 AUDIO L R 11 AUDIO R 14 Auto 25 Button 4 CAM 6 Censorship 23 Center extract 20 Change PIN Code 23 Channel 26 CI 6 Common Interface 6 Common Interface 7 Current Event 44 Cut 55 Date 46 Dayligh...

Страница 69: ...OUT 10 RF LOOP 2 OUT 12 RS 232 11 RS 232 39 59 60 S PDIF 11 S PIDF 14 Save 55 Search Mode 25 26 Service 43 45 Service Search 25 services list 27 Show Provider 28 Size 49 Sorting 49 Sound Mode 20 Space...

Страница 70: ...64 INDEX Video Output 19 Weekly 45 wide screen television 19...

Страница 71: ......

Страница 72: ...ct either the retailer where they purchased this product or their local government office for details of where and how they can dispose this product for environmentally safe recycling Business users s...

Отзывы: