28
PREPARATIONS
PREPARATIONS
INSTALLATION
1
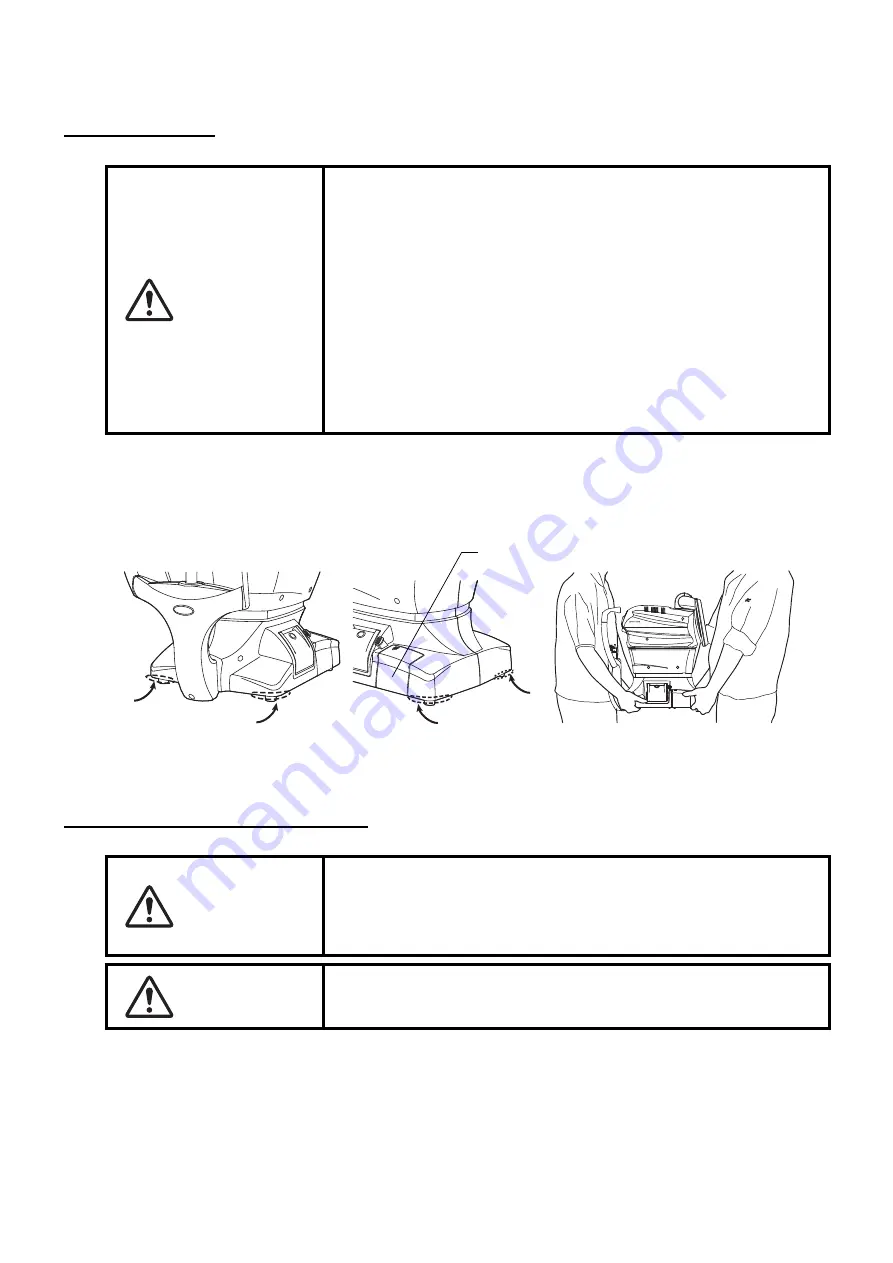
Use the base stopper to fix the main body.
Firmly hold the instrument at the position shown below and place it on the automatic instrument
table. For the adjustable instrument table, see "OPTIONAL ACCESSORIES" on page 77.
2
After installation, turn the base stopper down. The main body can be moved.
CONNECTING POWER CABLE
1
Make sure the POWER switch of the instrument is OFF.
2
Tilt the body slowly so that the POWER switch is on top and the power inlet at the bottom can be
seen.
CAUTION
• When moving the instrument, two people should lift from the bot-
tom of the device.
One person lifting the device may cause harm to his back or
injury by falling parts. Also, holding areas other than the bottom
and holding the External I/O terminal cover may cause injury, as
well as damage to the instrument.
• To prevent damage and injuries, do not install the instrument on
an uneven, unsteady or sloped surface.
• When setting an instrument on an instrument table, pay attention
not to injury the patient's fingers between the instrument and the
table.
• The instrument should also be placed away from strong light like
direct sunlight. Auto alignment may not function properly.
WARNING
Be sure to connect the power plug to an AC 3-pin receptacle
equipped with grounding. Connection with receptacle without
grounding may cause fire and electric shock in case of short-
circuiting.
CAUTION
To avoid electric shocks, do not handle the power plug with wet
fingers.
External I/O terminal cover
Holding positions
Holding the instrument
Содержание SP-1P
Страница 1: ...USER MANUAL SPECULAR MICROSCOPE SP 1P ...
Страница 2: ......
Страница 18: ...16 COMPONENTS 5 Tap the to return to the capture screen check that patient ID is updated Next button 1081 ...
Страница 25: ...23 COMPONENTS SETUP SCREEN ...
Страница 90: ......
Страница 92: ...SPECULAR MICROSCOPE SP 1P 41904 97030 Printed in Japan 1308 100LW0 ...


