background image

Customer Helpline

 1300 889 028

11

Operating Instructions

BEFORE PUTTING INTO OPERATION
1. BEFORE USING YOUR CORDLESS TOOL

WARNING: 

The charger and battery pack are specially designed to work together so do 

not attempt to use any other devices. Never insert or allow metallic objects into your 

charger or battery pack connections because of an electrical failure and hazard will occur.
The Li-Ion battery is protected against deep discharging. When the battery is empty, the 
tool is switched off by means of a protective circuit: The tool holder no longer rotates. In 
a warm environment or after heavy use, the battery pack may become too hot to permit 
charging. Allow time for the battery to cool down before recharging.
When the battery pack is charged for the first time and after prolonged storage, the 
battery pack will accept a 100% charge after several charge and discharge cycles.

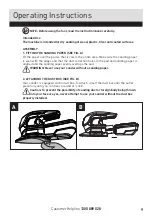
2. TO REMOVE OR INSTALL BATTERY PACK (See Fig. E1, E2)

Press the battery pack latch and remove the battery pack from the sander. After recharge slide 
the battery pack into sander’s  battery port. A simple push and slight pressure will be sufficient.

3. HOW TO CHARGE YOUR BATTERY PACK (See Fig. F)
Charging procedure

1) Plug the charger into an appropriate outlet. The light will be green.
2) Slide the battery pack into the charger, the light will turn to red to indicate the 
charging process has started.
3) When charging is completed, the light will turn to green. The pack is now fully 
charged, unplug the charger and remove the battery pack.

WARNING:  

When battery charge runs out after continuously use or exposure to 

direct sunlight or heat, allow time for the tool to cool down before re-charging to 

achieve the full charge.

CHARGING INDICATOR

This charger is designed to detect some problems that can arise with battery packs. 
Indicator lights indicate problems (see table below). If this occurs, insert a new battery 
pack to determine if the charger is OK. If the new battery charges correctly, then the 
original pack is defective and should be returned to a service center or recycling service 
center. If the new battery pack displays the same problem as the original Battery Pack, 
have the charger tested at an authorized service center.

E1

E2

Содержание CPS18LD.9

Страница 1: ...instructions contain important information that will help you get the best from your Cordless Palm Sander ensuring it remains safe to operate If you need help or have damaged or missing parts call the...

Страница 2: ...Customer Helpline 1300 889 028 2 Contents Safety Information 03 InTheBox 08 Accessories 08 Operating Instructions 09 Working hints for your Sander 14 Maintenance 14 Technical Data 15...

Страница 3: ...where facilities exist Check with your local authorities or retailer for recycling advice Li ion battery This product has been marked with a symbol relating to separate collection for all battery pac...

Страница 4: ...r grounded c Do not expose power tools to rain or wet conditions Water entering a power tool will increase the risk of electric shock d Do not abuse the cord Never use the cord for carrying pulling or...

Страница 5: ...afety measures reduce the risk of starting the power tool accidentally d Store idle power tools out of the reach of children and do not allow persons unfamiliar with the power tool or these instructio...

Страница 6: ...instruction and use the correct charging procedure j Do not maintain battery pack on charge when not in use k After extended periods of storage it may be necessary to charge and discharge the battery...

Страница 7: ...supply 6 The charging device must be protected from moisture 7 Do not use the charging device in the open 8 Do not short out the contacts of battery or charger 9 Respect the polarity when charging 10...

Страница 8: ...omer Helpline 1300 889 028 8 In The Box Parts 1 2 3 4 5 6 On off switch Soft grip handle Battery pack Dust box Sanding plate Sanding paper Accessories Dust box 1 Sanding paper 60 80 120 grit 3 2 3 4 5...

Страница 9: ...s and that the dust collection holes in the pad and sanding paper is aligned and the sanding paper evenly overlaps the pad WARNING Never use your sander without a sanding paper 2 ATTACHING THE DUST BO...

Страница 10: ...process is conducted when detail sanding attachment is changed to triangular base 5 SELECT THE RIGHT SAND PAPER Selecting the correct grit of sandpaper is an extremely important decision that will al...

Страница 11: ...After recharge slide the battery pack into sander s battery port A simple push and slight pressure will be sufficient 3 HOW TO CHARGE YOUR BATTERY PACK See Fig F Charging procedure 1 Plug the charger...

Страница 12: ...Customer Helpline 1300 889 028 12 Operating Instructions Light ON OFF flash Status Red on Charging Red flash Defective Battery Green on Fully Charged Green flash Hot Cold Delay F...

Страница 13: ...ree sides of the base plate which allows easy access to corners and edges of moulding 3 ORBITAL SANDING Your sander operates in small circular rotations which allows efficient material removal Operate...

Страница 14: ...o the sander Preferably use a light circular motion Pressing too hard will slow down the machine s movement and affect the quality of the work 2 The most common error however is applying too much wax...

Страница 15: ...for warranty or any other reason please call POSITEC AUSTRALIA PTY LIMITED ABN 14 101 682 357 Unit 15 23 Narabang Way Belrose 2085 NSW Australia FREE CALL 1300 889 028 EMAIL salesau positecgroup com C...

Страница 16: ......

Отзывы: